SharePoint details
Overview
In the Motific.ai knowledge base page, SharePoint online can be added as a data source for a knowledge base. For Motific.ai to connect to your organization’s SharePoint it needs information about your SharePoint. And in this document, we have provided you with official Microsoft Azure documentation links, and we have documented the steps for you. You can refer any of the docs to get the following essential information:
- URL: The URL of your SharePoint site. Example: https://testing.sharepoint.com/sites/mysite
- Source path: The path to the document library or folder to index. Example: ‘Documents’ or ‘Documents/folder’
- Data source name: Give your SharePoint data source a distinct name
- Azure app ID: It is the ID that you receive when you register your SharePoint app online.
- Azure tenant ID: The tenant ID is created when you create an Azure Active Directory B2C (Azure AD B2C) for your organization, it’s assigned a default domain name (name) and a directory (tenant) ID. The tenant ID is same as the organization ID.
- Certificate thumbprint: A certificate thumbprint, often referred to as a fingerprint, represents a cryptographic hash value computed from the entirety of the certificate’s data, including its signature.
- Certificate PEM: A PEM (Privacy Enhanced Mail) certificate is a base64 encoded certificate used in various digital security protocols, such as SSL/TLS for securing web communications. It includes the certificate itself, the certificate chain (if any), and possibly the private key, all in a standardized text-based format that is delimited by specific header and footer lines.
Below you can see the steps to follow to get the above information.
Tip: To perform the steps that we mention in this document you need admin permissions to the Microsoft Azure account of your organization.
Also visit the Microsoft Azure documentation for further details.
It should be noted that in Motific.ai, SharePoint on-premises is not supported. Please note only SharePoint online can be added as a data source.
Create a self-signed certificate
For demonstration purposes here we are creating a self-signed certificate via Mac terminal:
- Open a terminal on you Mac
- Enter the following code into Cloud Shell to create a self-signed certificate:
openssl req -x509 -sha256 -nodes -days 365 -newkey rsa:2048 -keyout privateKey.key -out selfsigncert.crt
-days 365 denotes the number of days the certificate is valid. Once the certificate expires the Admin has to renew the certificate and upload the new certificate in Motific.ai where the SharePoint data source was added.
- Export the certificate private key by running the following command:
cat selfsigncert.crt privateKey.key > selfsigncert.pem
- Export the certificate pem file by running the following command:
cat selfsigncert.pem >> fullchain.pem
-
Submit the CSR (Certificate Signing Request) to Azure. You can associate the certificate-based credential with the client application in Azure AD from the Azure portal.
Tip: At the end of these steps, you will have a Cert .pem file. Please save this file as you would need to upload the Cert .pem file to Motific.ai while adding SharePoint as a data source to a knowledge base.
Register an application in Microsoft Azure portal
-
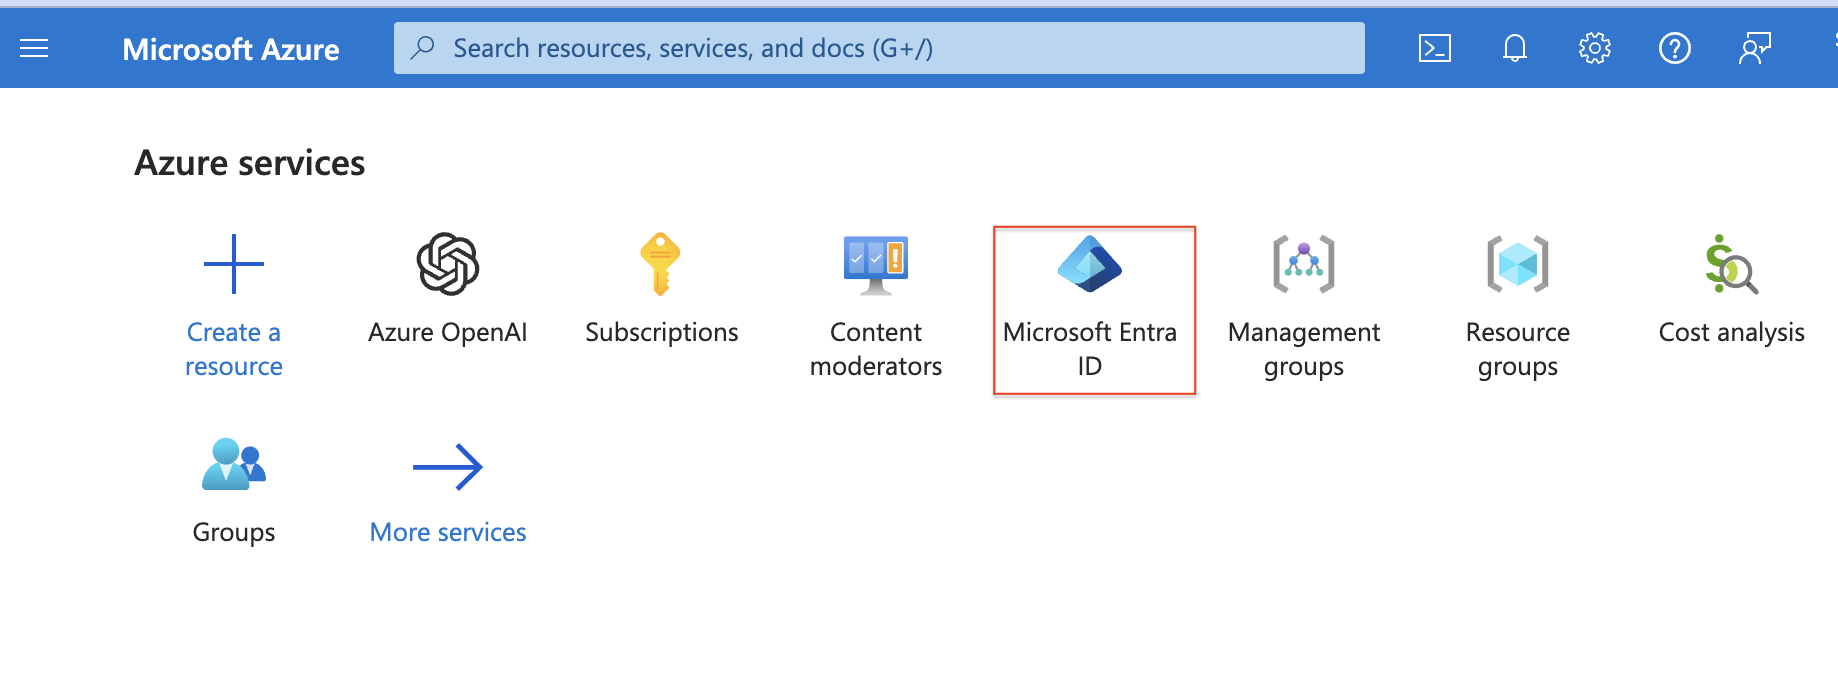
Click on the Azure Active Directory link under the Admin centers group on the left-side. A new browser’s tab opens to Microsoft Azure portal.
-
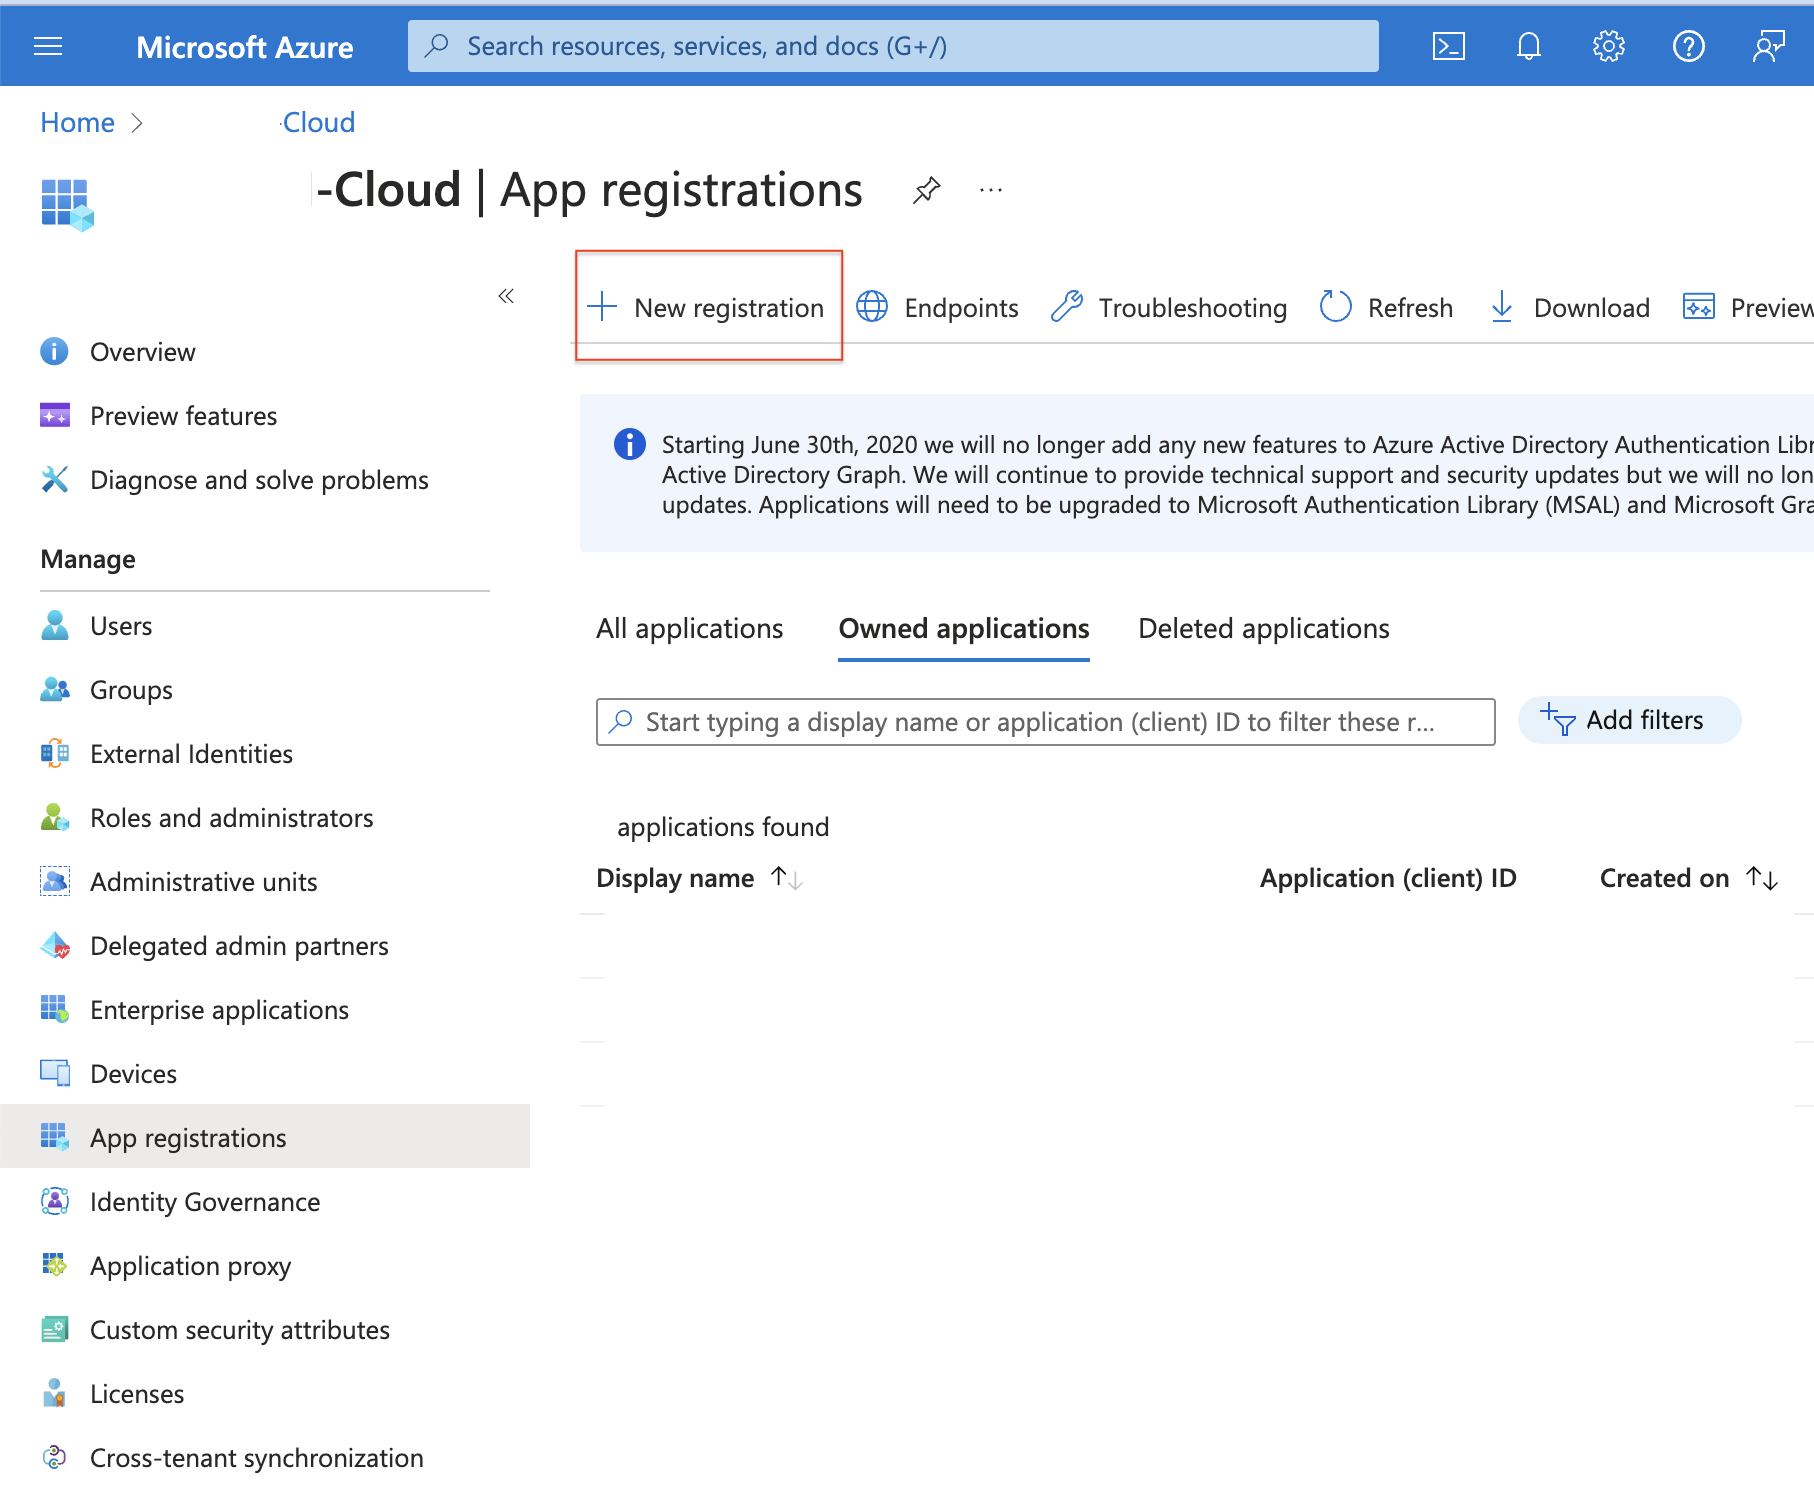
In the App registrations tab the list of Azure AD applications registered in your tenant is displayed.
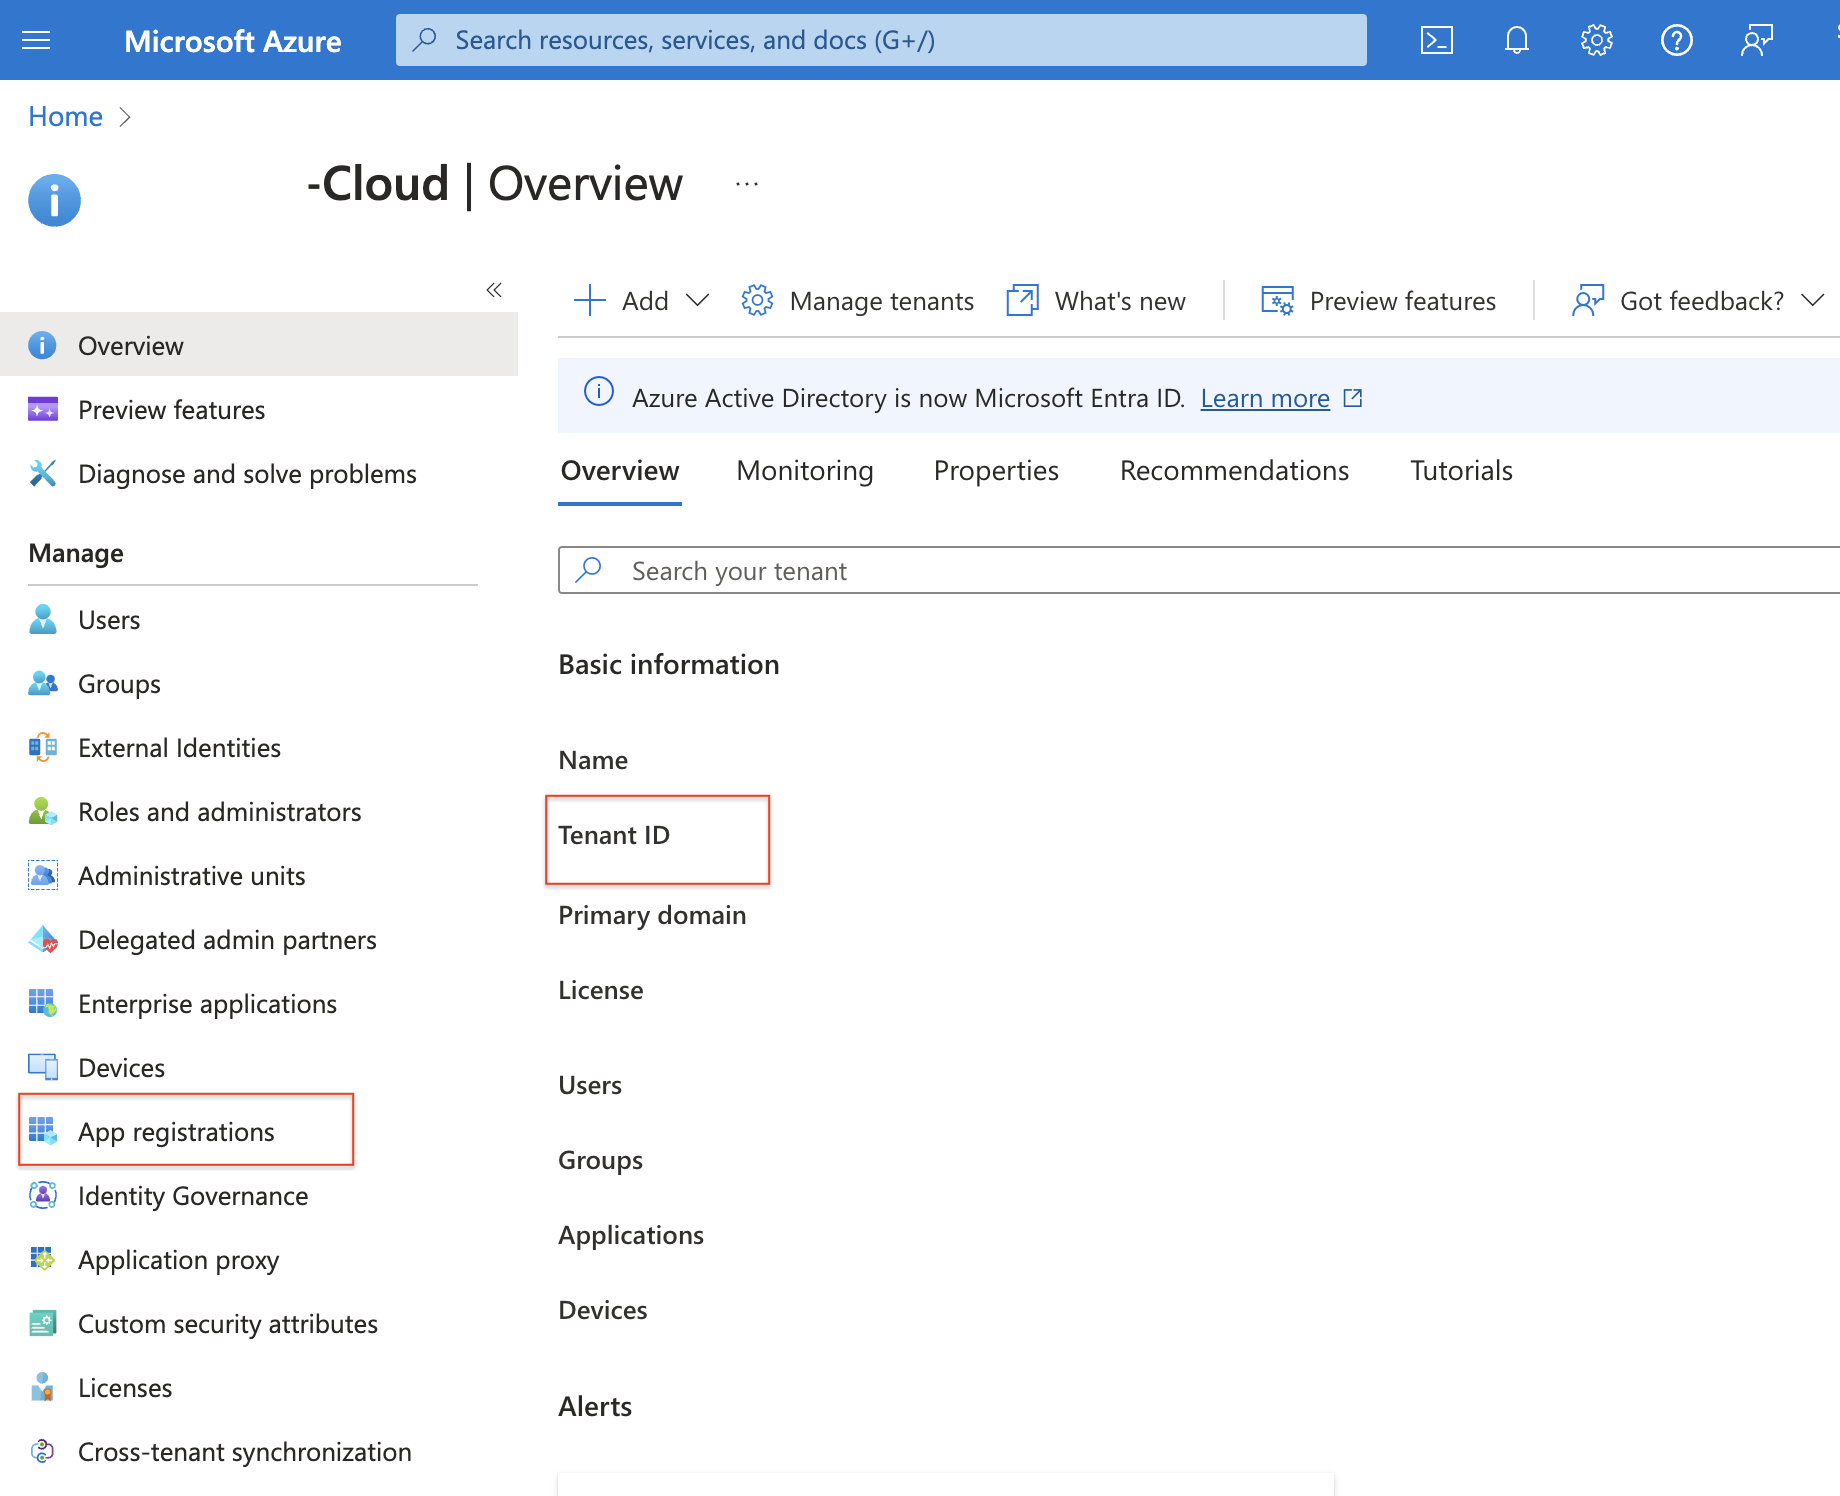
Note: If you do not have a tenant then create a new tenant and note down the Azure Tenant ID as this needs to be input in the Motific.ai while adding SharePoint as a data source. Also, you should add users and assign access to users for the SharePoint site.
Please see the official Microsoft documentation to learn- How to create, invite, and delete users.
-
Click the New registration button in the upper-left.
-
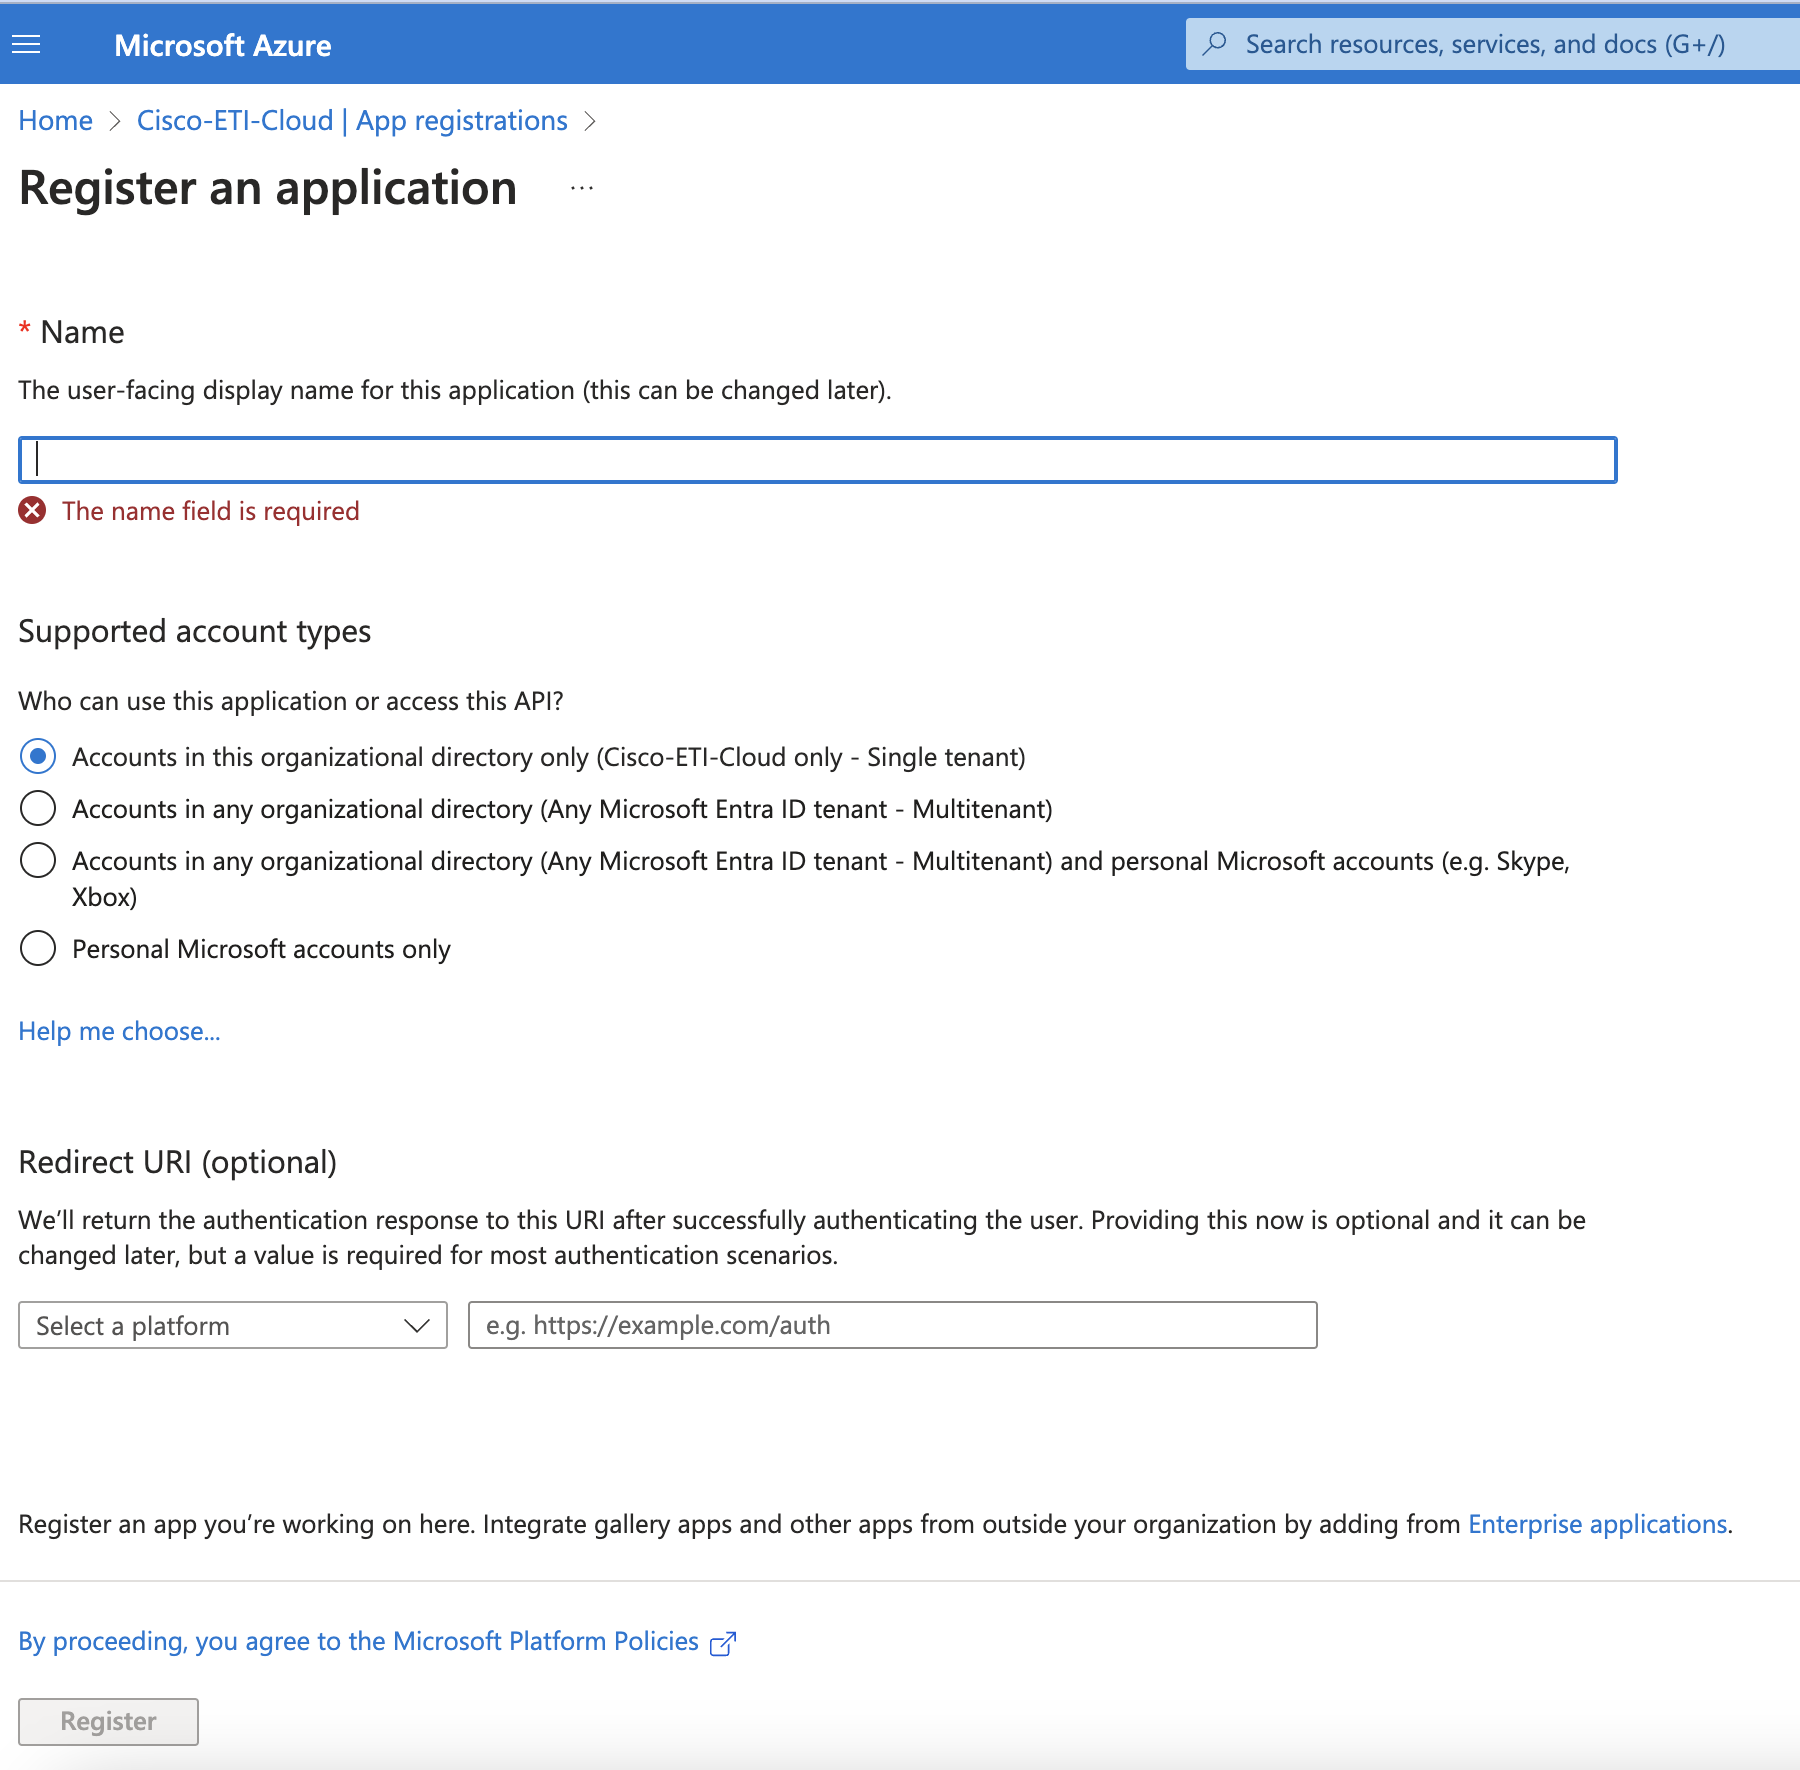
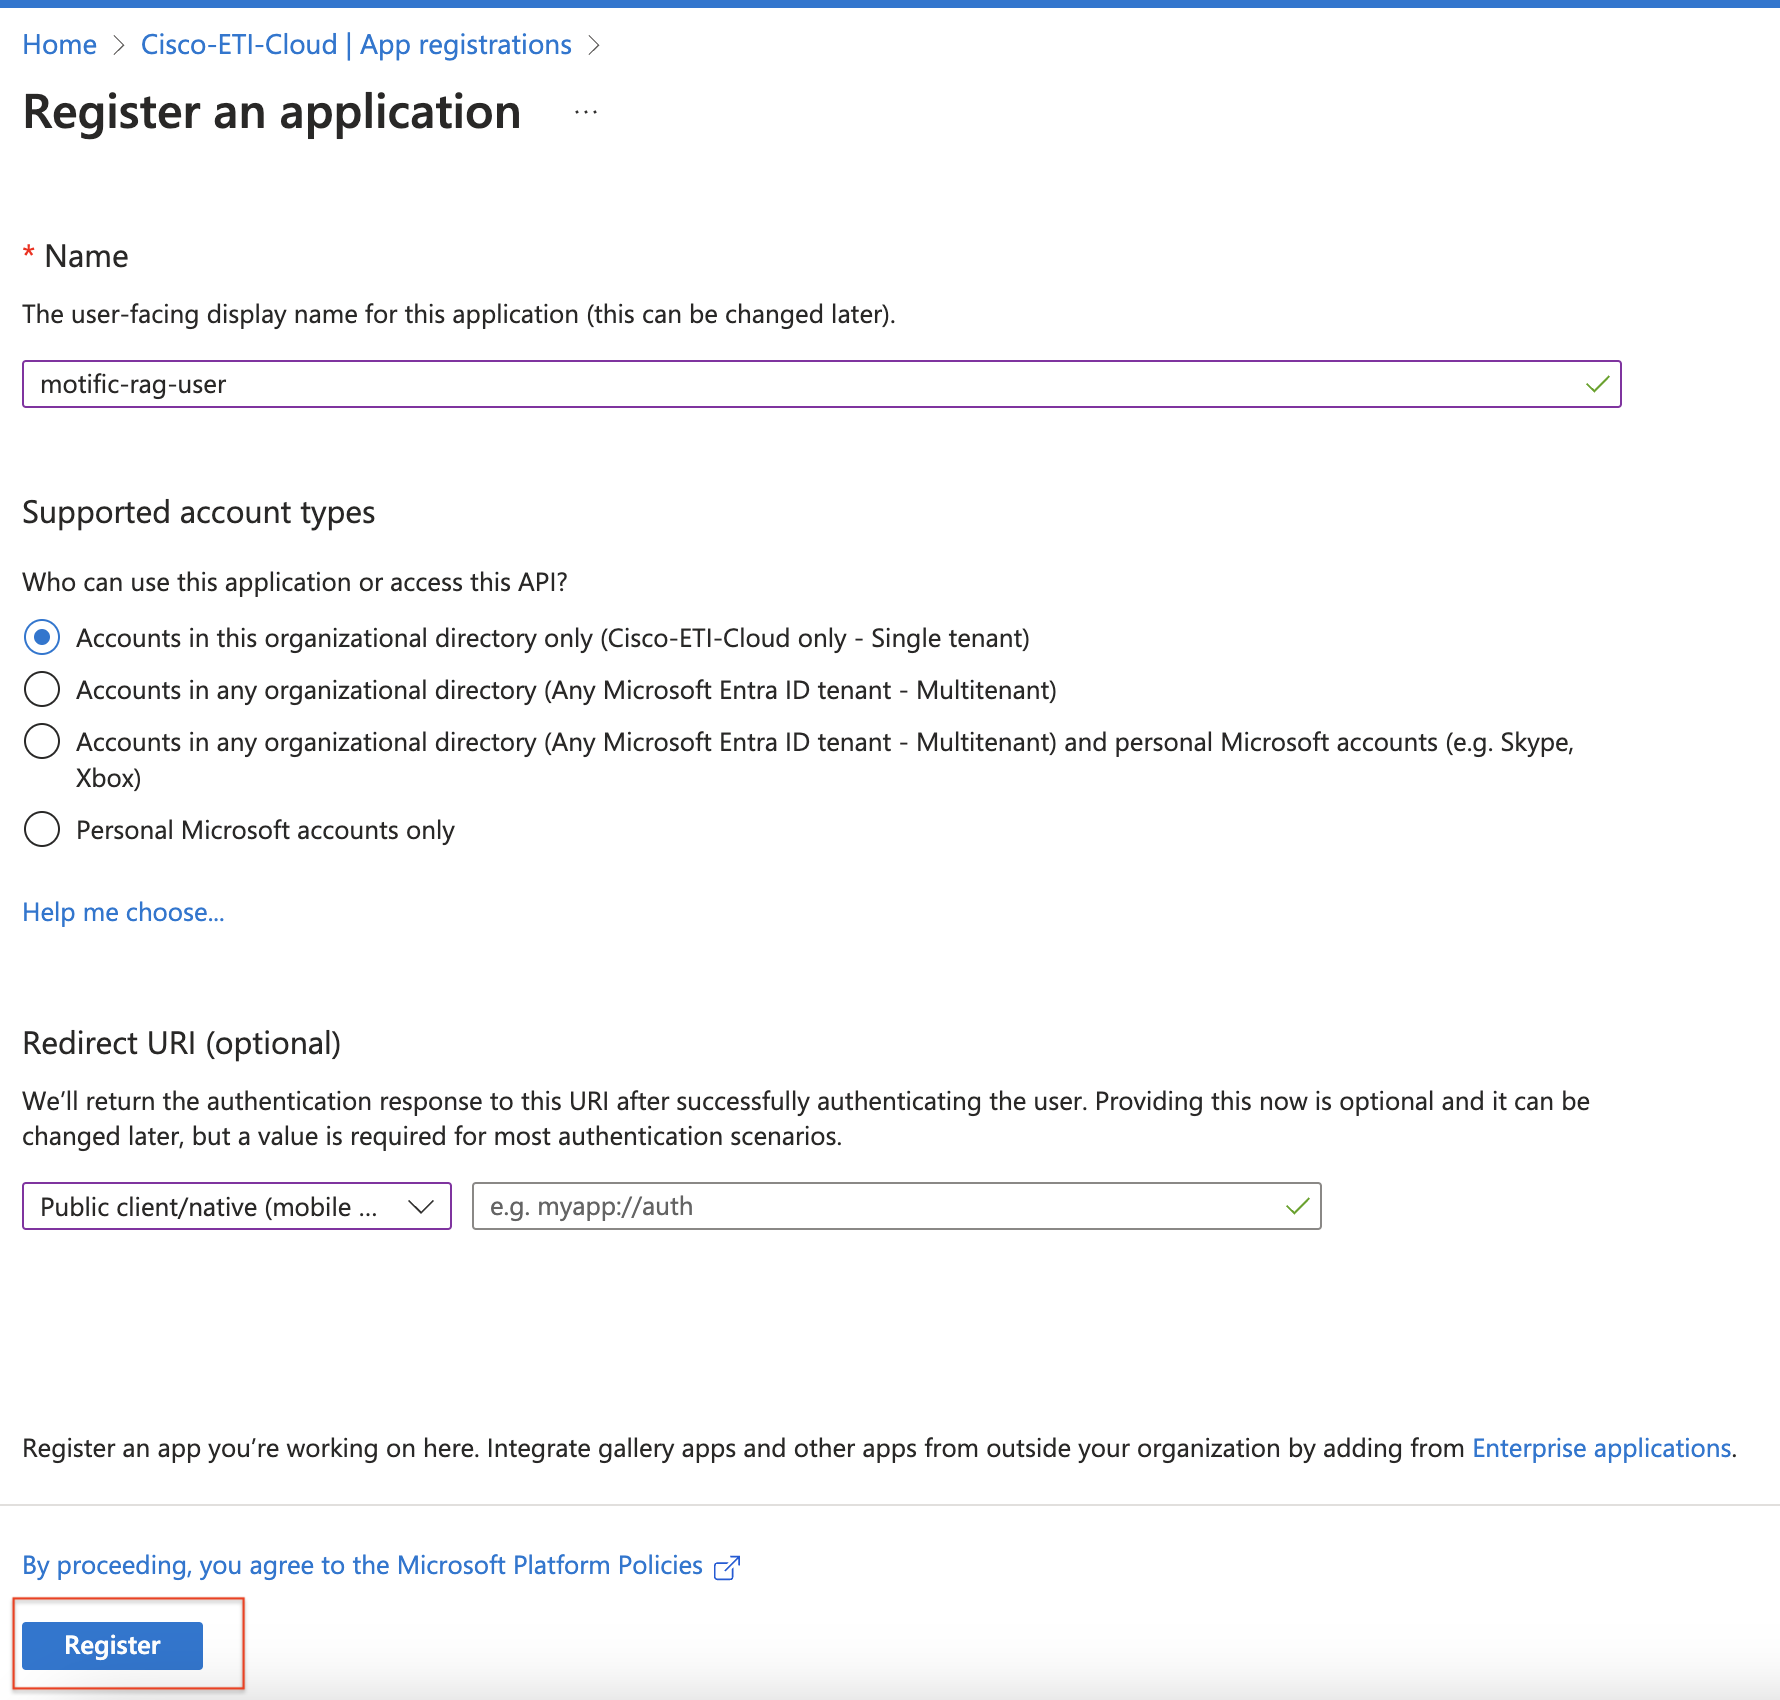
Register the app by entering the details.
-
Fill in the app registration details and click the Register button at the bottom.
-
After App Registration, AppID is displayed.
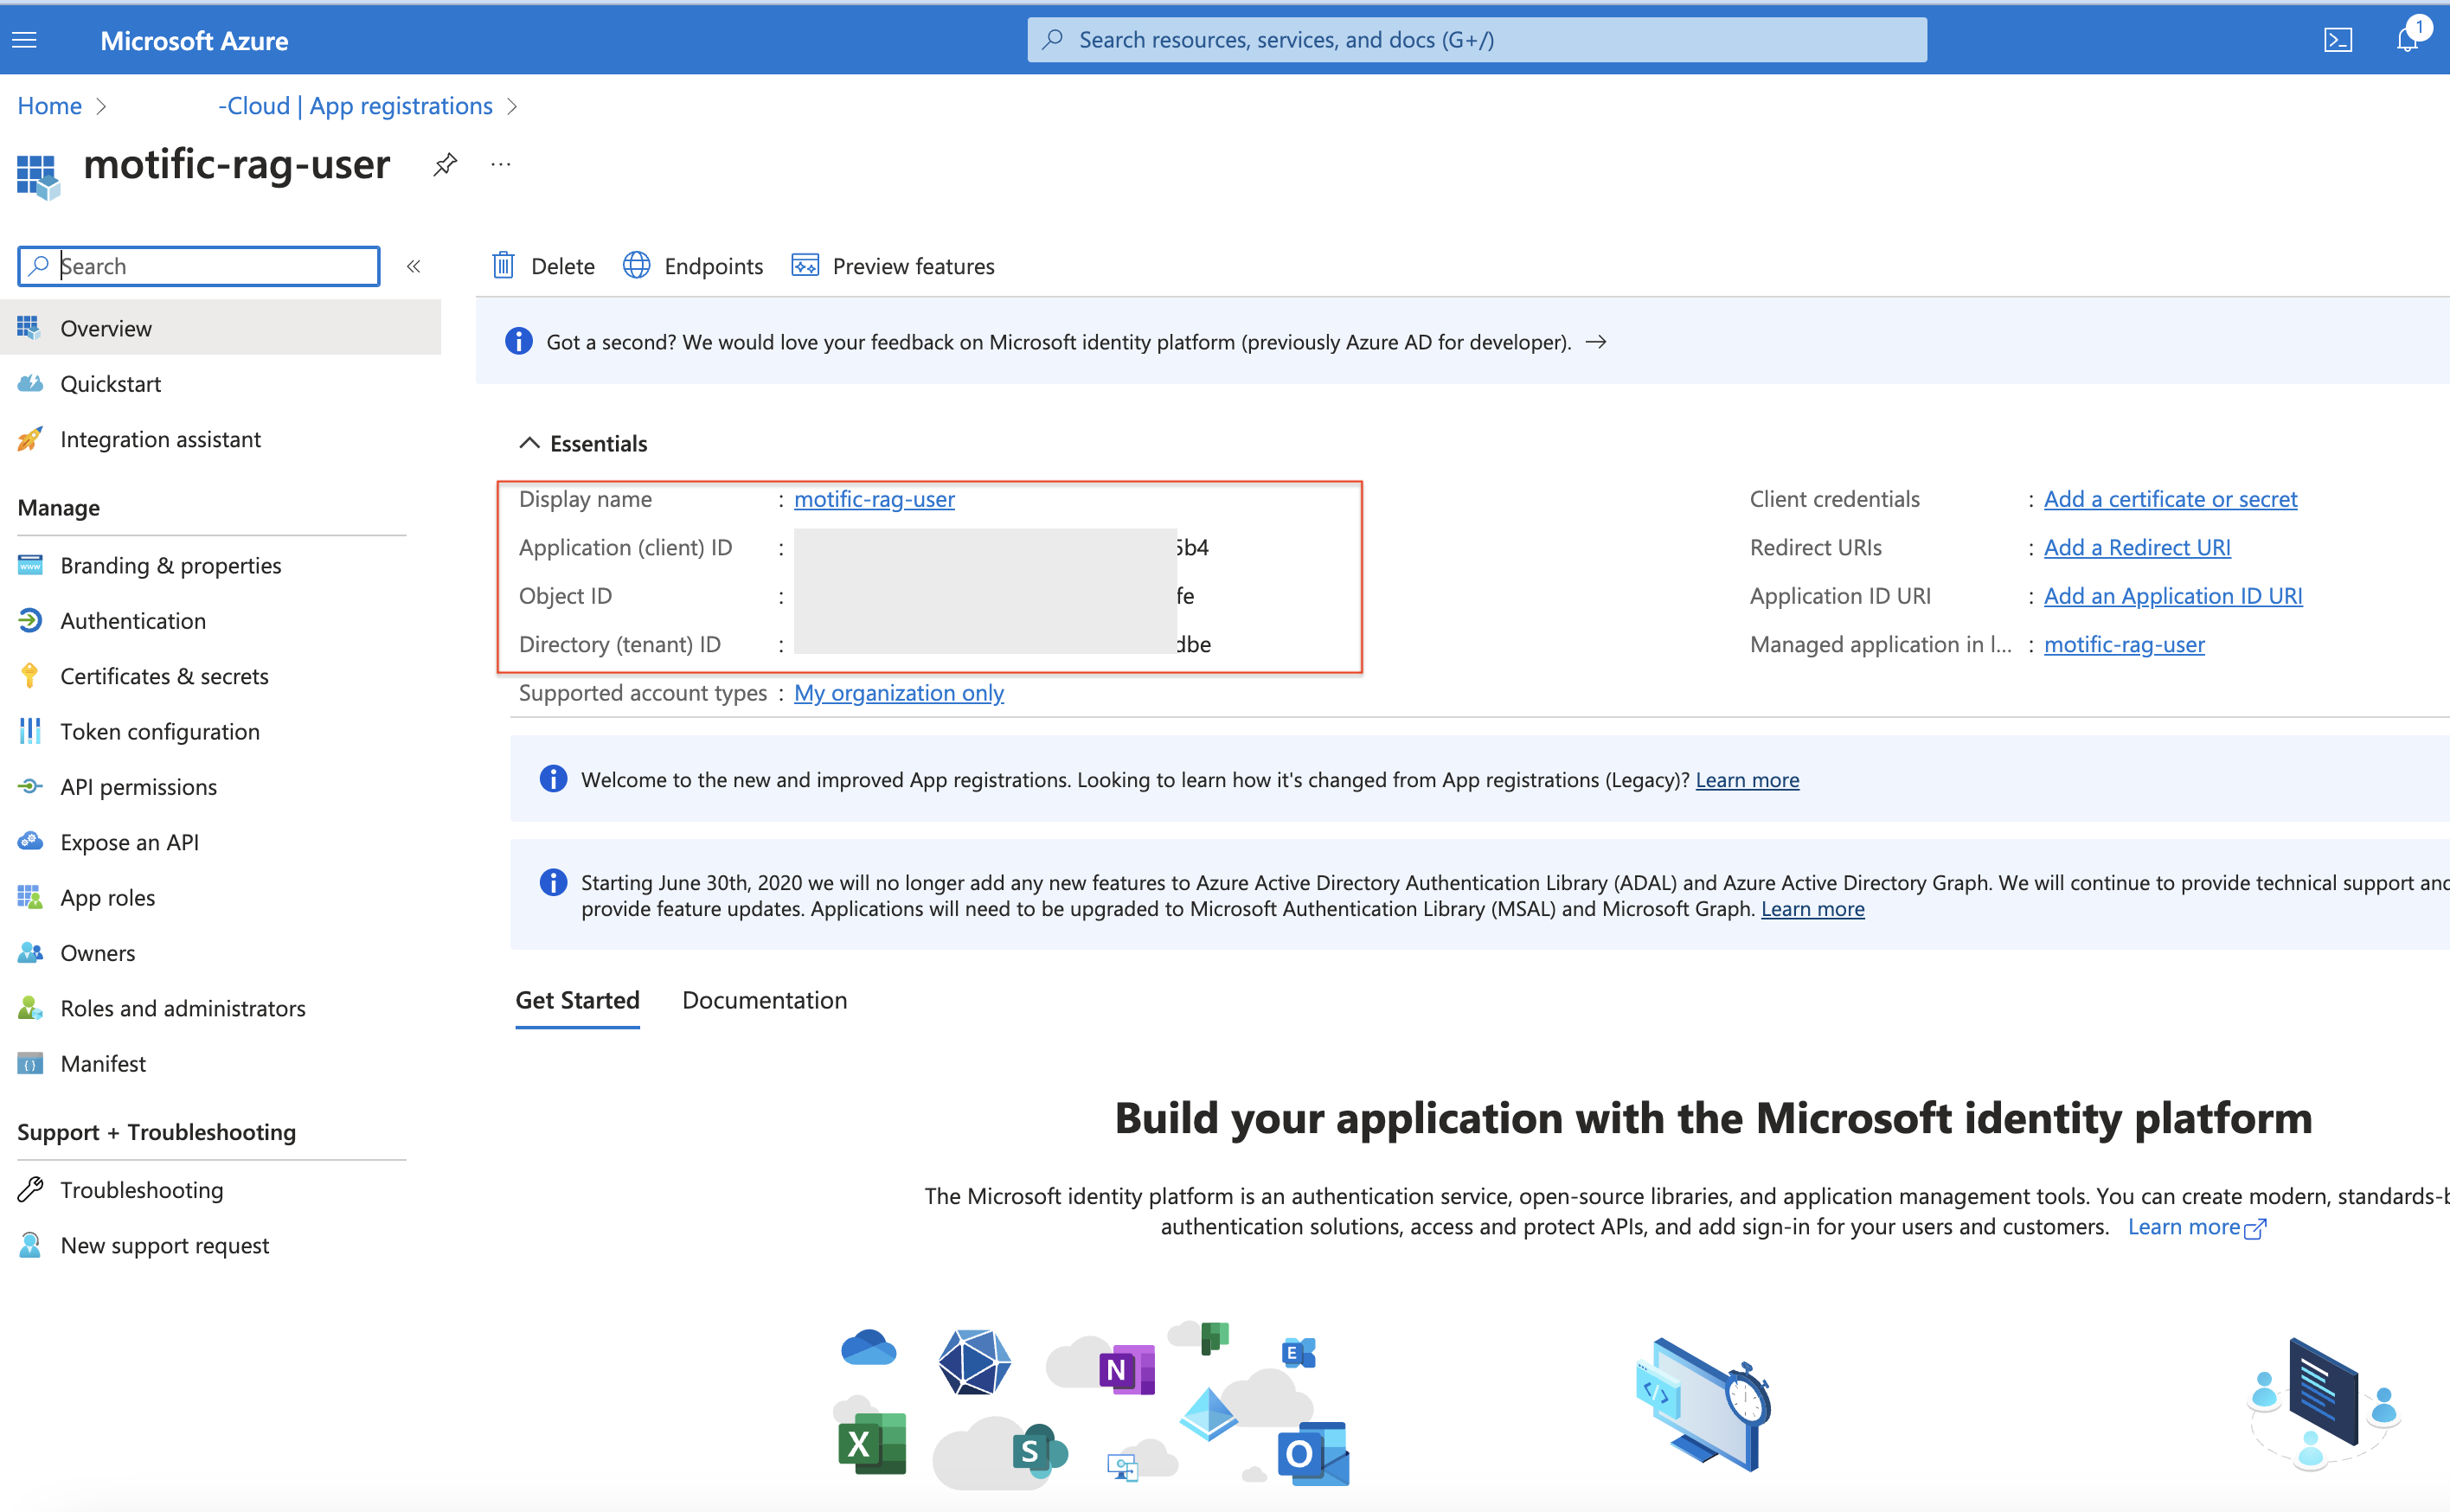 Tip: Once the application has been created copy the Application (client) ID as you’ll need it later. This is the Azure app ID needed to be input in Motific.ai while adding SharePoint as a data source.
Connect the certificate to the application
-
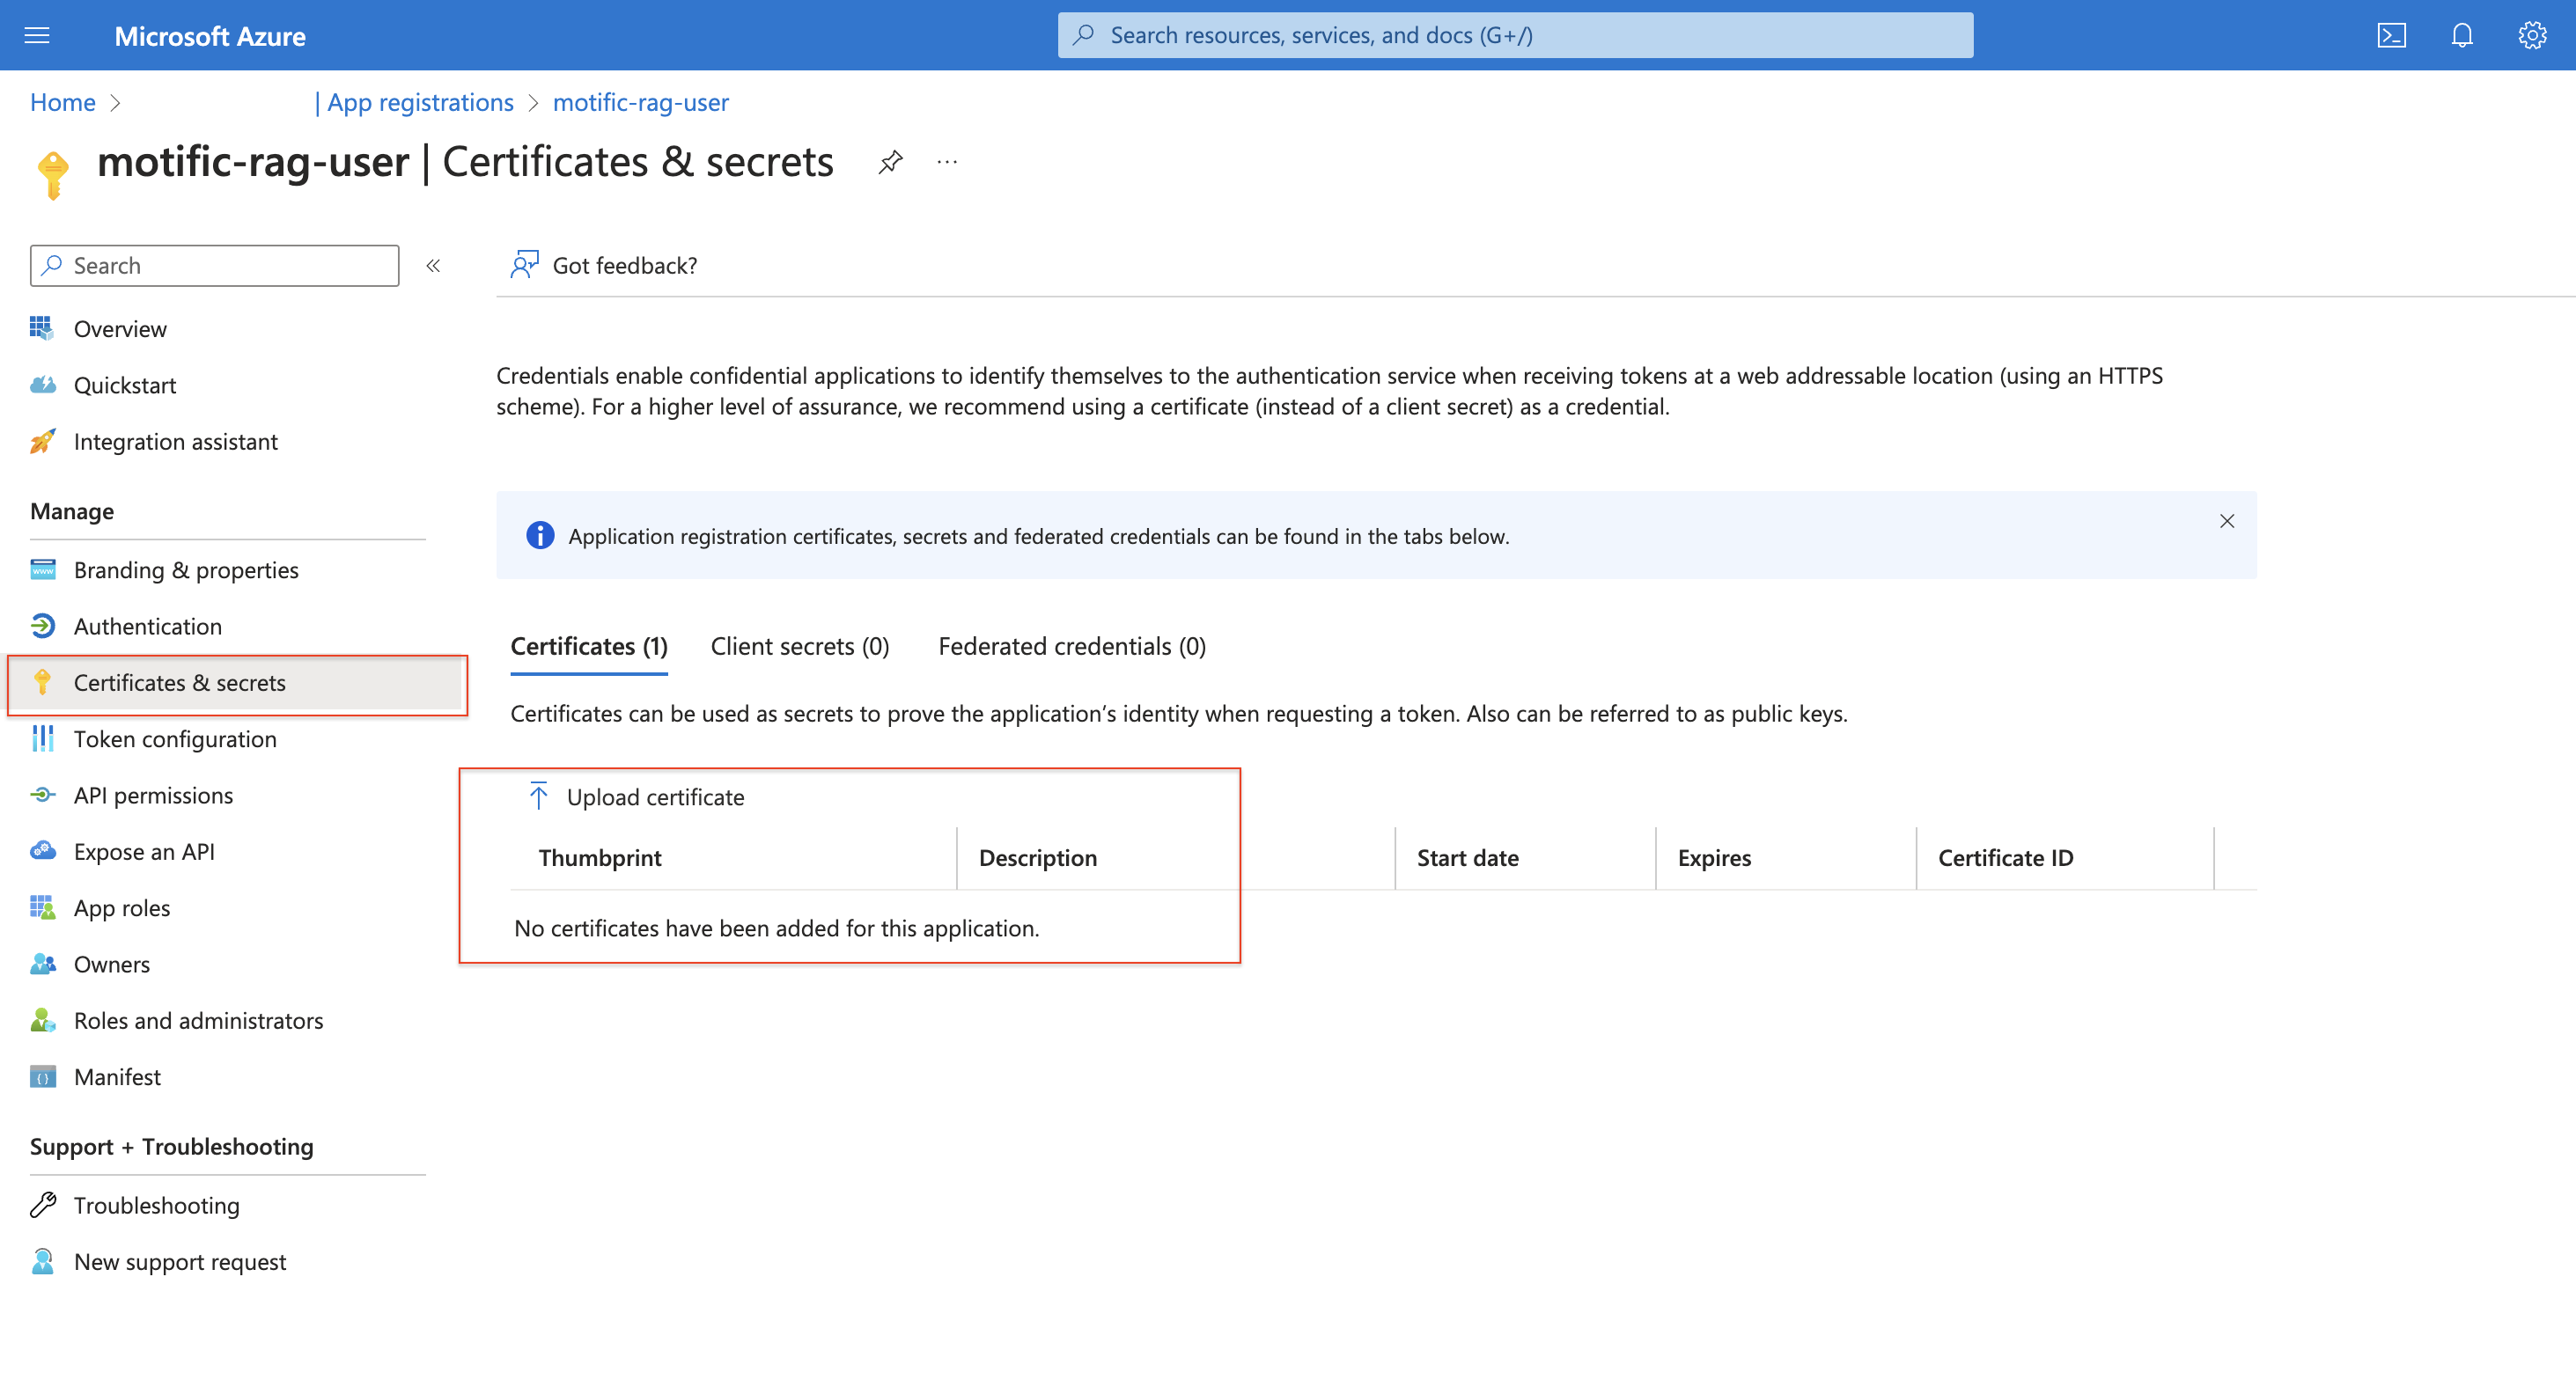
Click on Certificates & secrets in the left menu bar.
-
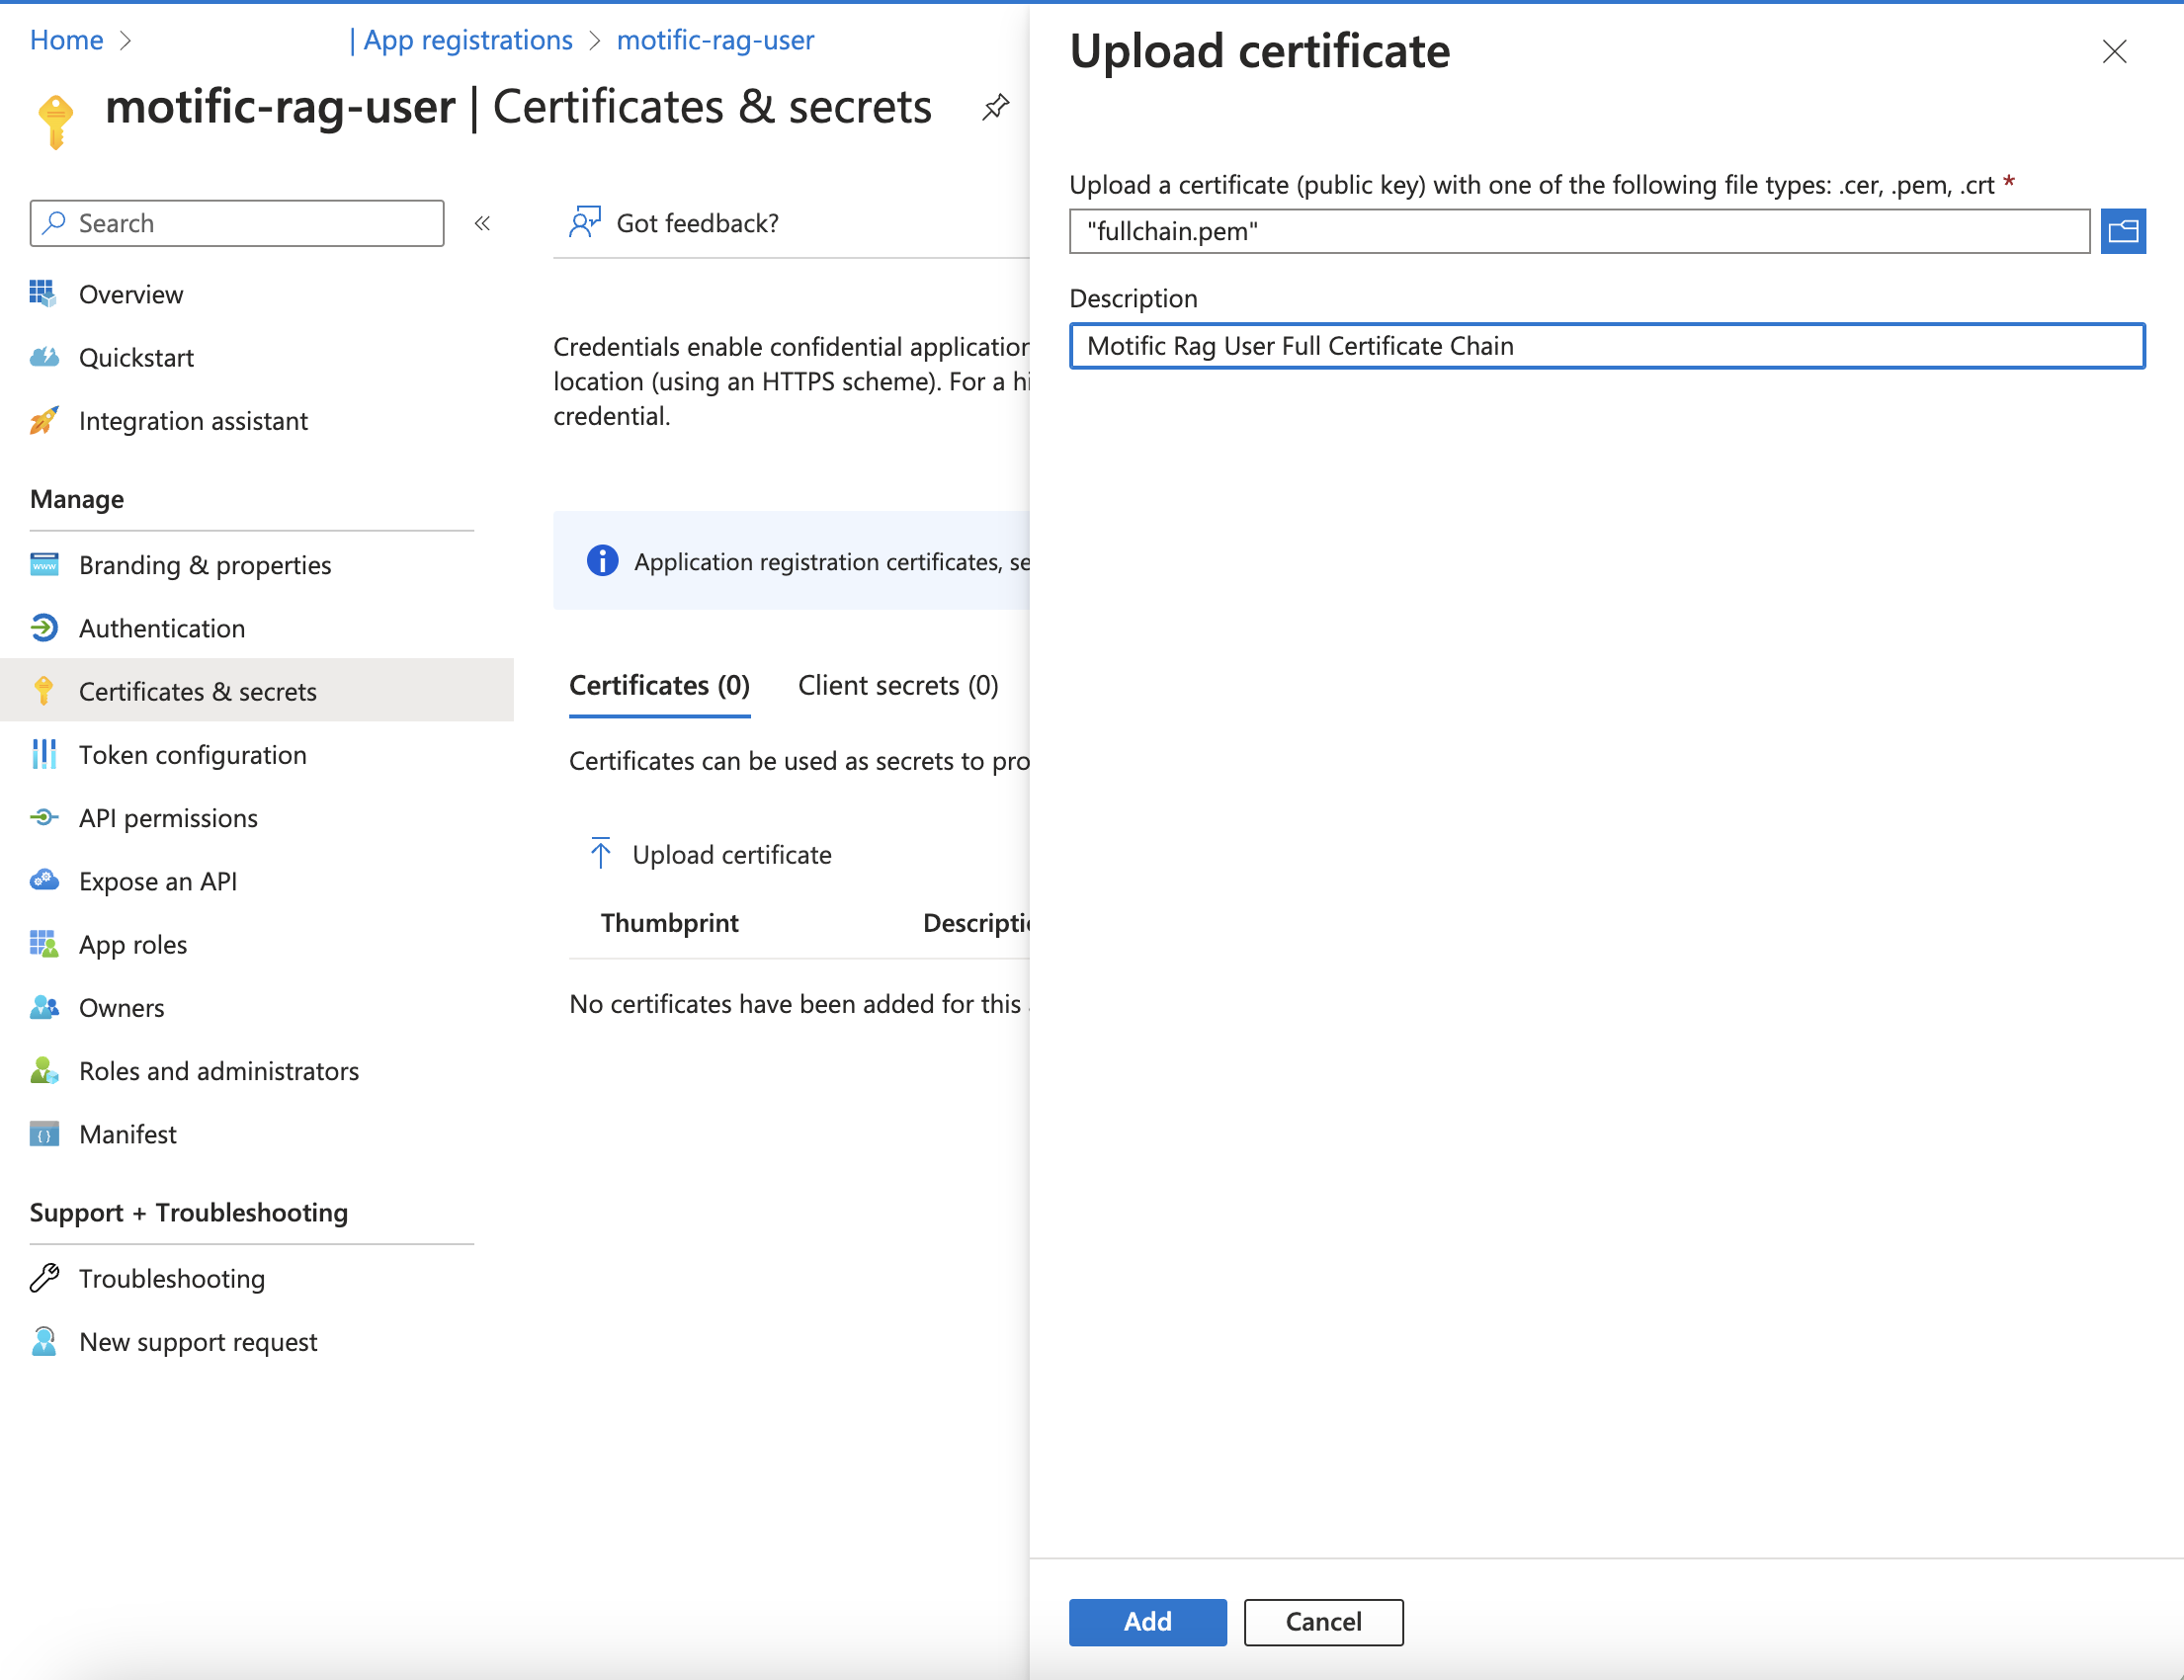
Click on the Upload certificate button, select the fullchain.pem file you generated earlier and click on Add to upload it.
-
Once the certificate is uploaded, note down the Cert Thumbprint from the Certificates & secrets UI. This Cert Thumbprint is needed as an input to Motific.ai while creating a KB with SharePoint as a data source.
Grant Azure Graph API permissions
-
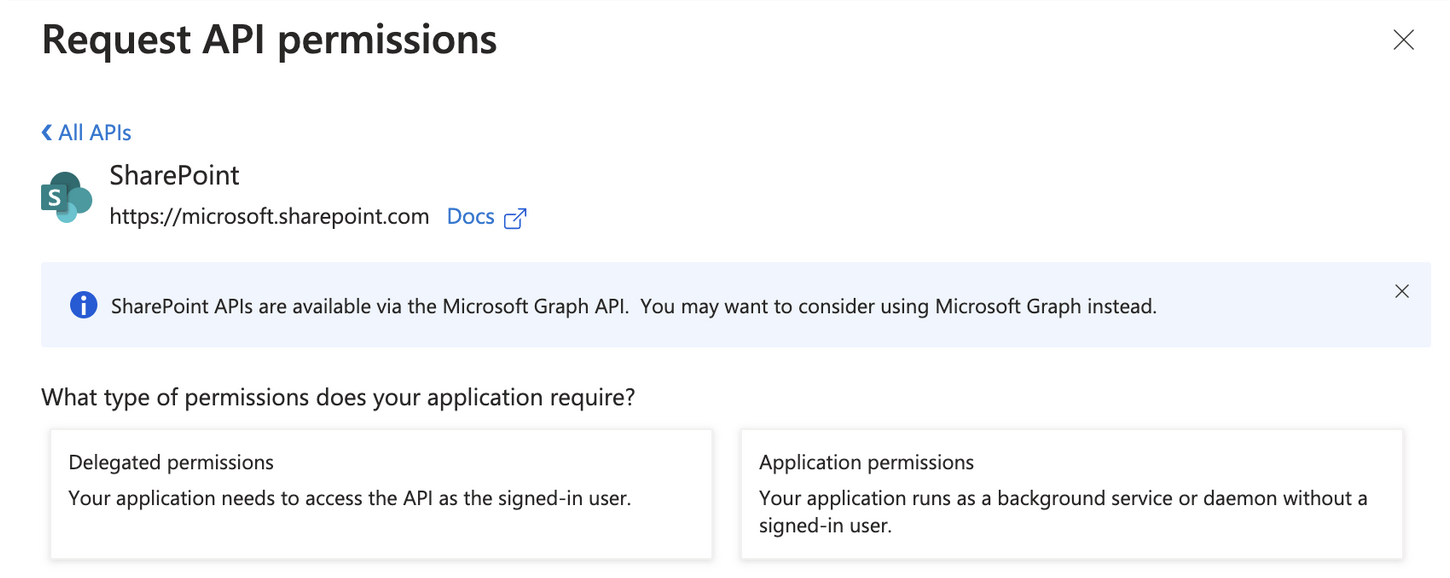
You’ll need to add API permissions to use SharePoint API. Choose Add a permission and under Microsoft APIs.
-
Grant API Permissions.
-
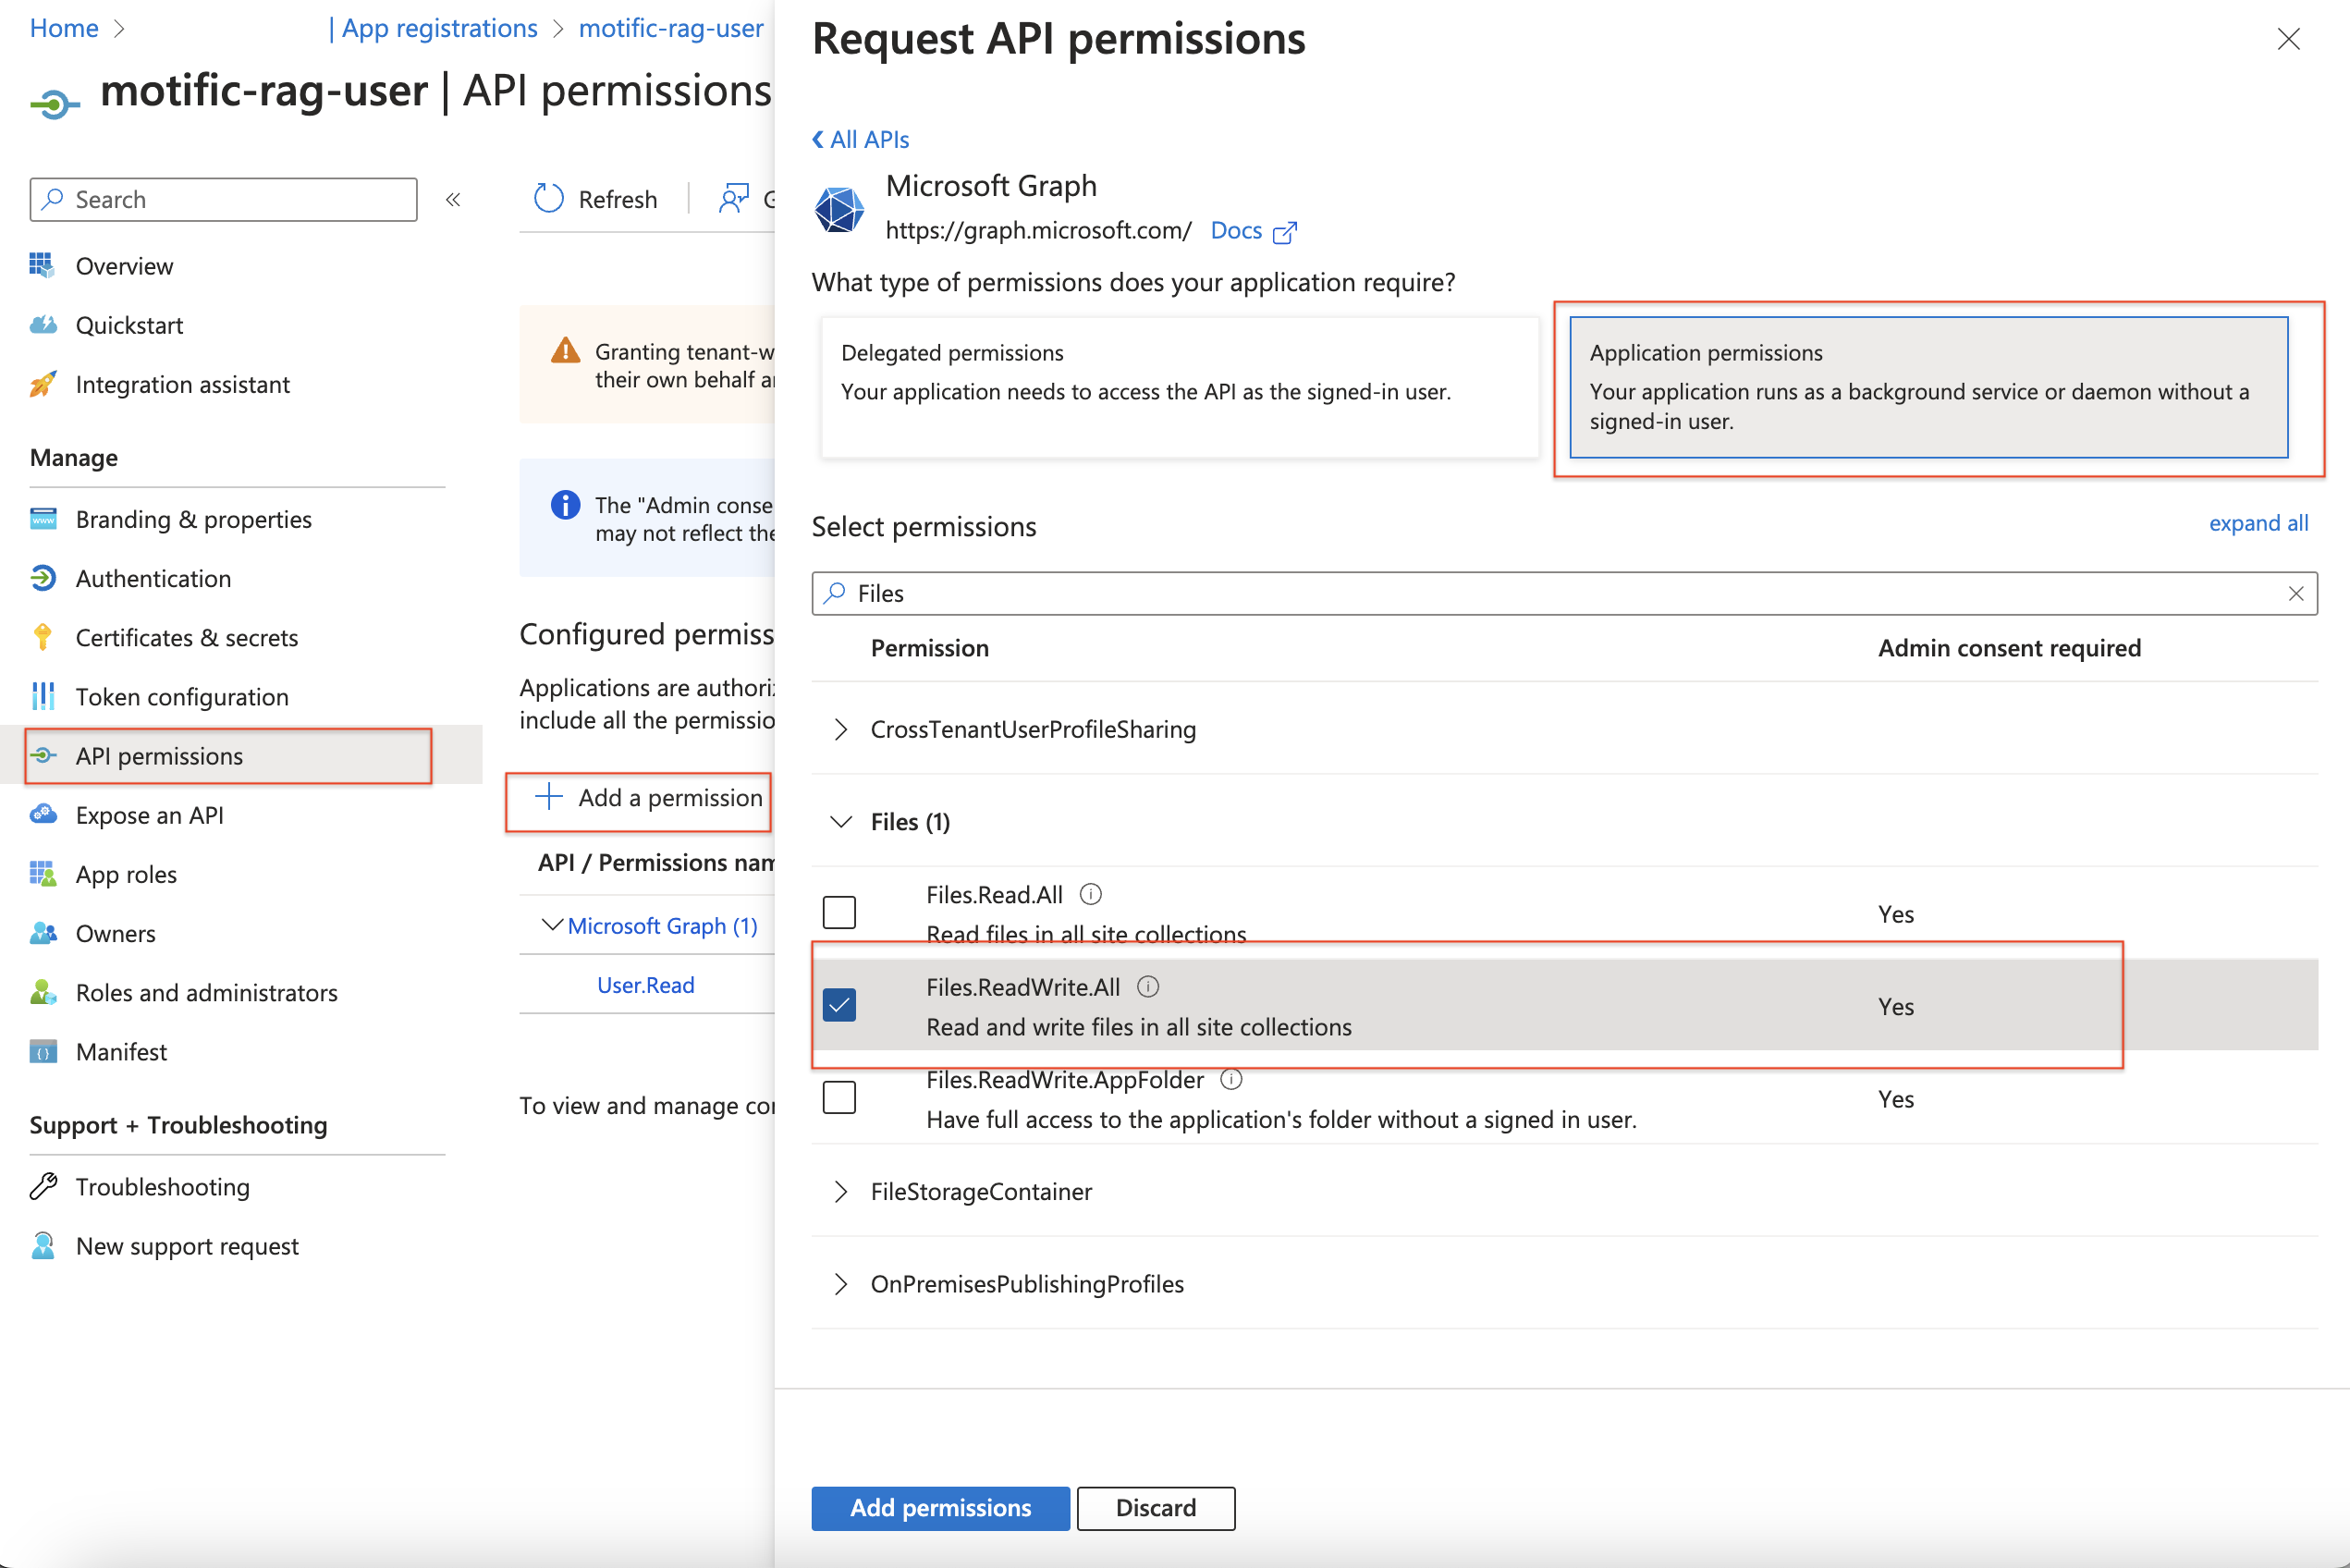
Select Graph API permissions
-
Add Graph API User Read all
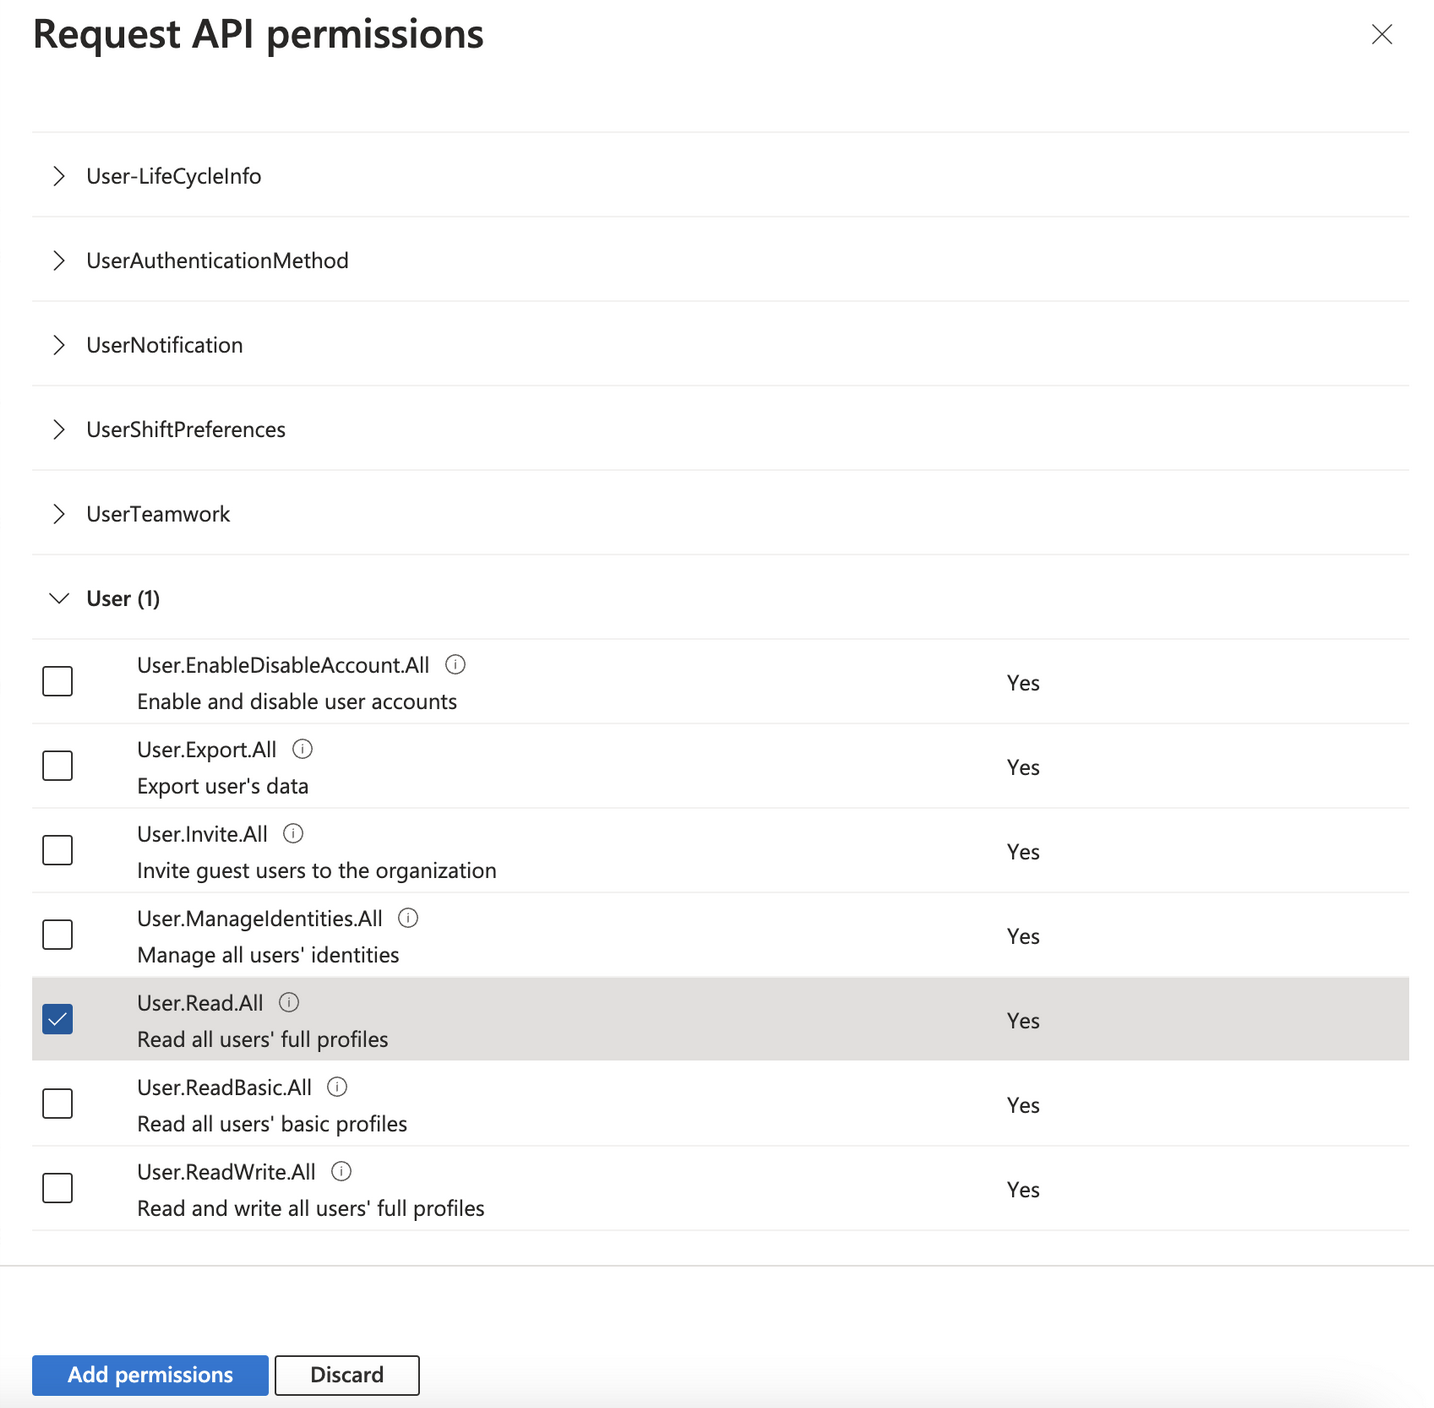
-
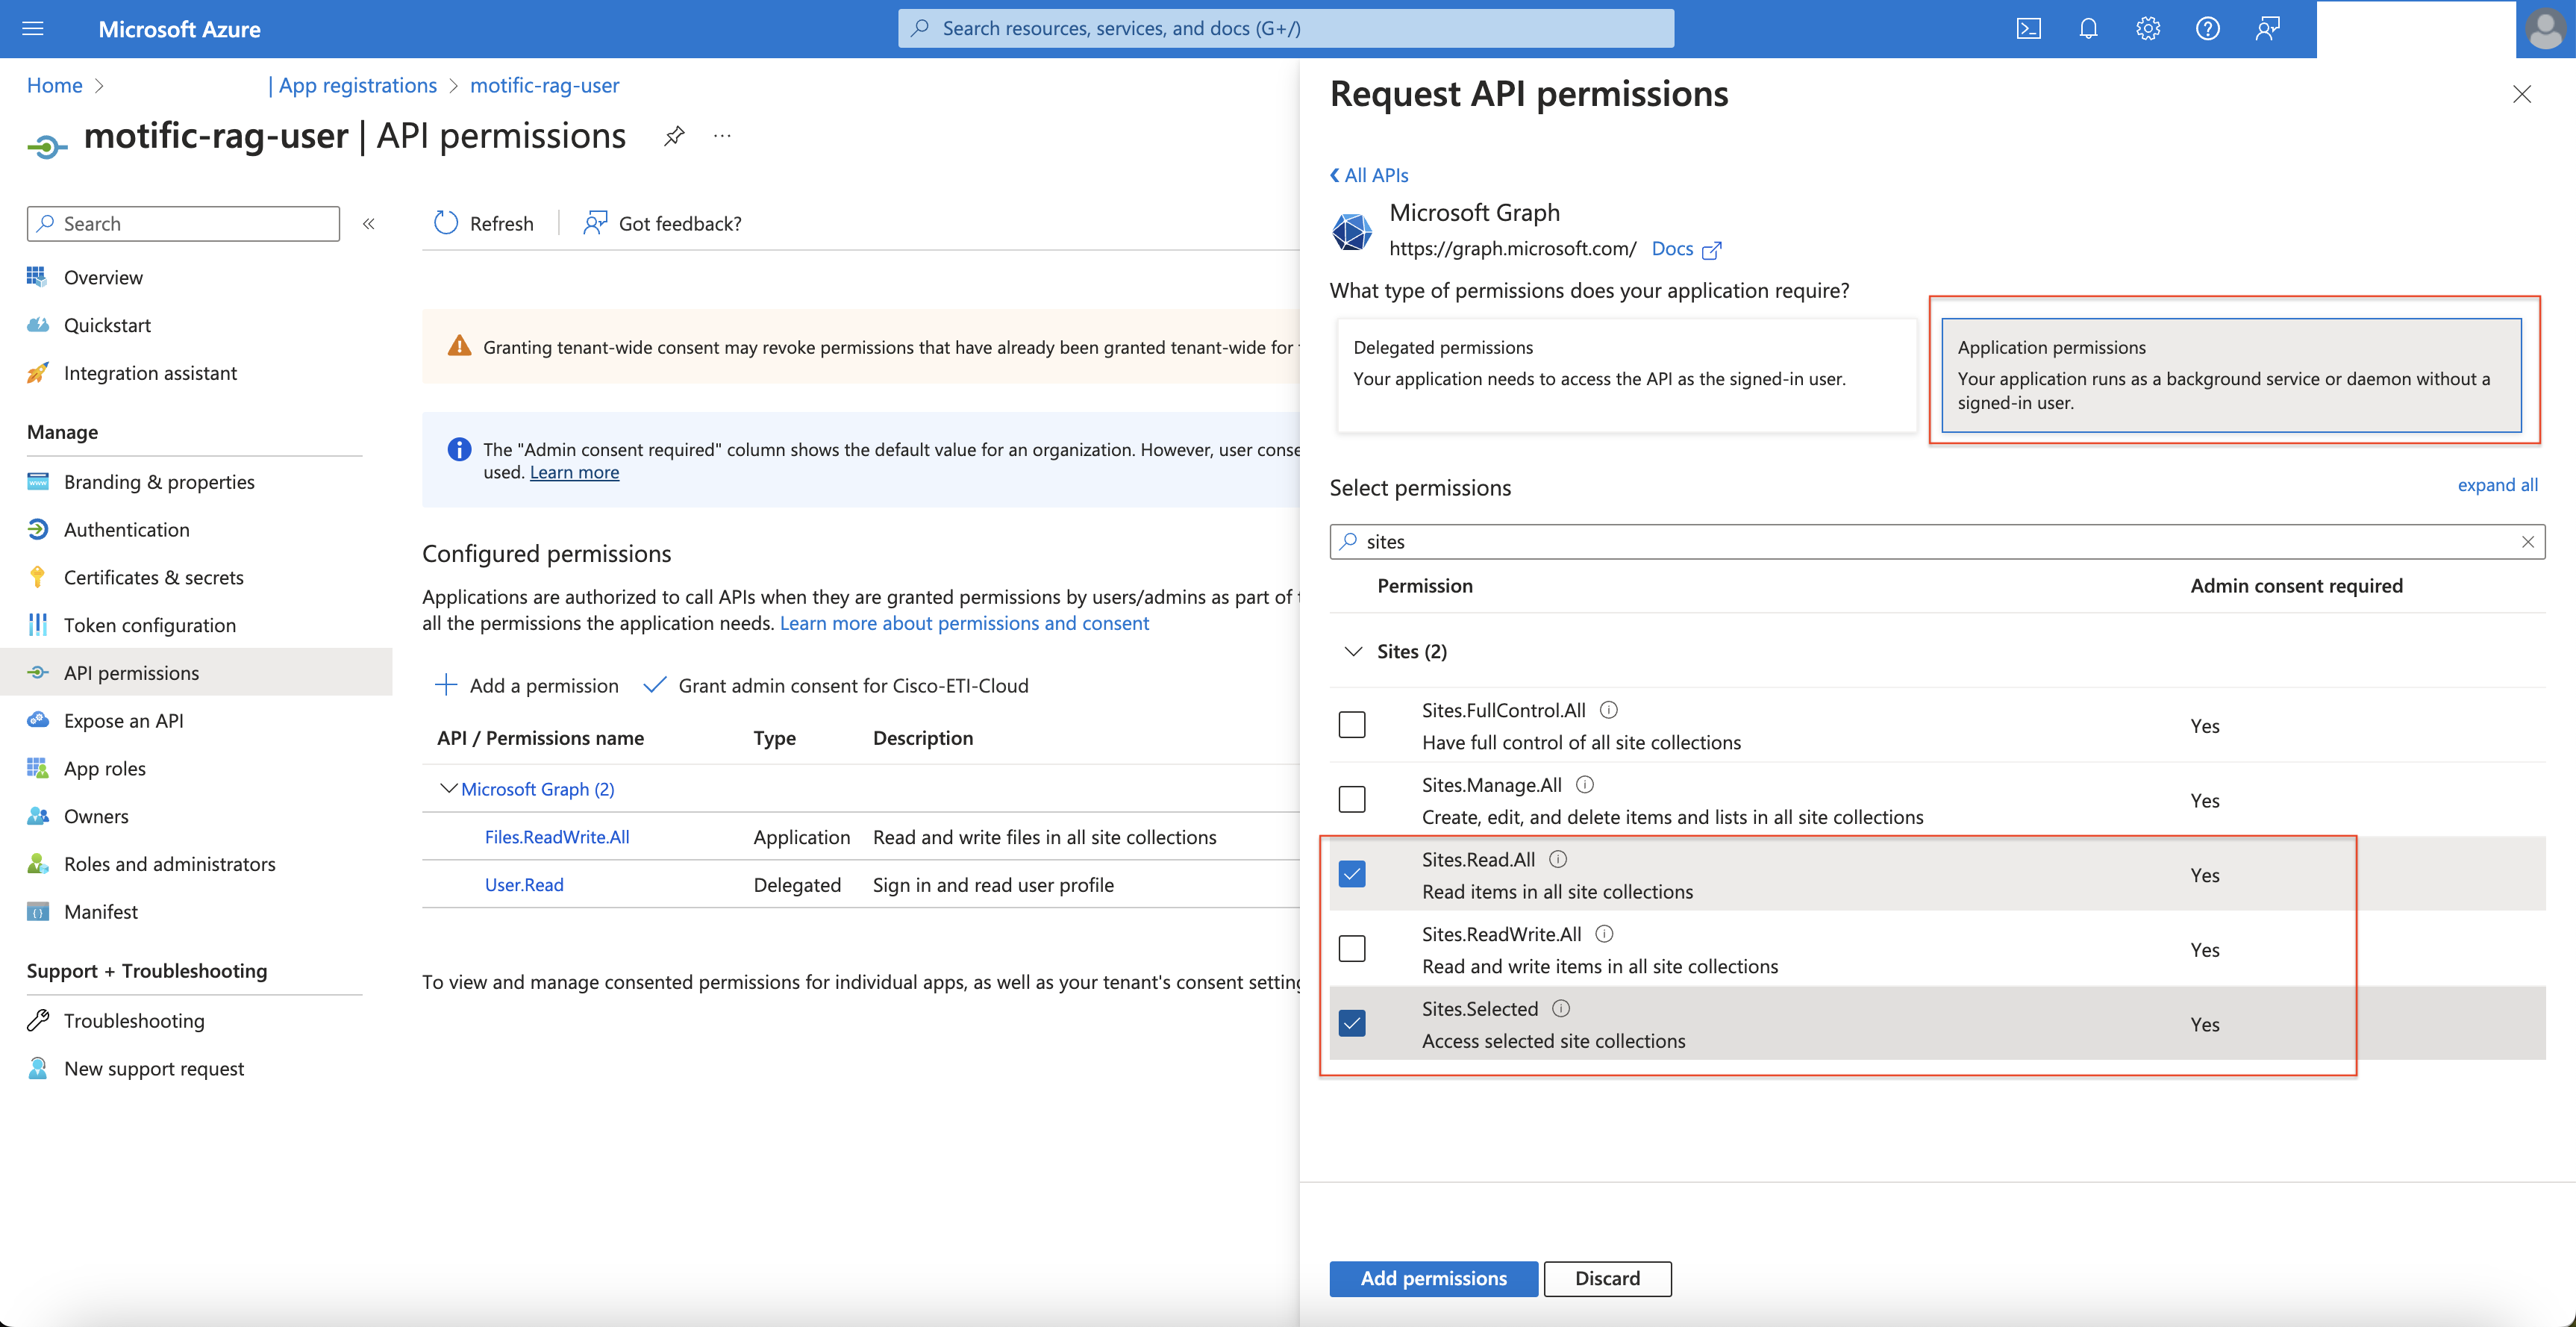
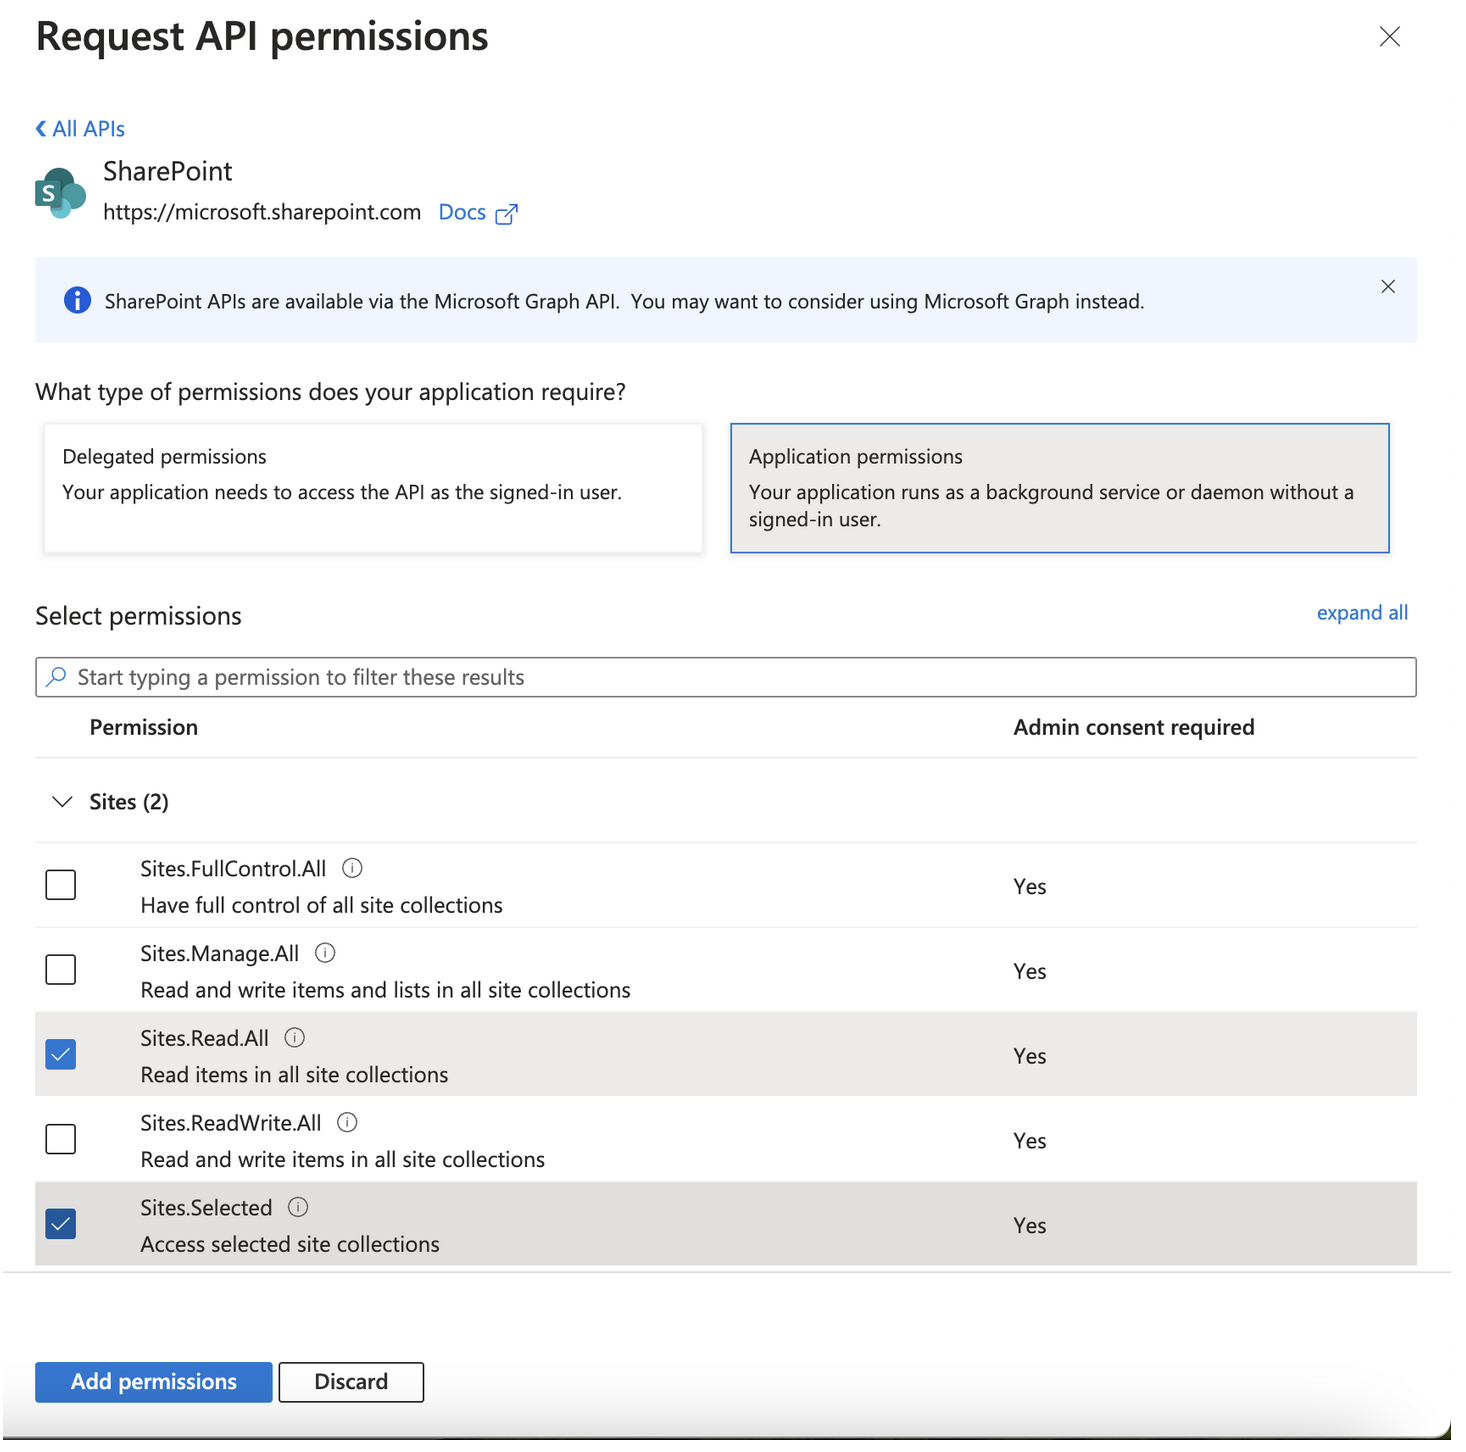
Add SharePoint Site Permissions.
-
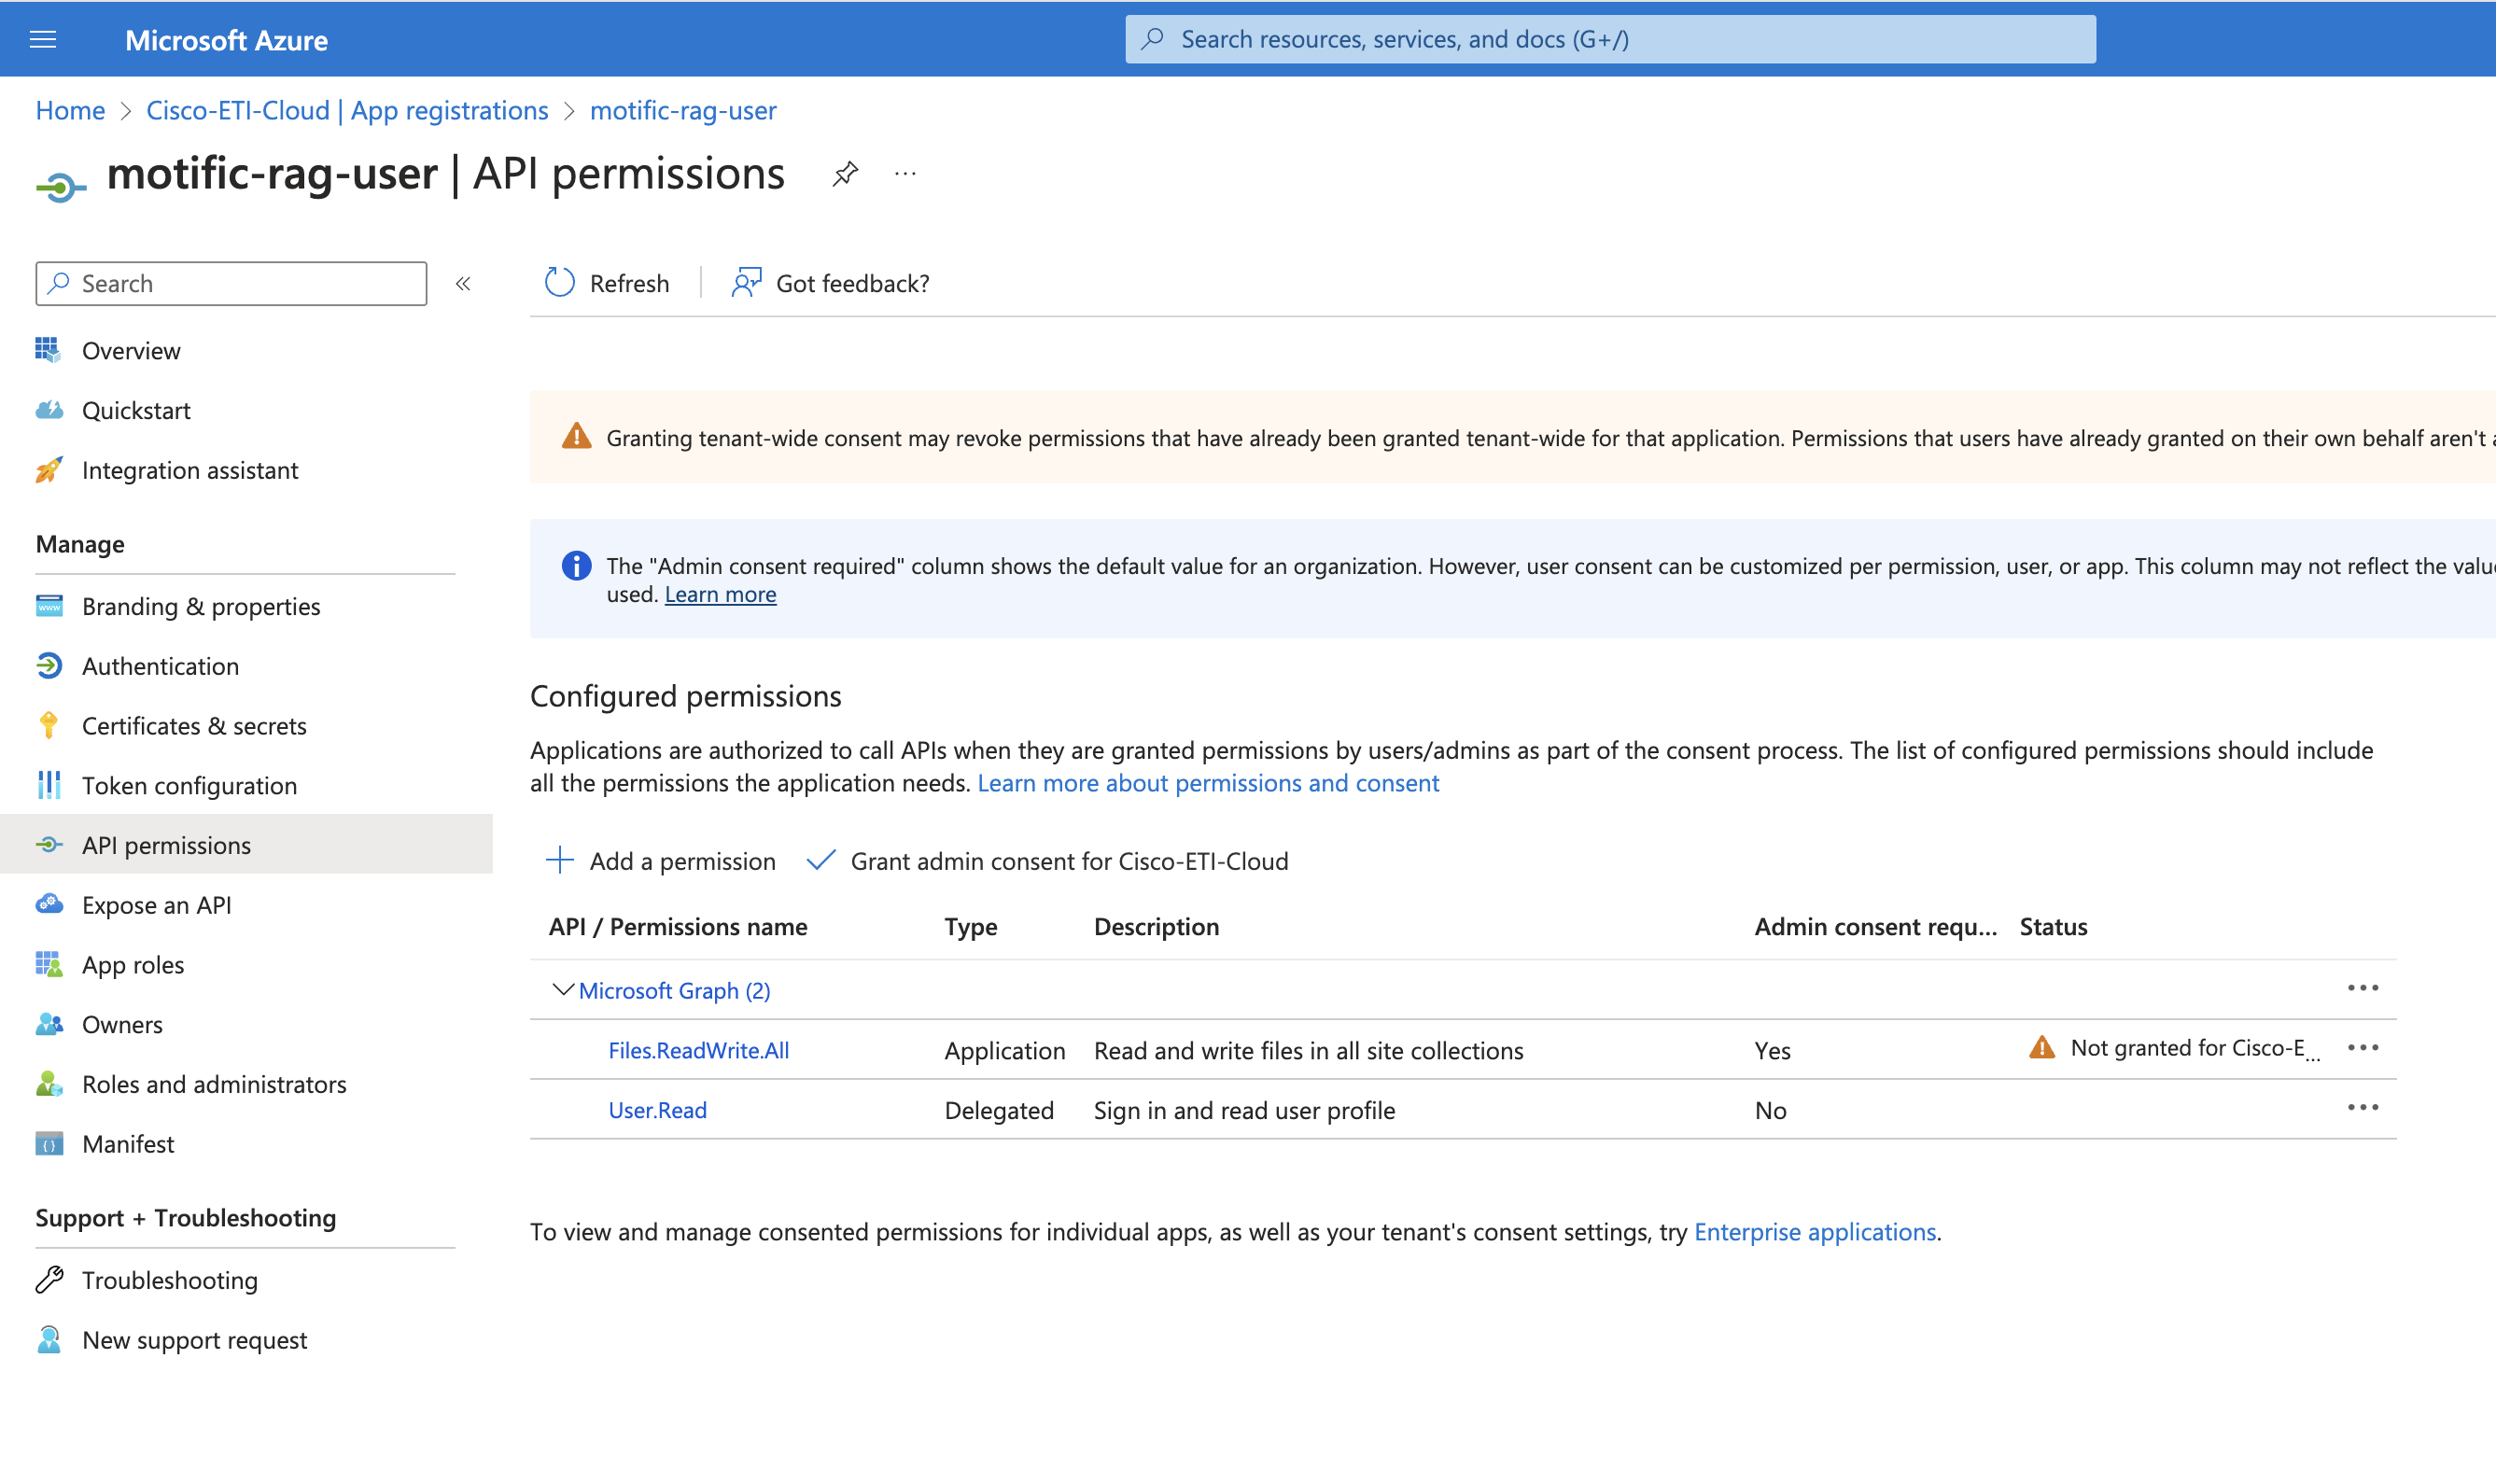
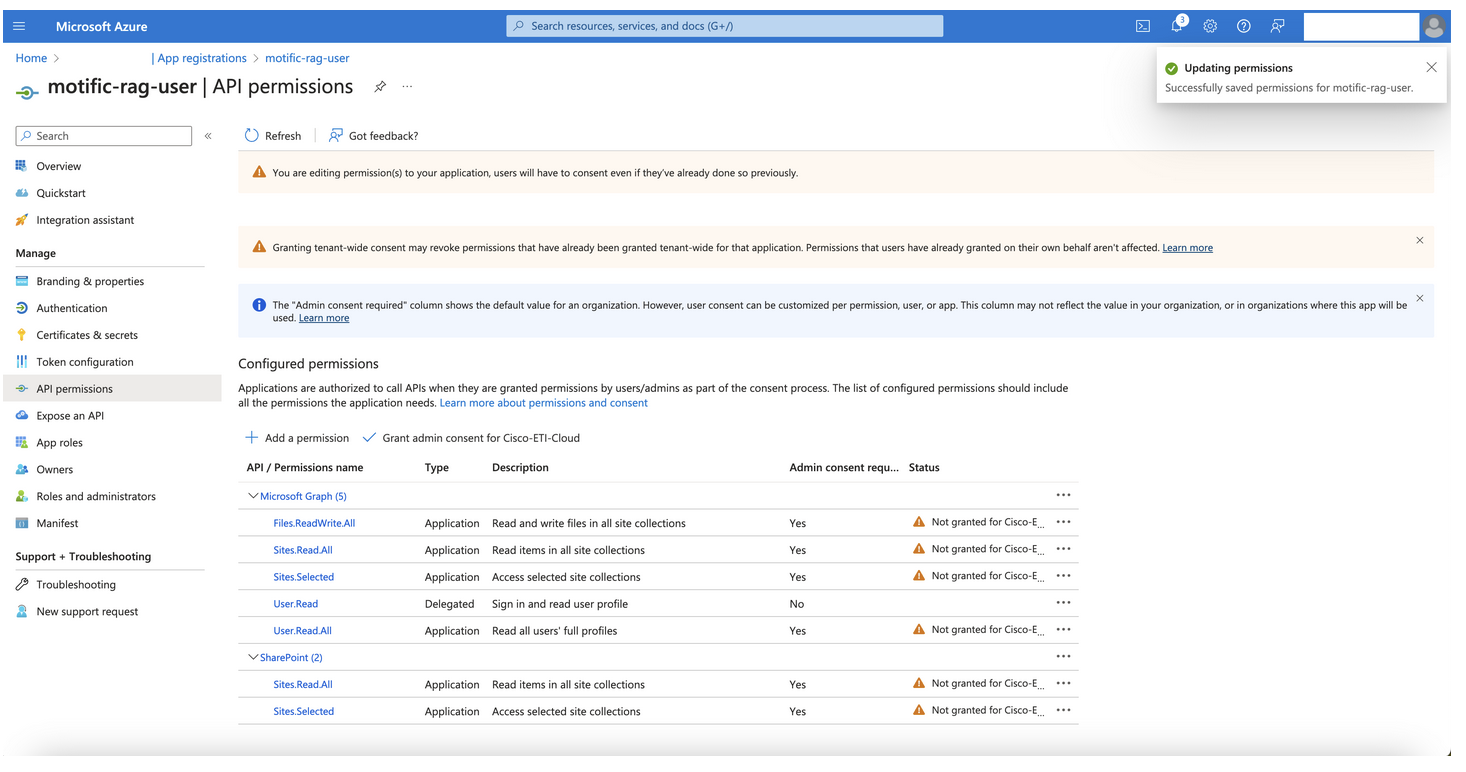
Grant permissions.
-
Grant Permissions using Admin Privilege. Click Yes.

-
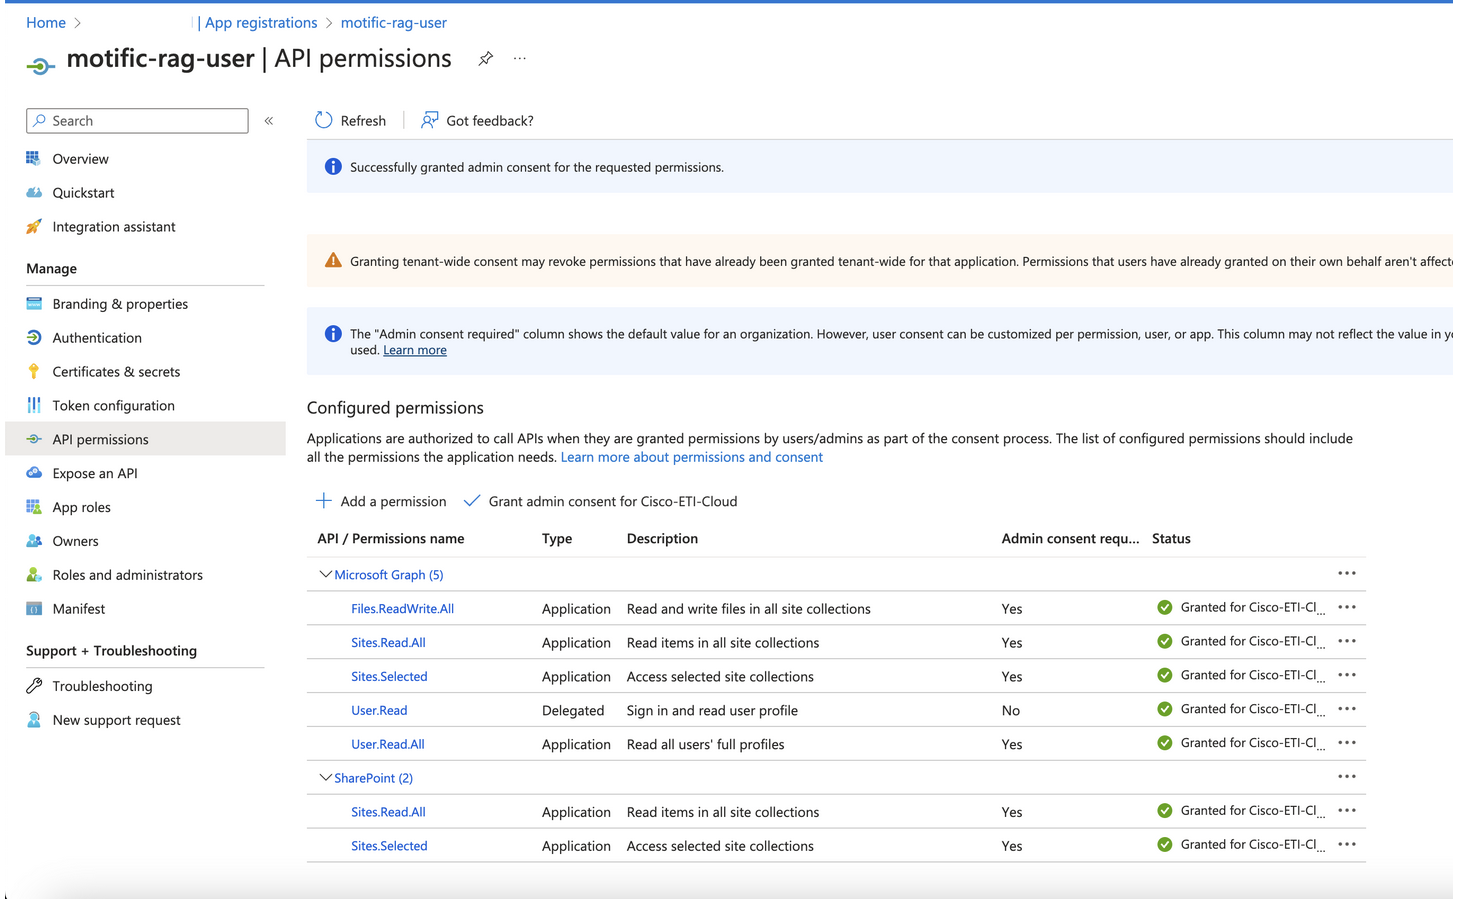
Verify all permissions granted successfully message.
Note down the URL to the SharePoint site and the folder where all the files and folders are present, this information should be added while creating a SharePoint data source. Within each of the steps above you can collate all the information needed to add the SharePoint site as a data source. For any other SharePoint site follow the same procedure to get the necessary information.