Create Motifs
Create a Motif
In this section, we show you how to create a Motif and configure the advanced Motif options like KB’s, policies, and access control, that can get you one step closer to provisioning GenAI apps for your users.
To create a new Motif, follow the steps below:
Required steps
Motif options
Step 1: Motif details
-
To create a Motif, click on the Motifs menu on the left navigation bar.
-
Next, click on the Create a new Motif button on the upper-right side corner.

-
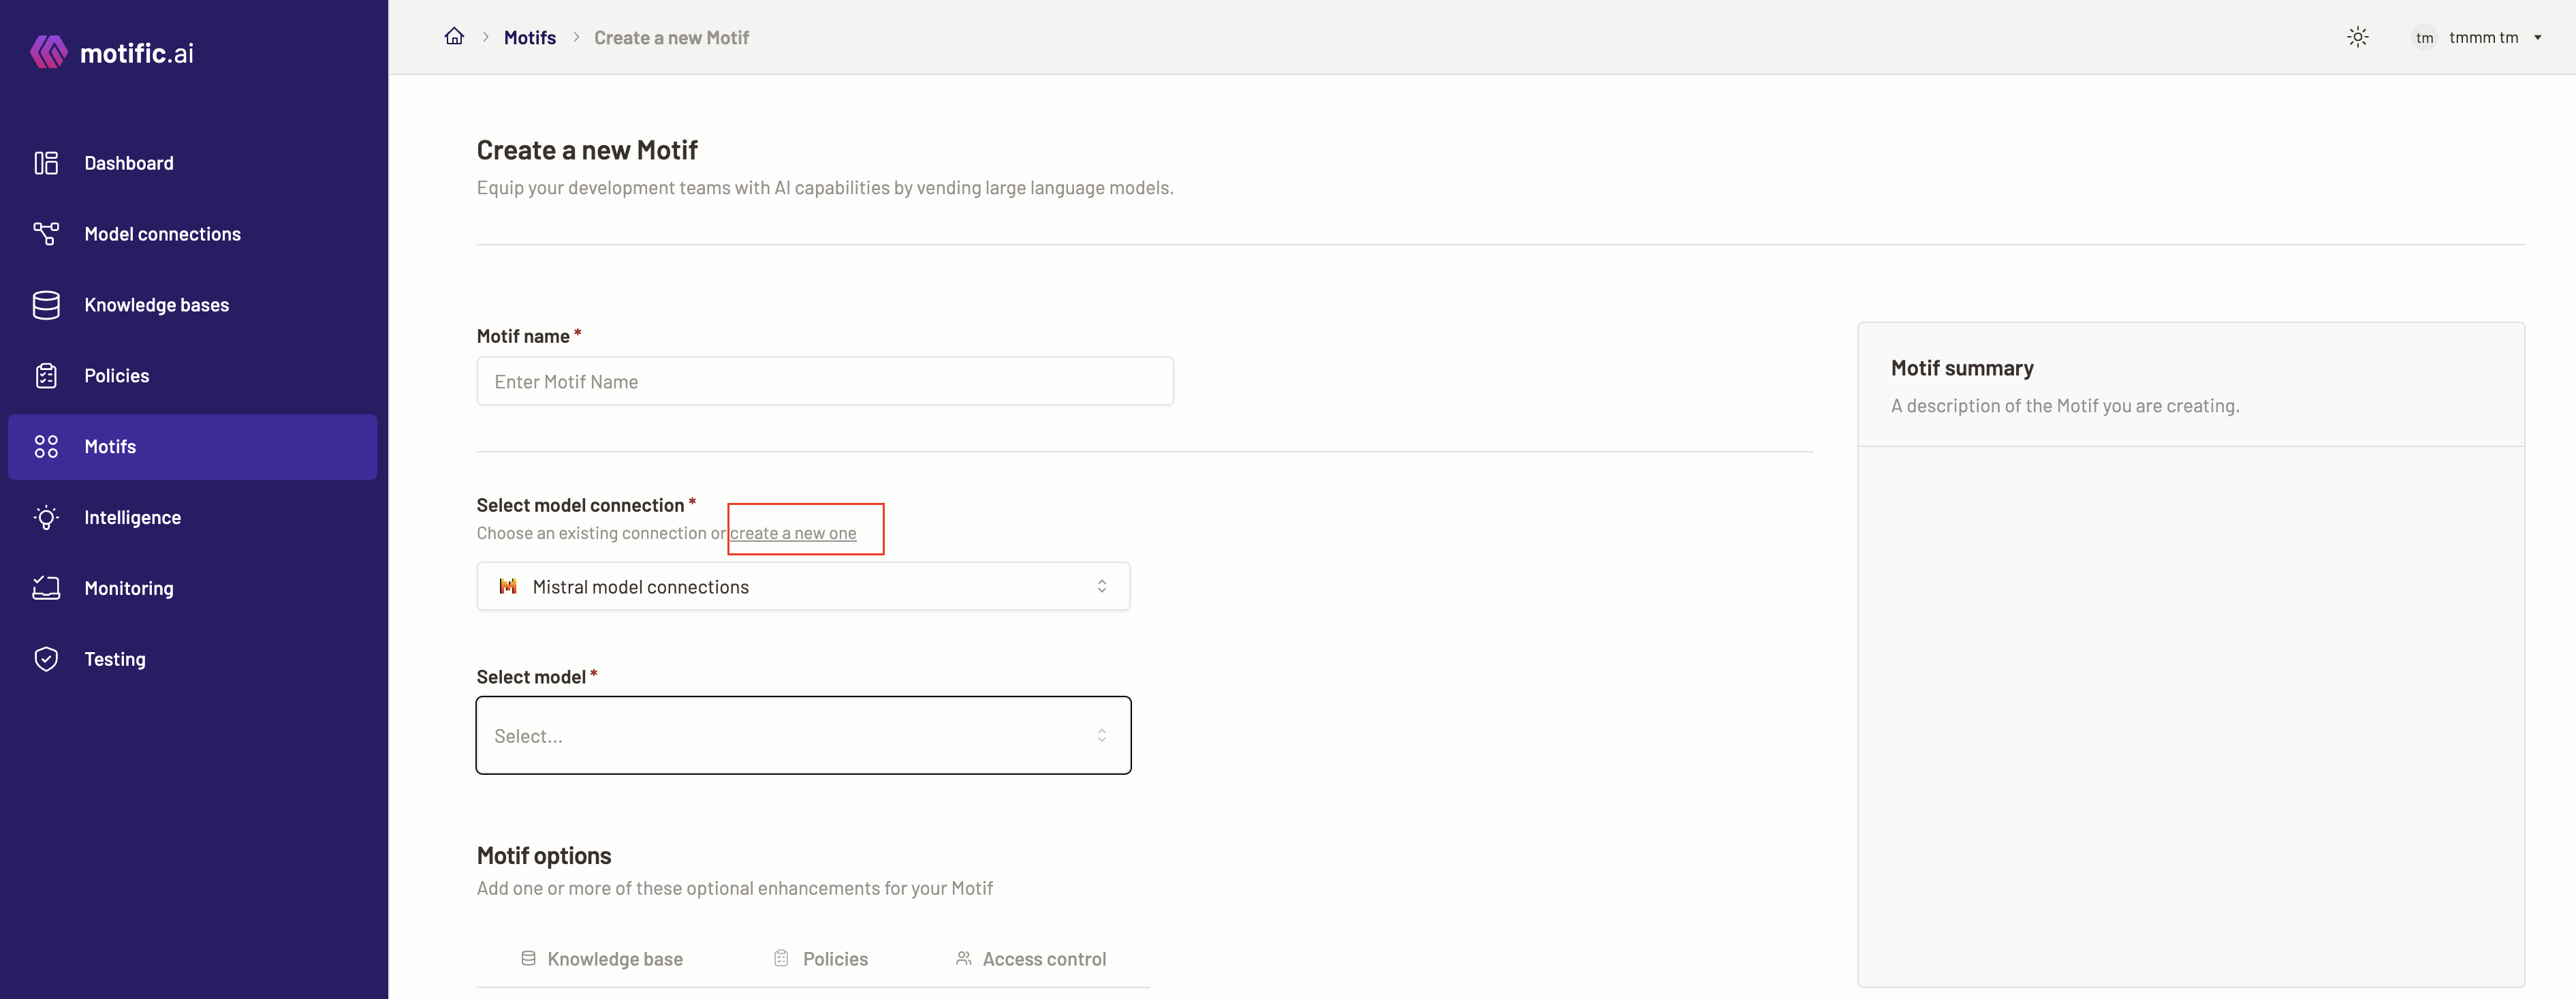
Enter a Motif name. This field is mandatory.
Step 2: Model connection
Select a model connection
The existing model connections can be viewed in the dropdown. If you do not have a model connection, then create a new model connection. Once you have created a new model connection or have existing model connections, it’s time to select a model for your Motif.
-
To choose a model connection, click on the drop-down. The newly added and previously configured model connections are displayed in the drop-down.
-
Select the connection you want to add.
-
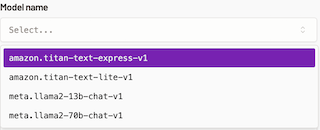
Next, choose a model connection from the drop-down that can connect to the Motif. Depending on the model provider, different models are listed in the drop down.

Add a new model connection
If you do not wish to use existing model connections or want to connect to a new LLM provider, then you can create a new model connection.
-
To add a new model connection, click on the Create a new model connection link.
-
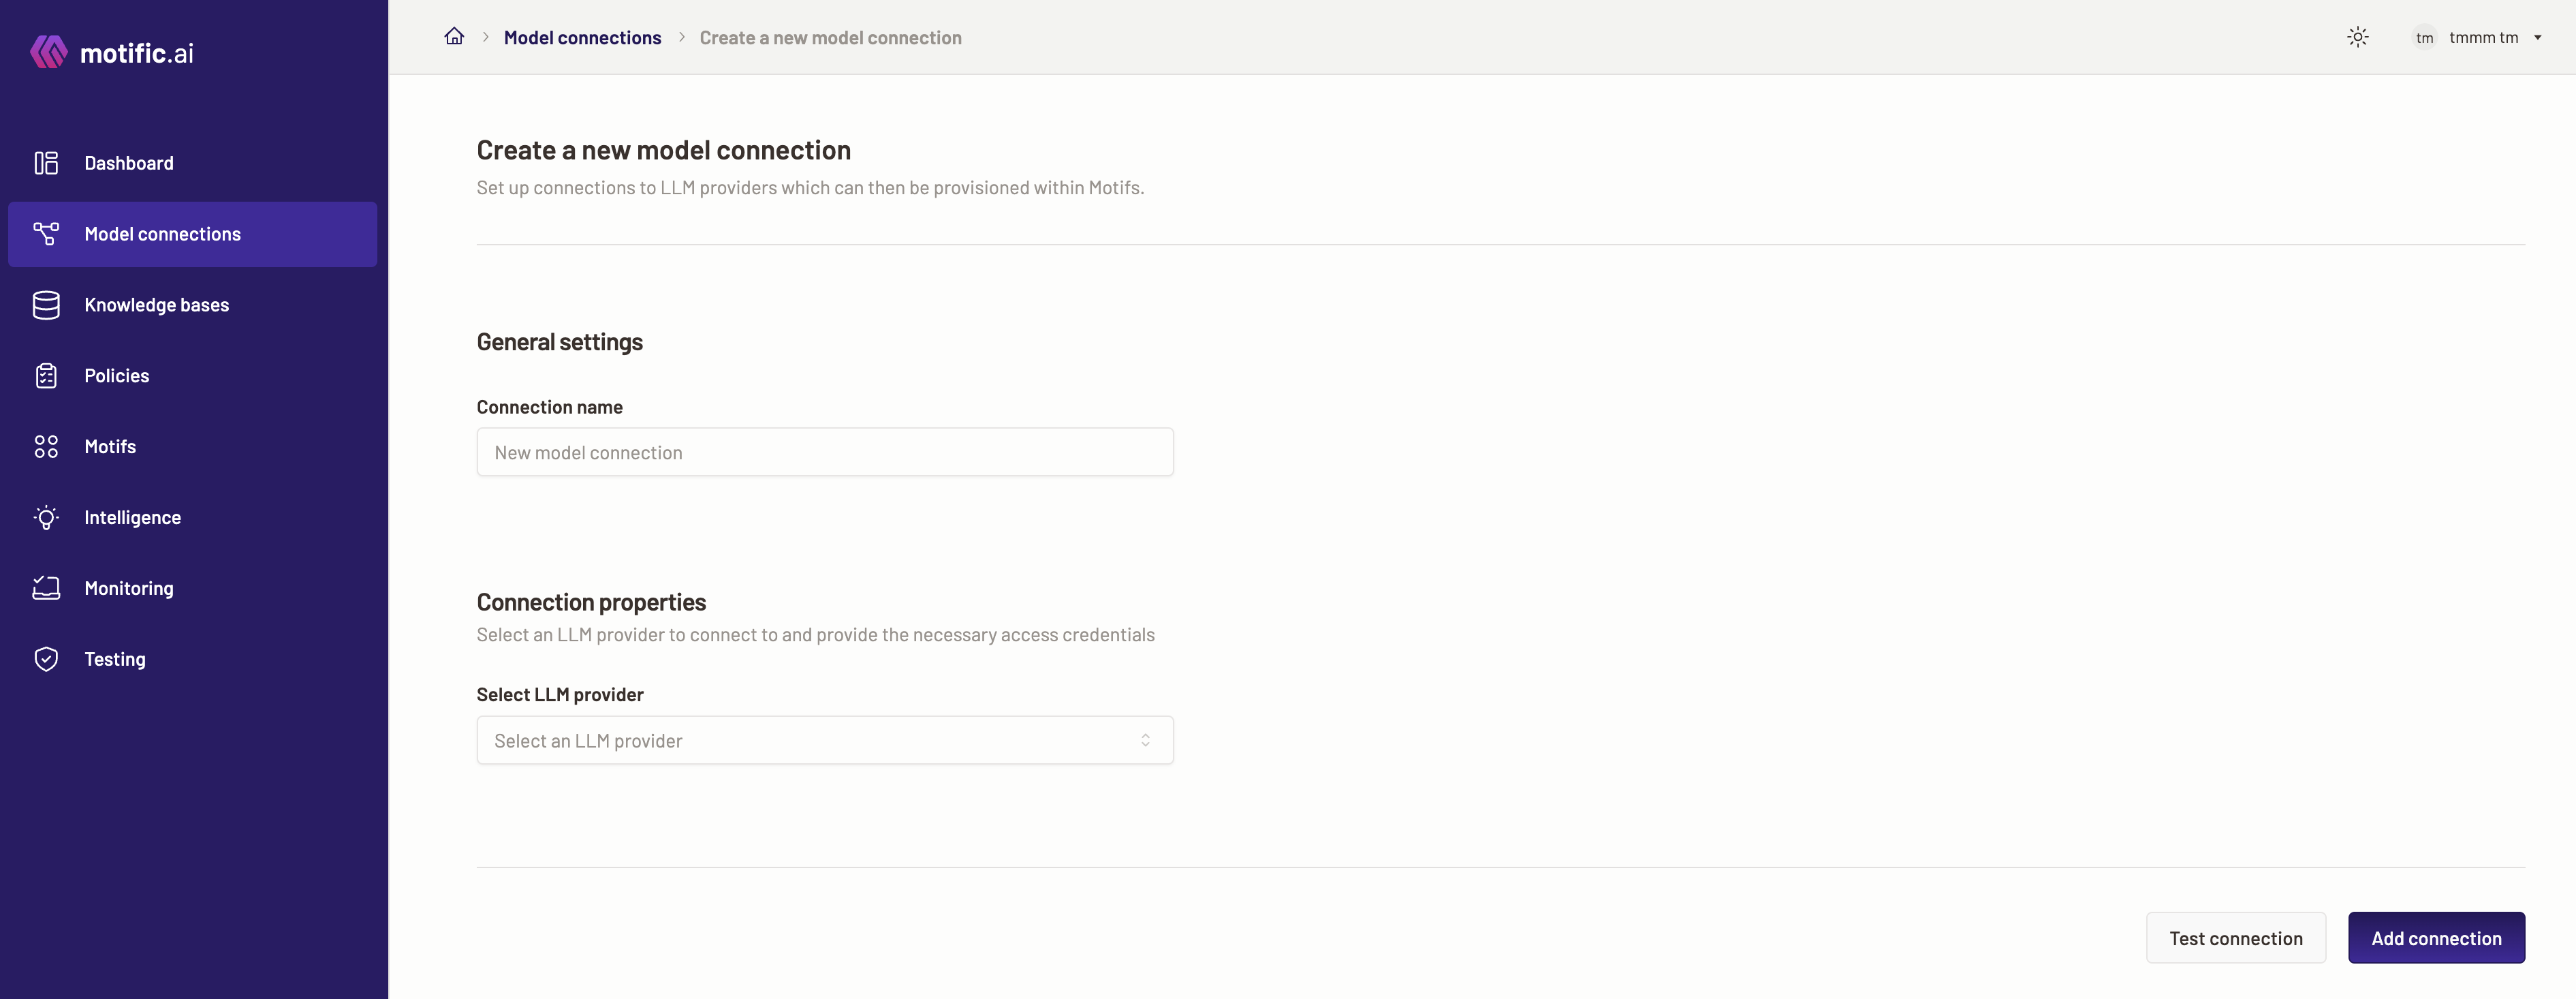
A new browser tab with the page to add a model connection open.
-
To start creating a model connection, provide a connection name.
-
Select an LLM provider to connect to from the drop-down. Provide the necessary credentials for Motific.ai to connect to it.
-
Provide the respective model provider API key. This is necessary for motific to connect to the provider.
-
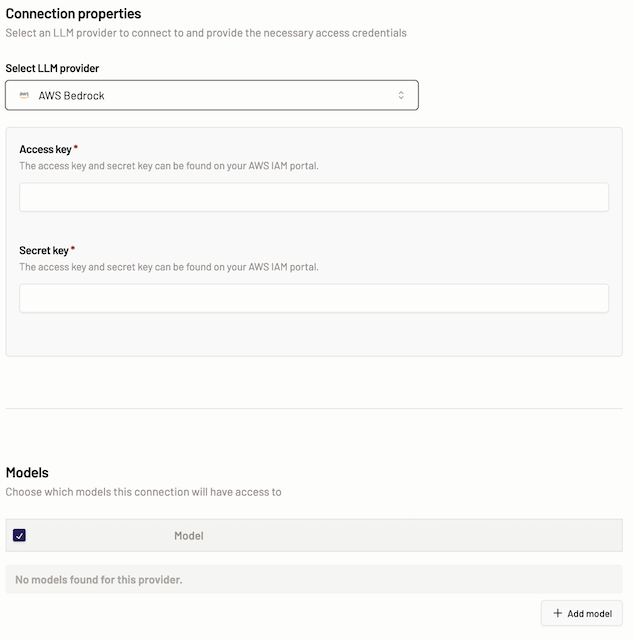
AWS Bedrock- To connect to an AWS bedrock model, Provide Access key and Secret key. Both the credentials are required to connect to the AWS Bedrock provider. The access key and secret key can be found on your AWS IAM portal.
-
Follow the steps below to choose models for this AWS Bedrock connection will have access to:
-
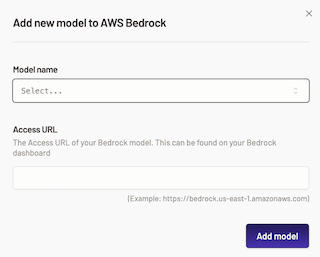
To add a model, click the Add model button.
-
Select a model from the drop-down list.
-
Enter the Access URL. The Access URL of your Bedrock model. This can be found on your Bedrock dashboard. For example:
https://bedrock.us-east-1.amazonaws.com -
To add the model, click Add model.
-
-
Mistral- Provide API key to connect to the Mistral models.
- For Mistral model the models are displayed automatically
- Here you can select the model that you want the connection to have access to.
-
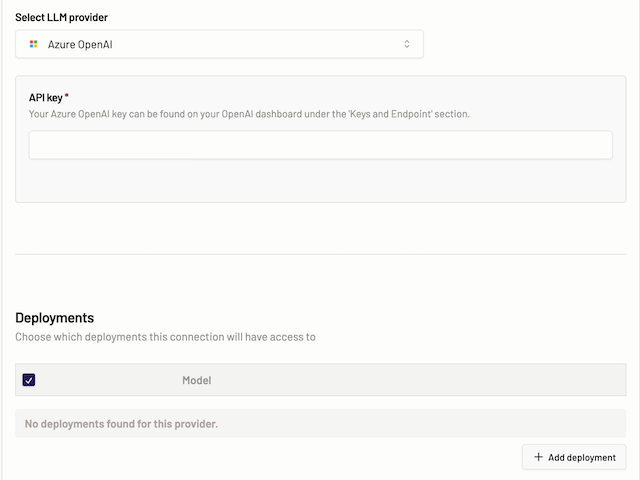
Azure OpenAI- Provide API key to connect to the Azure OpenAI models.
-
Follow the steps below to add the deployments and choose that models will have access to the Azure OpenAI connection:
-
To add a deployment, click the Add deployment button.
-
Select a model from the drop-down list.
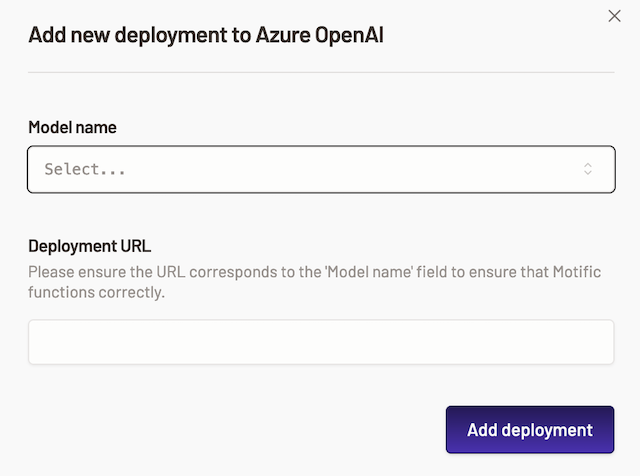
-
Enter the deployment URL for your Azure OpenAI model.
-
To add the deployment, click Add deployment.
-
-
-
To test the connection, click the Test connection button.
-
Once you are done adding the details, click the Add connection button.
Step 3: Knowledge base (KB)
Selecting a KB
The existing KB connections can be viewed in the dropdown. If you do not have a KB connection, then create a new KB connection. Once you have created a new KB connection or have existing KB connections, it’s time to select a KB for your Motif.
-
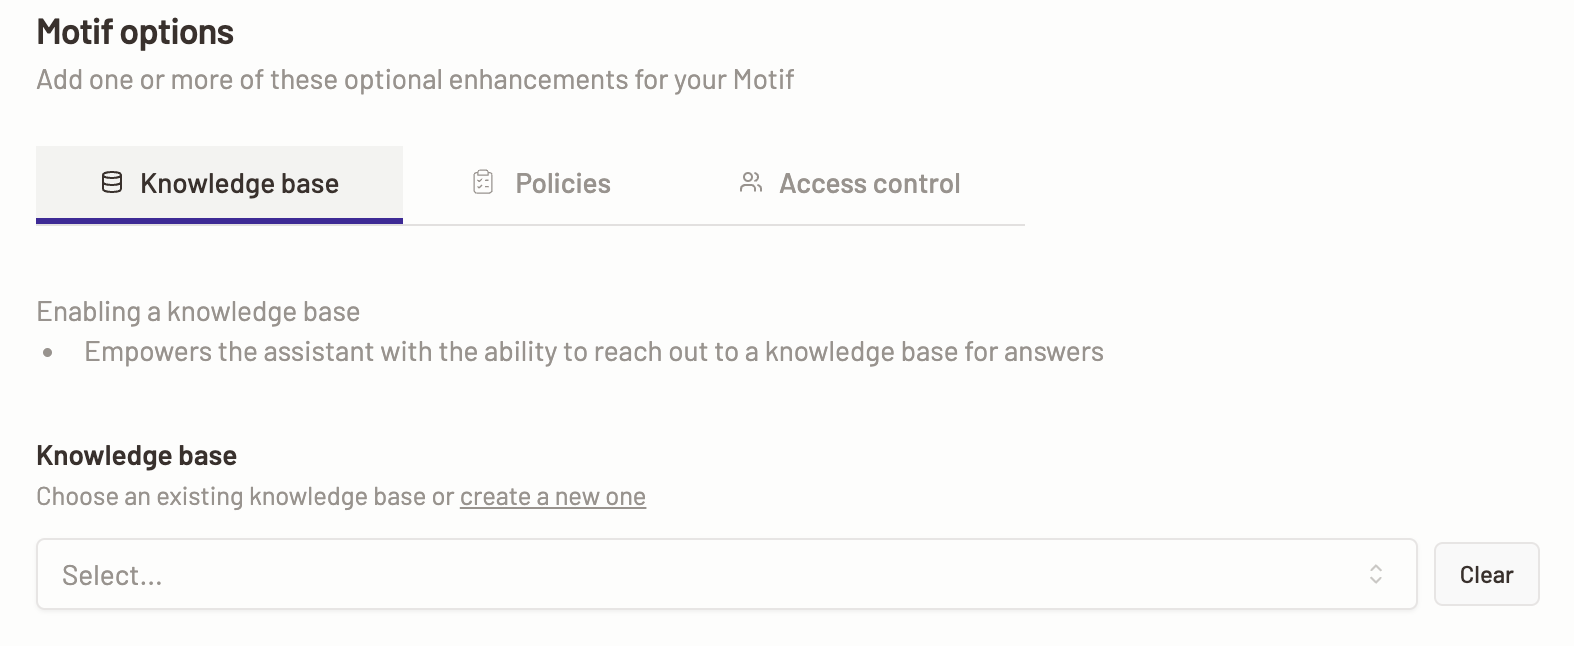
To choose a knowledge base, click on the drop-down. The newly added and the existing knowledge base connections are displayed in the drop-down.
-
Select the knowledge base you want to add.
Add a new KB
If you have not already created a knowledge base, then follow the steps below to create a knowledgebase:
-
To create a new knowledge base (KB) connection, click on the Create new knowledge base link.
-
A new browser window with the page to create a new KB opens.
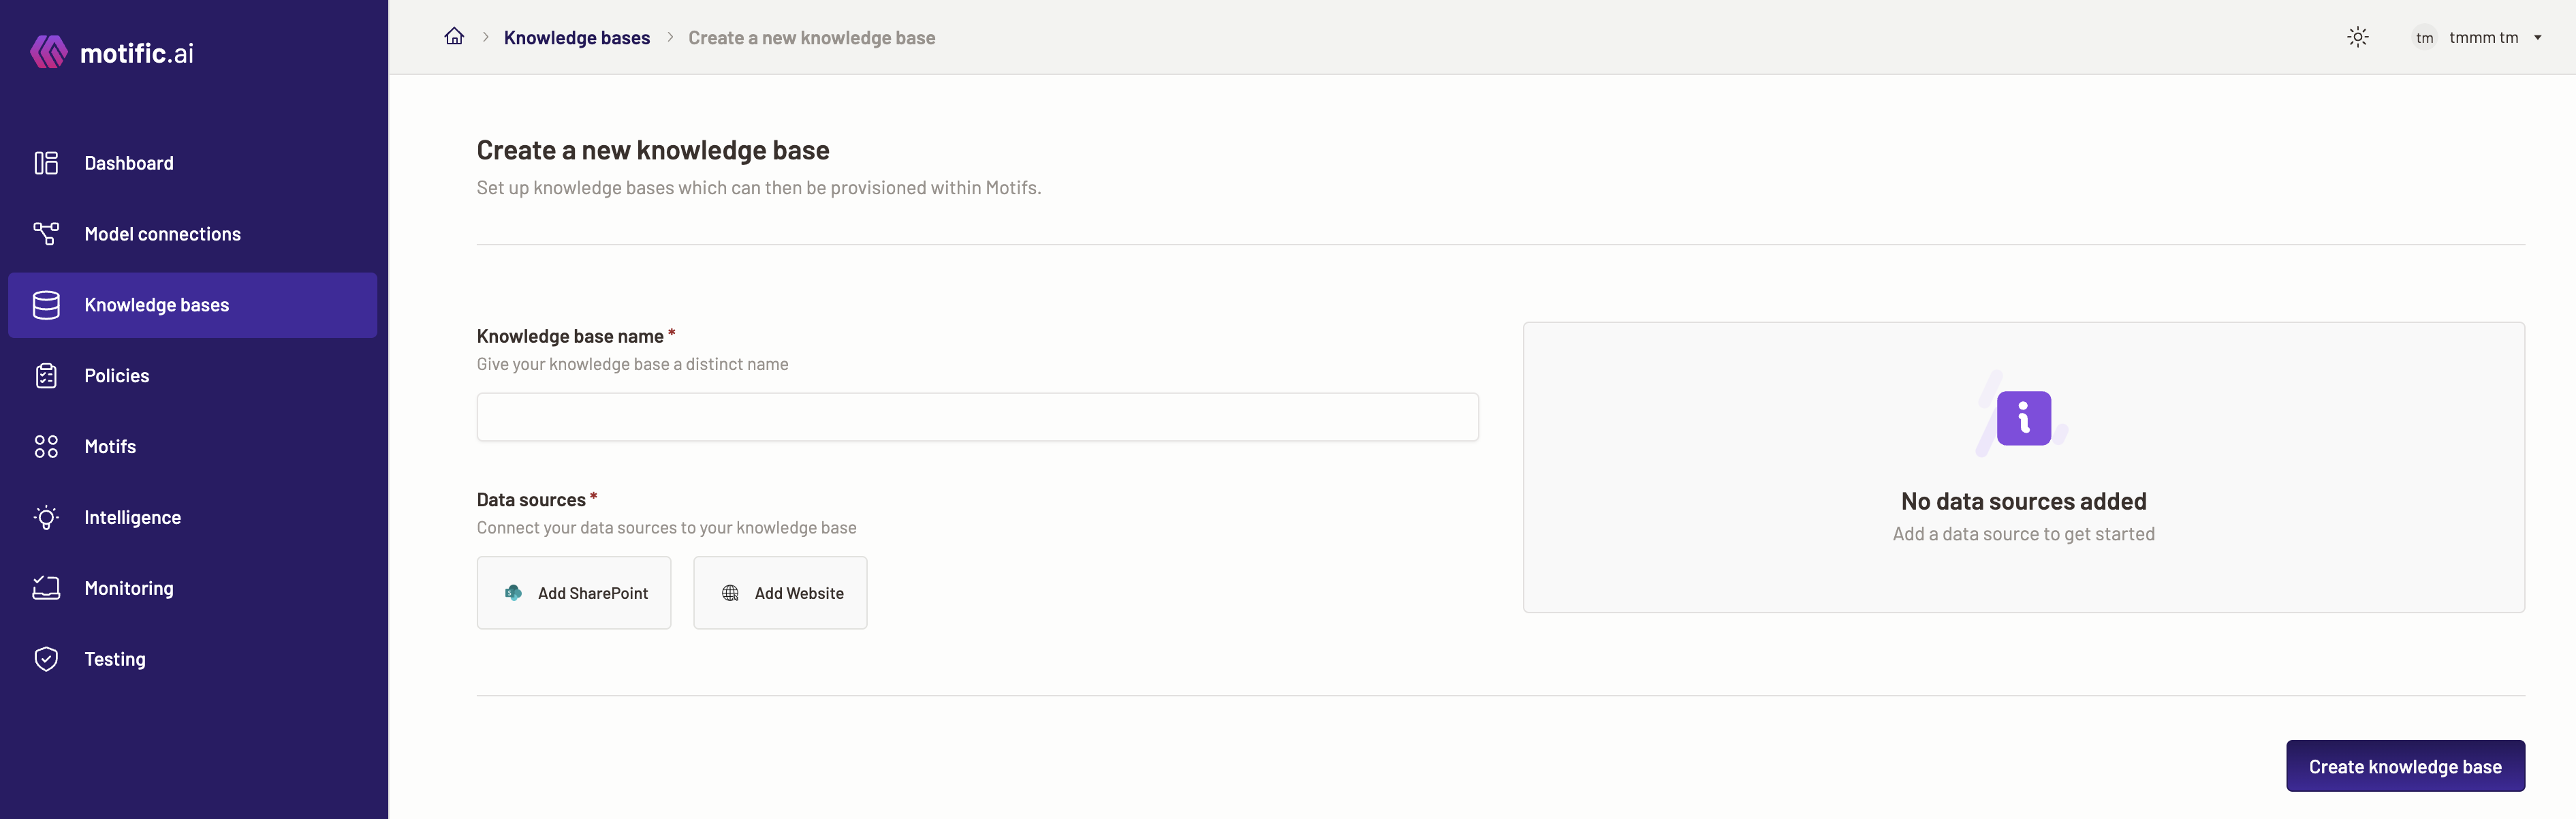
-
Enter a unique name for your KB. Optionally, provide a description for your KB.
Caveats for knowledge base creation
-
A knowledge base can currently be created using only two types of data sources - SharePoint and public websites. Multiple data sources can be included in a knowledge base.
-
Once a knowledge base is created then it is immutable, i.e., the data sources cannot be edited or added after the creation. The data sources can only be resynced if there is a failure or updated regularly to capture new data added to each data source over time.
-
In Motific.ai while creating a KB with either SharePoint or public website as a data source, following file formats are supported
.html, .json, .csv, .txt, .pdf, .docx, .doc, .pptx, .xlsx. -
Before creating a Motif with a knowledge base and testing it in a chat console, make sure that all the files and data sources of that KB have been completely ingested and there are no failures. The sync status should be
complete. To learn more about viewing the data source sync status, refer to the here. -
If there are failures during the ingestion of data sources, you have the option to resync the data sources. Resyncing the data sources will restart the ingestion process.
-
While creating the knowledge bases you should be aware of the following resource limits:
- The maximum number of knowledge bases that can be created per tenant is ten (10).
- The maximum number of documents per knowledge base that can be added is ten thousand (10000).
- The largest document size allowed is 50 MB.
- Next, add data sources for your KB. You have the option of adding one or multiple of the following two data sources:
- Add SharePoint: SharePoint sites where you have different files and folders that can be the data source for the knowledgebase.
- Add website: Public websites are the websites available on the general internet. These websites can be added as data sources to a KB.
Add SharePoint
A SharePoint can be a website or a secure place to store, organize, share, and access information from any device. It can also consist of folders with various files.
-
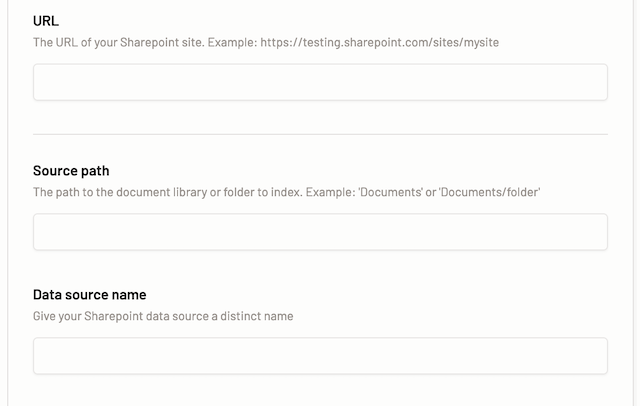
To add a SharePoint as a data source, click the Add SharePoint option.
-
Provide the URL for the SharePoint site that you want to add.
-
Enter the source path- the path to the folder or document library you want to index.
-
Provide a Data source name for your SharePoint data source.
-
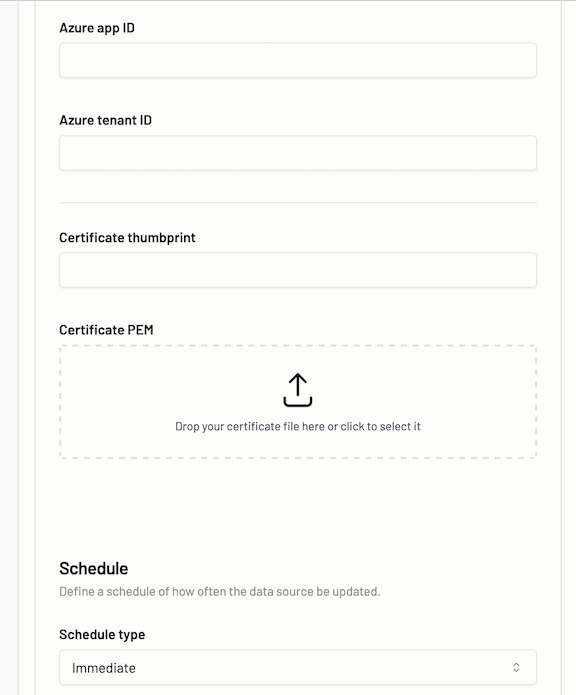
Enter the Azure app ID for the site.
-
Enter the Azure tenant ID for the site.
-
Enter the Certificate thumbprint for the SharePoint site.
-
Provide Certificate PEM (Privacy Enhanced Mail). Drag and drop or click on the drop area to upload the PEM certificate.
-
Define a schedule of how often the data source should be updated by selecting an option from the drop-down. You have the following options:
- One-Time - The data source sync begins as soon the KB is created.
- Weekly- Specify the day of the week and time of the day when the data source should be updated with any new content.
- Monthly- Specify the day of the month and time of the day when the data source should be updated with any new content.
- Daily- Specify the time of the day when the data source should be updated with any new content.
When you add a data source and define a schedule to update that data source while creating a knowledge base the time is always defined in UTC. This is essential information as this defines your data source update schedule and defining the right time is very essential. -
Verify all the details, then to add the data source, click the Add SharePoint button.
You can add multiple data sources as you want to a knowledgebase.
Caveats for adding a SharePoint as a data source
-
For a user to access a SharePoint added to a KB during testing a Motif, the user should have access to the said SharePoint.
-
The email ID of a user authorized to use a Motif should be the same as the email ID that has access to the SharePoint within a KB of the Motif. If the email addresses of a user do not match, then when the user accesses the above-mentioned Motif, they may encounter errors as shown below.

- When you are done adding the data source(s), you can view the details of the data source added in the knowledge base summary section. You can also delete the data sources in the summary section by clicking the red delete icon.
Add public website
Public websites are the websites available on the general internet. These websites can be added as data sources to a KB.
- To add a website as a data source, click the Add Website button.
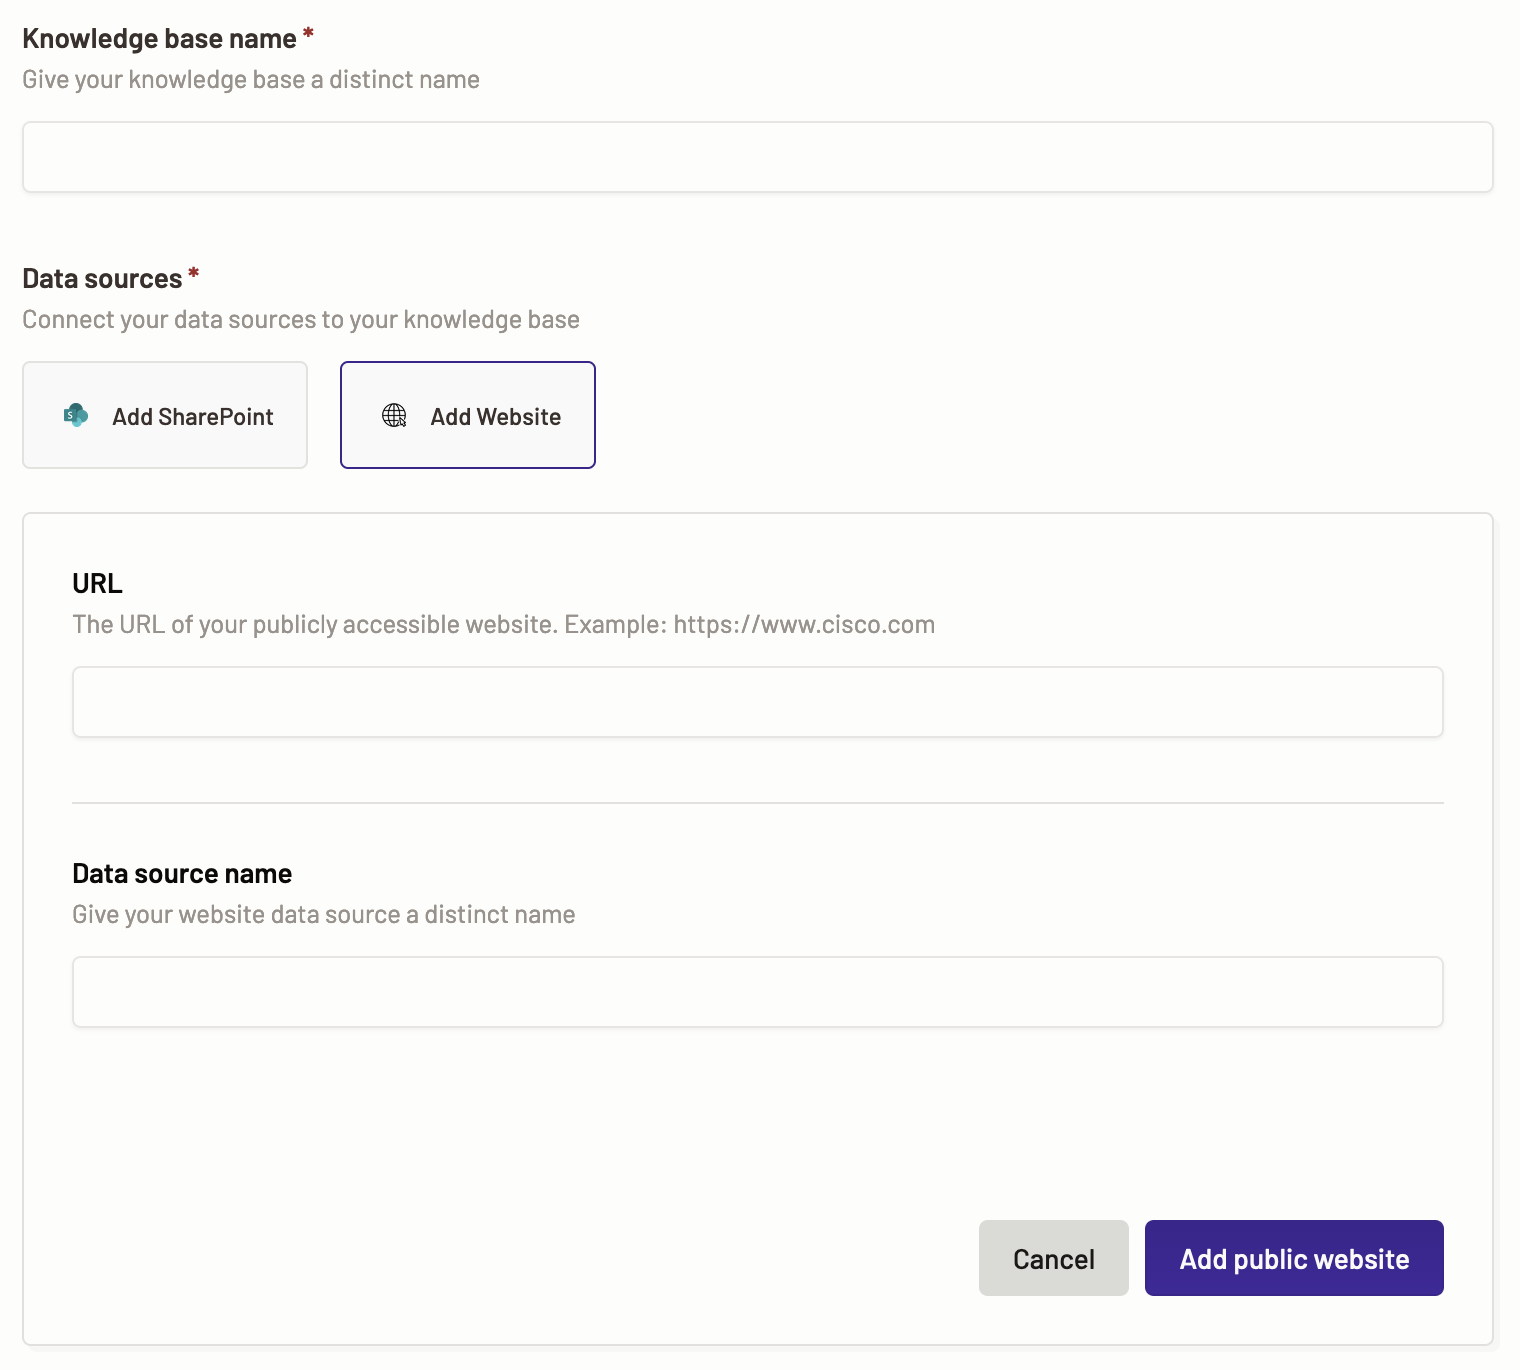
- Provide the source URL for the website that you want to add.
- Provide a name and description for your website.
- Verify all the details, then to add the data source, click the Add public website button.
You can add multiple data sources as you want to a knowledgebase.
Caveats for adding public website as a data source
- The source URL added for a public website data source should be in the proper format. For example- if a URL for a website is added www.cisco.com, you may get an error while creating the KB. The right format would be https://www.cisco.com.
-
When you are done adding the data source(s), you can view the details of the data source added in the knowledge base summary section. You can also delete the data sources in the summary section by clicking the red delete icon.
-
Click the Create Knowledgebase button to add the data sources to the knowledge base.
Step 4: Policies
Choose policies
The existing policy can be viewed in the dropdown. If you do not have a KB connection then create a new KB connection Once you have created a new policy or have existing policy, it’s time to select a policy for your Motif.
-
To choose a policy, click on the drop-down. The newly added and existing policies are displayed in the drop-down.
-
Select the policy base you want to add.
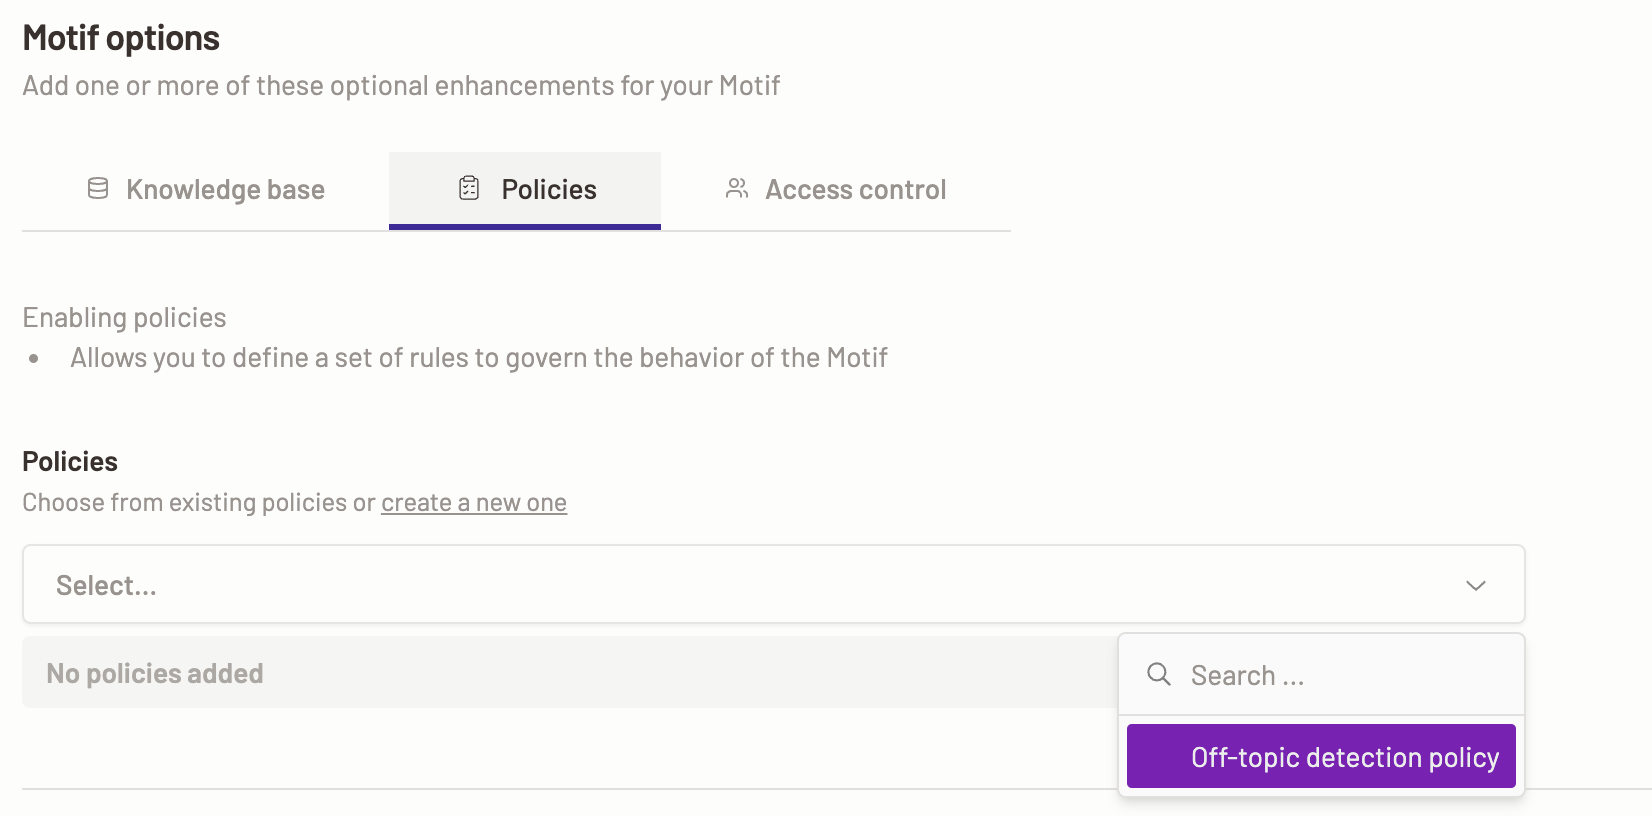 Note: You can add multiple policies to a Motif.
Add a policy
-
To define a policy, click on the Create a new policy link.
-
A new browser tab with the page to create a new policy opens.
-
Provide identification information for the new policy.
-
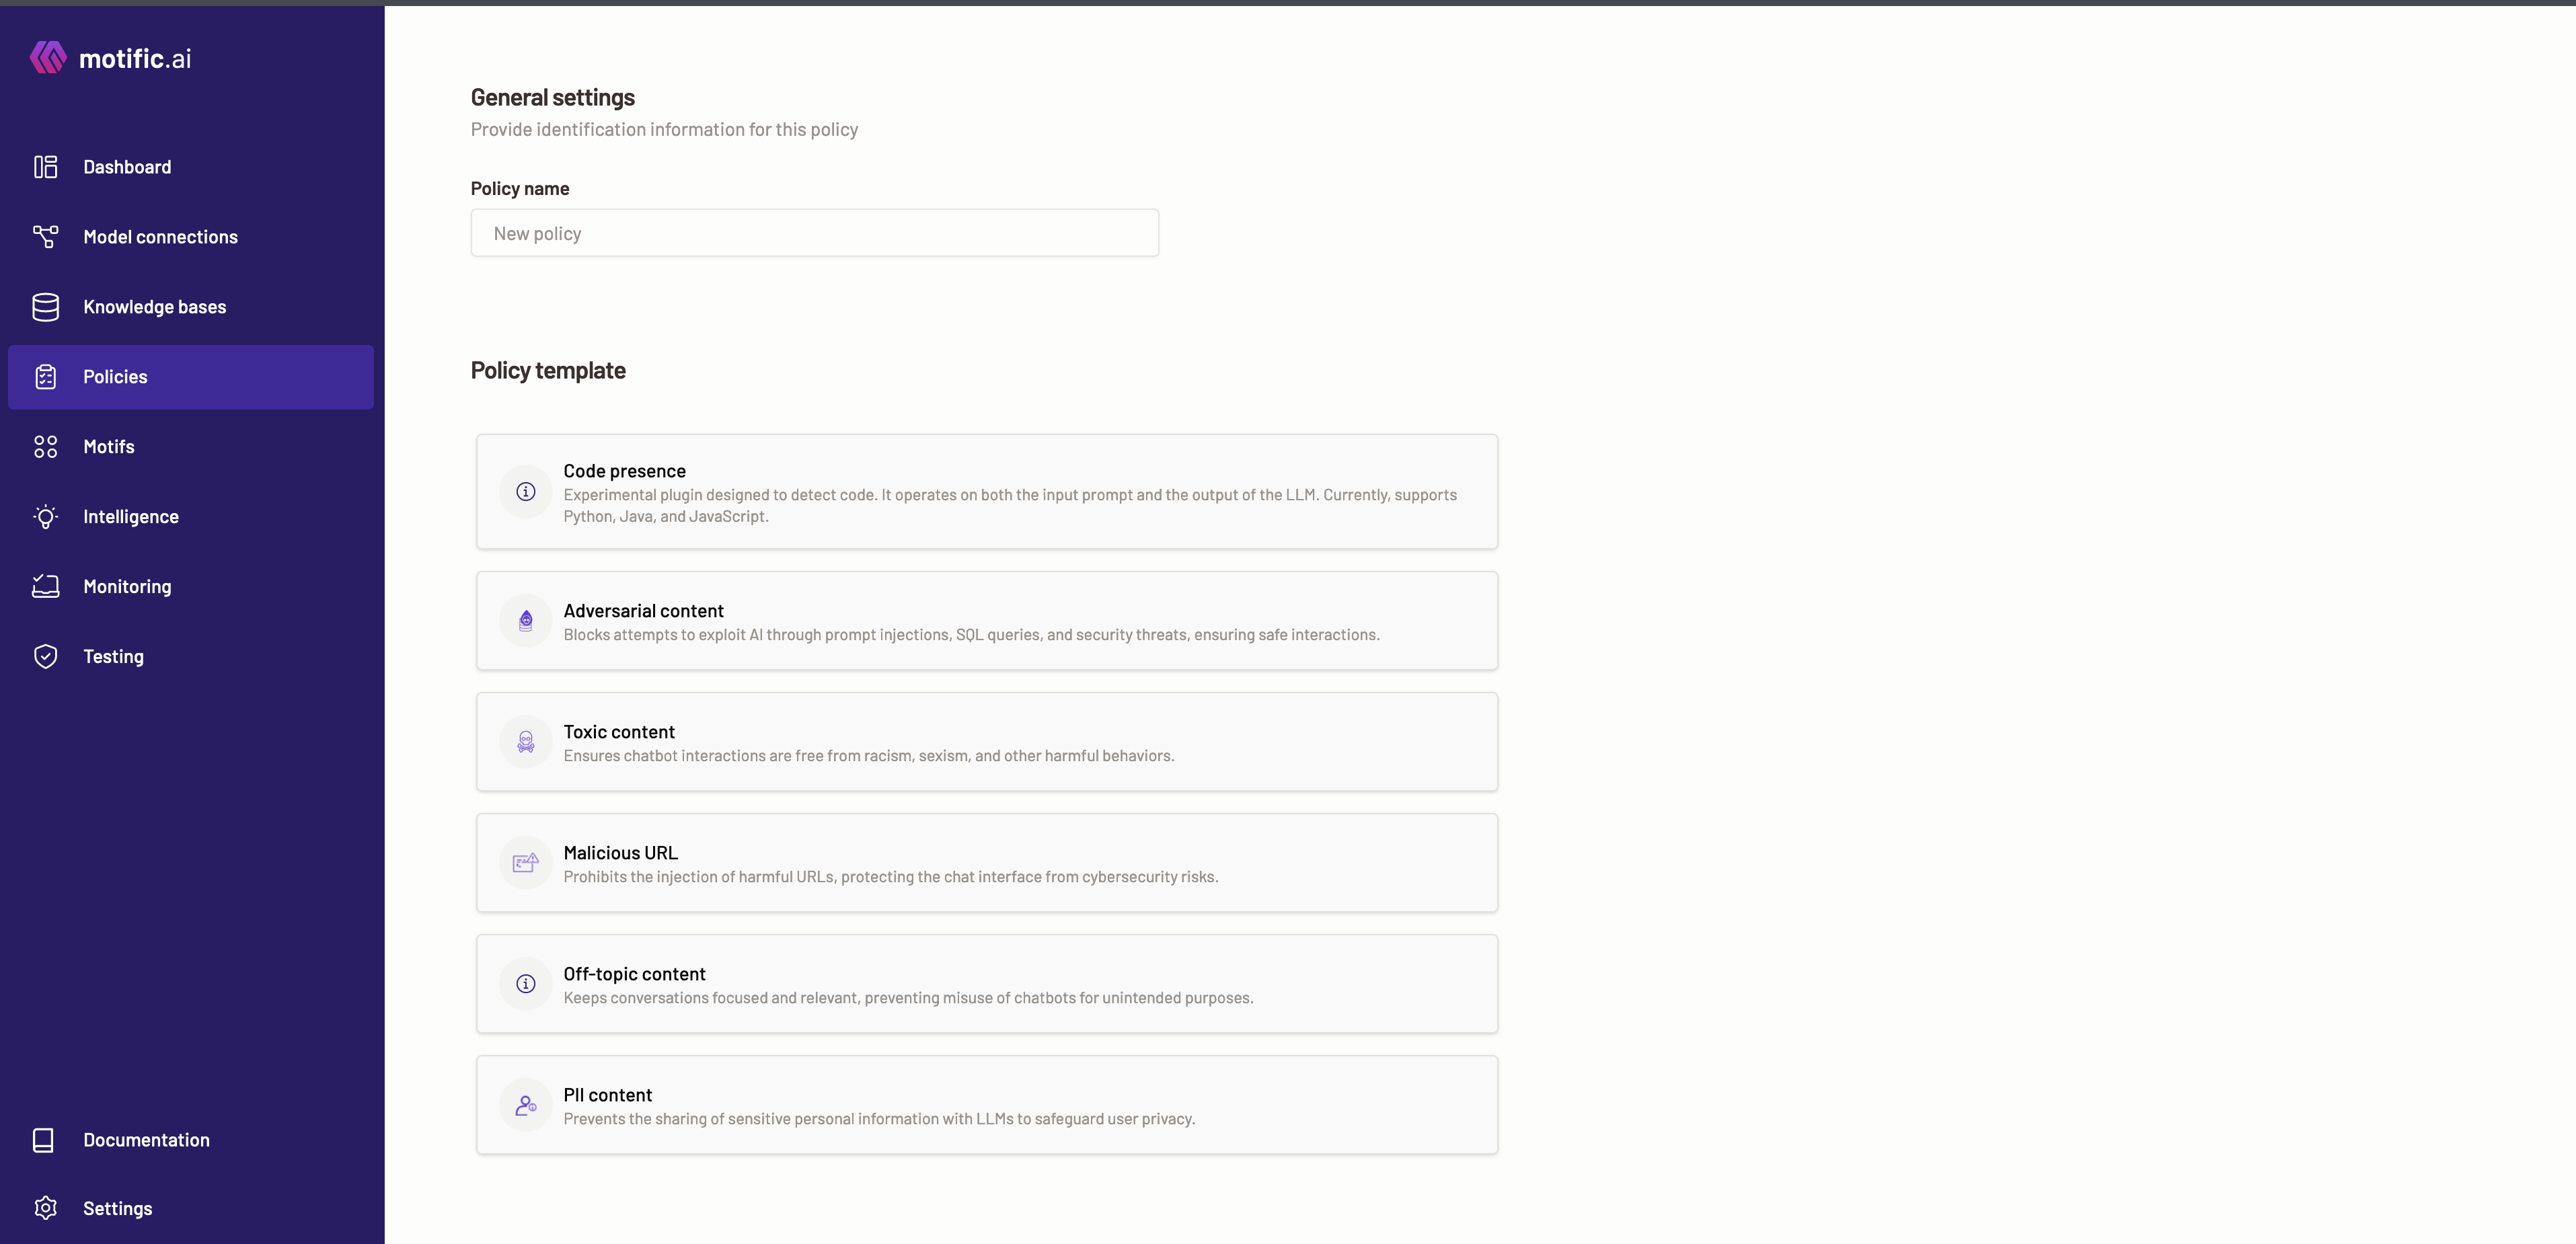
Next, choose from the policy template displayed:
Adversarial content
An adversarial content policy can block attempts to exploit AI models through prompt injections, SQL query injection, and security threats, ensuring safe interactions.
You can define the policy with an action that Motific.ai should perform when it detects that a prompt is injected with adversarial or harmful content. This policy also examines and blocks the output from a model that contains any adversarial or harmful content. The actions that Motific.ai can take are Pass the prompt and out or Block it.
- Pass- When the
Passaction is selected, Motific.ai passes a prompt detected with adversarial and harmful content to the LLM for inference, without any action. - Block- When
Blockaction is selected, Motific.ai blocks a prompt detected with adversarial and harmful content from getting an inference. Also, an LLM response is also blocked when it detected to have adversarial content.
-
To define adversarial content policy, select the Adversarial content template.
-
The following categories are available for you to define policies over:
-
Adversarial- The adversarial category is triggered when the content of a prompt tries to deceive a LLM with harmful input. Select a policy action for Motific.ai to perform when it identifies that the prompt or a model output contains adversarial content.
-
Harmful- This category is triggered when a prompt contains hate speech, profanity, or self-harm content. Select a policy action for Motific.ai to perform when it detects that the prompt passed contains harmful content.
-
SQL injection- This category is triggered when an input contains SQL code intended to manipulate data. Select a policy action for Motific.ai to perform when it detects that the prompt or a model output is injected with SQL content i.e., SQL queries.
-
XSS injection- The XSS injection, also known as a cross-site scripting attack it is triggered when an input contains malicious scripts. Select a policy action for Motific.ai to perform when it detects that the prompt or a model output is injected with XSS content i.e., malicious scripts.
-
Context switch- This category is triggered when a prompt contains content that signals a LLM to change the topic or type of content that it is generating. Select a policy action for Motific.ai to perform when it detects that the prompt or a model output is injected with context switching content.
-
DAN (Do anything now)- The DAN category is triggered when the input contains open-ended master instructions that could potentially lead LLM to generate outputs without clear ethical or safety boundaries. Select a policy action for Motific.ai to perform when it identifies that the prompt or a model output is injected with a master prompt.
-
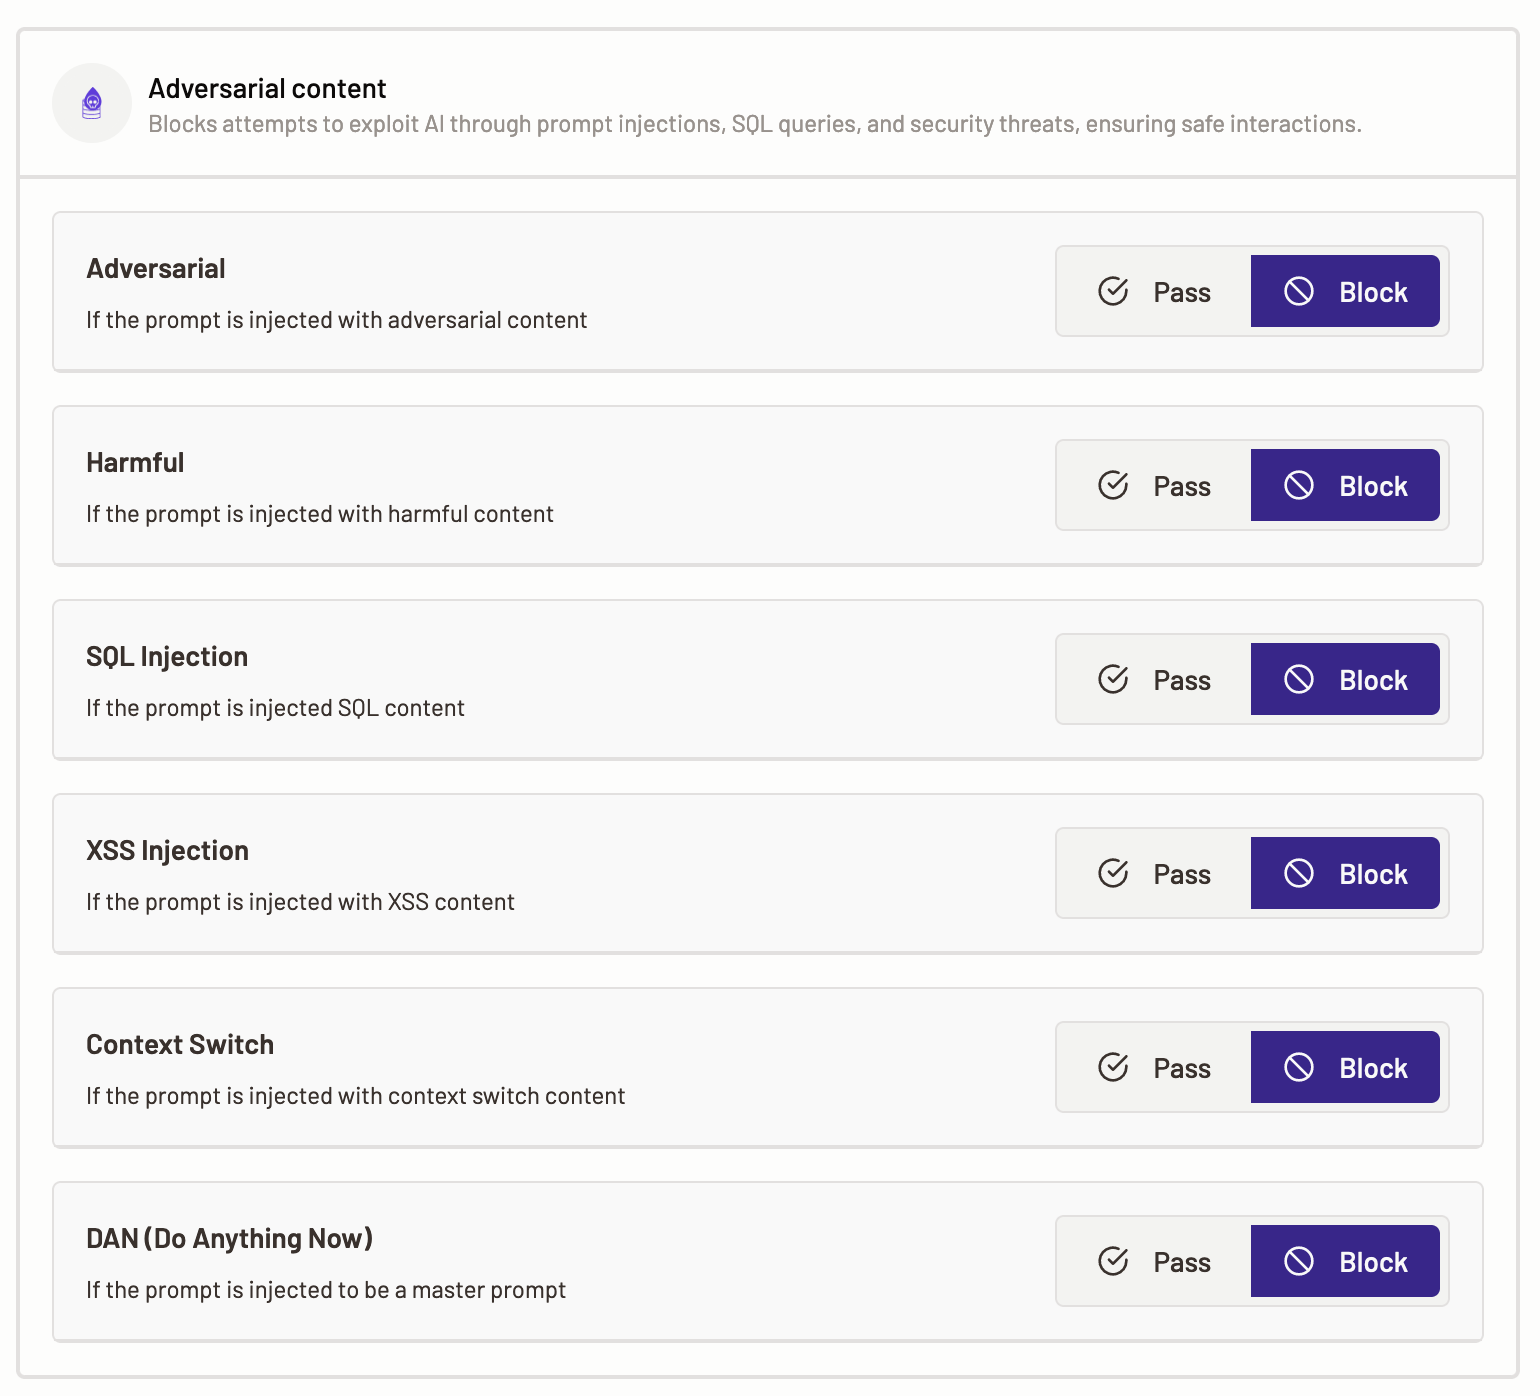
Toxic content
Toxic content policy helps you enforce guidelines for toxic (umbrella term for rude, offensive content) and unsafe content. It ensures interactions with any LLMs are free from racism, sexism, and other harmful behaviors.
Here, you can set actions for when Motific.ai identifies that a prompt contains ethically wrong and unsafe content, such as hate, violence, self-harm, or sexual etc. The actions that Motific.ai can take are Pass or Block the PII.
Policy action
- Pass- When the
Passaction is selected, Motific.ai passes a prompt with toxic content to the LLM for inference, without any action. - Block- When
Blockaction is selected, Motific.ai blocks a prompt with toxic content. The request does not proceed to the LLM.
-
To set toxic content actions, select the Toxic content option.
-
The following categories are available for you to define policies over:
-
Violence- Select a policy action such as Pass or Block that Motific.ai can perform when it detects that the prompt contains content describing violence.
-
Self-harm- Select a policy action such as Pass or Block that Motific.ai can perform when it detects that the prompt contains content that describes or is related to self-harm.
-
Hate- Select a policy action such as Pass or Block that Motific.ai can perform when it detects that the prompt contains hateful or fairness-related harmful content.
-
Sexual- Select a policy action to perform for when Motific.ai detects that the prompt or inference response contains sexually explicit content.
-
Malicious URL
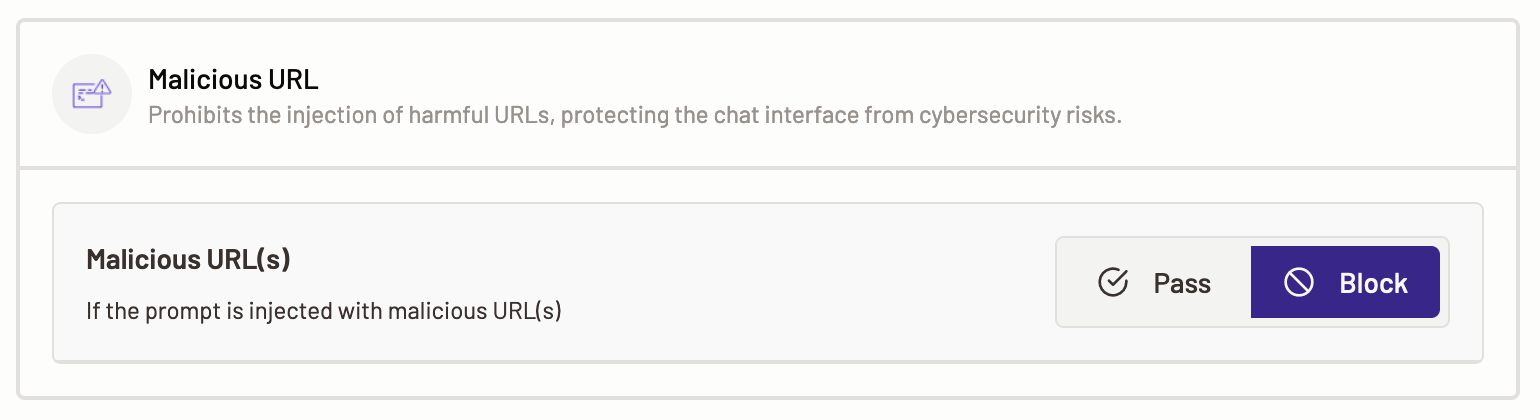
Malicious URL and data protection policy prohibits the injection of harmful URLs, protecting the chat interface from cybersecurity risks.
Here, you can select the action that Motific.ai should perform when it detects that a prompt contains deliberately malicious, sensitive data theft, or data poisoning content. The actions that Motific.ai can take are Pass or Block the malicious content from reaching the model.
Policy action
- Pass- When the
Passaction is selected, Motific.ai passes a prompt with malicious and data theft content to the LLM for inference, without any action. - Block- When the
Blockaction is selected, Motific.ai blocks a prompt with malicious content. The request does not proceed to the LLM.
- To define malicious URL policy, select the Malicious URL option.
- The following malicious URL and data protection content categories are available for you to define policies over:
- Malicious URL- Malicious URLs are unsafe URLs that, if undetected, can cause phishing attacks, etc. Select a policy action for Motific.ai to perform when it detects that a prompt is injected with malicious URL(s).
Off-topic content
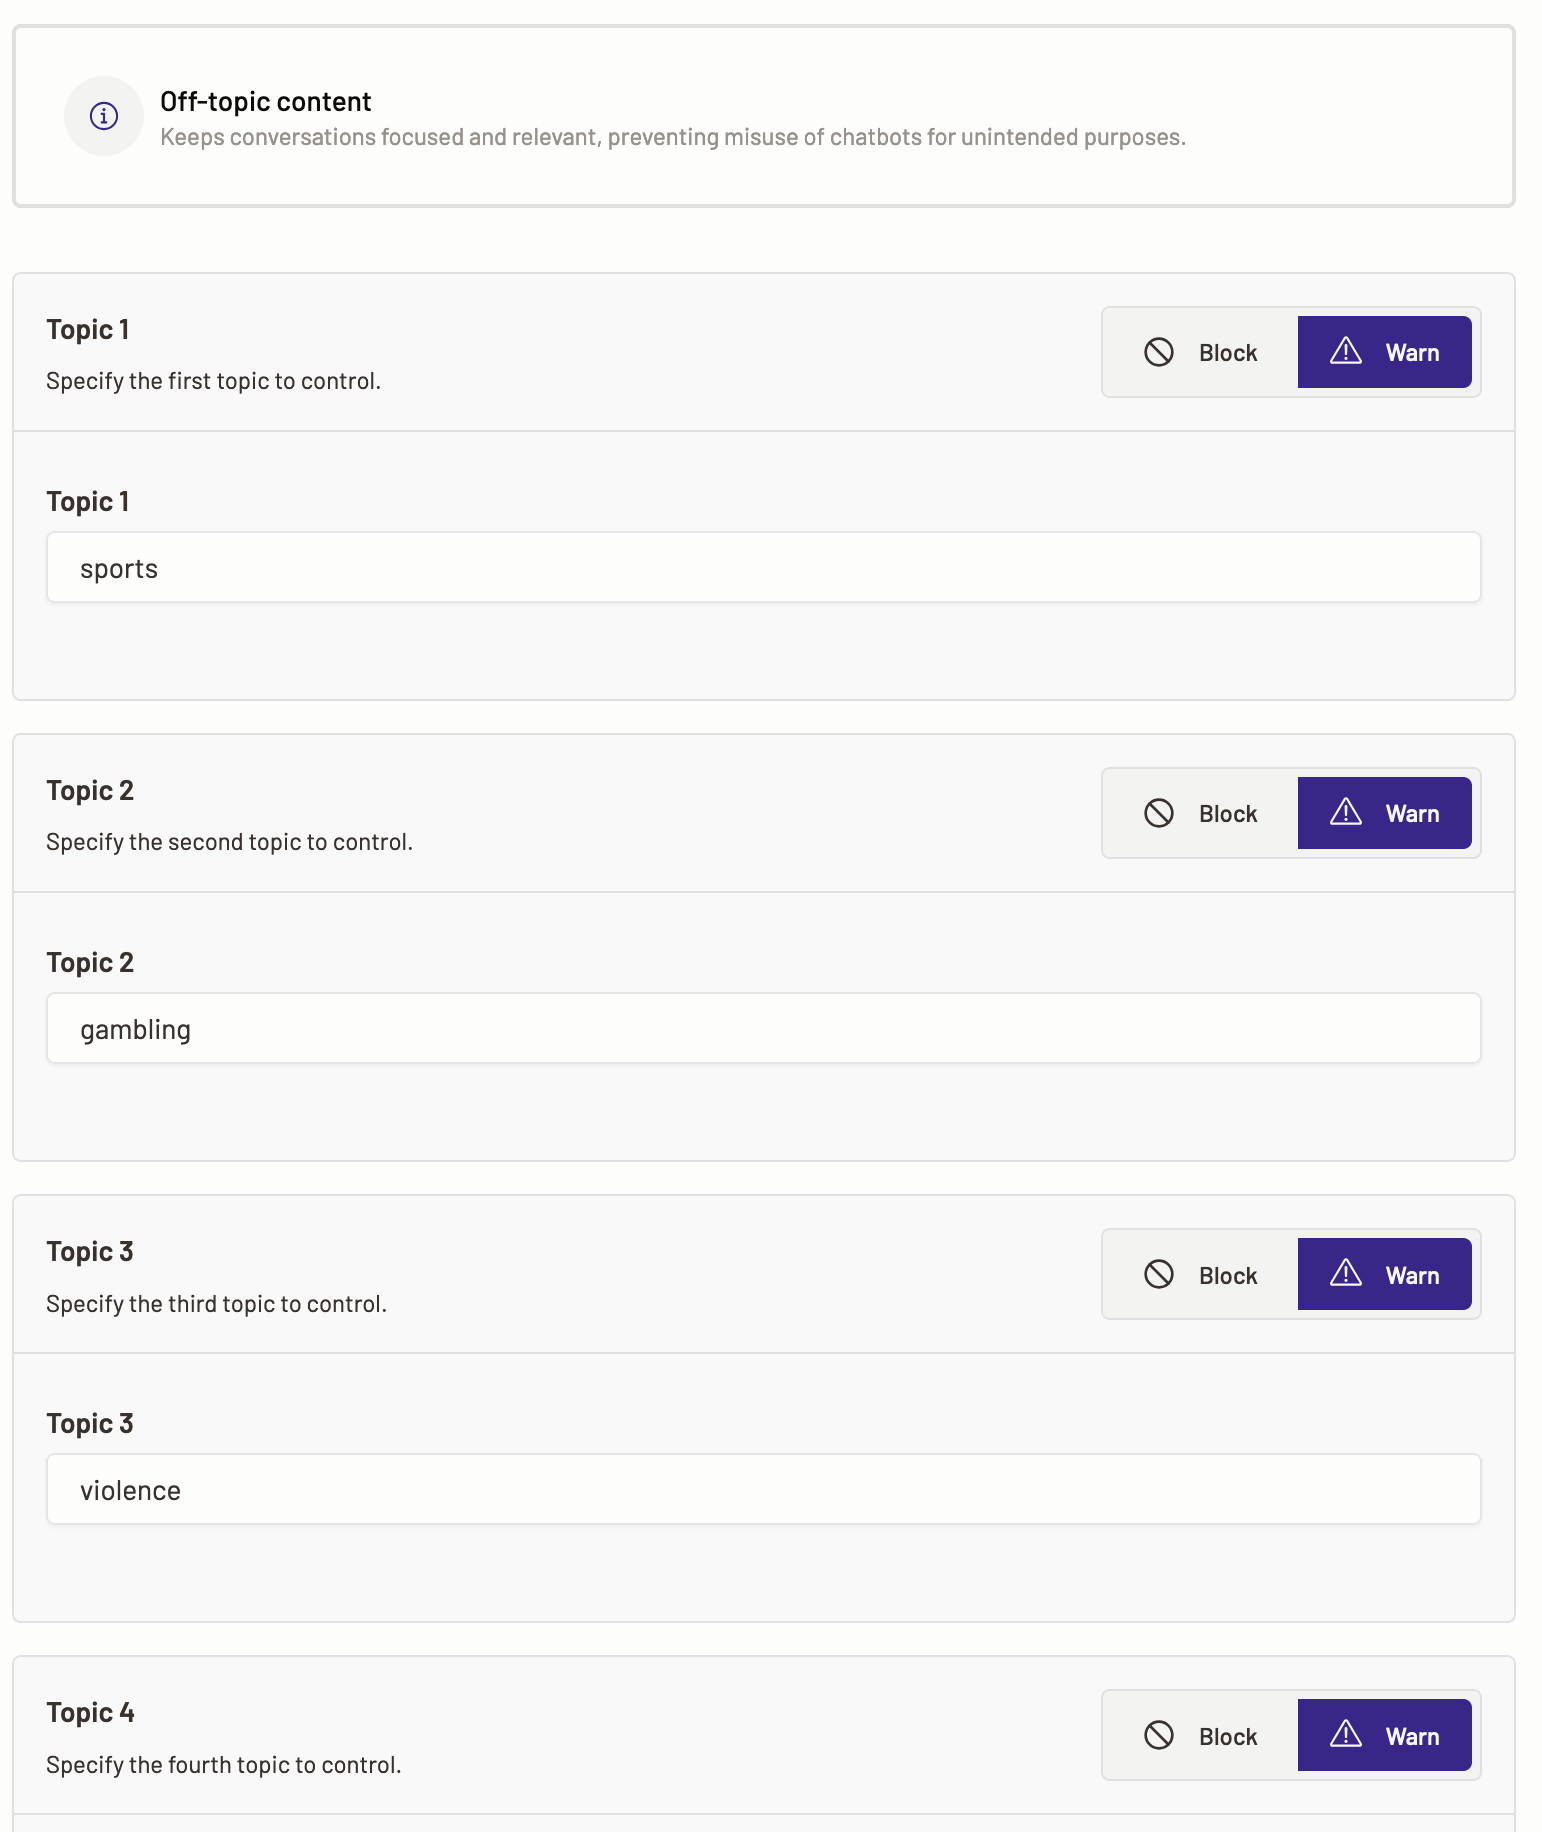
Off-topic content policy, when set, helps keep conversations focused and relevant, preventing misuse of chatbots for unintended purposes.
Here, you can set actions for when Motific.ai identifies that a prompt or a model output contains content from the restricted/unintended topics that you define within Motific.ai. You are provided with fields where you can define the topic names that are considered to be off-topic or restricted while interacting with an LLM. For example, topics like dating, vacation, travel, gaming etc., are topics that an organization may regard as irrelevant to the users to be productive.
For each topic you can define an action of block or warn when Motific.ai detects these topics in a prompt, that prompt can either be blocked from getting an inference from an LLM or can be passed to an LLM. Off-topic detection when set also examines the output of a model i.e., an LLM response for any restricted topic content. And depending on the action set, Motific.ai takes the next course of action. This helps ensure that the interaction with the GenAI apps is within the organization’s values and ethics.
The actions that Motific.ai can take are Warn or Block the off-topic content.
Policy action
- Warn- When the
Warnaction is selected, Motific.ai passes a prompt detected with off-topic content from the restricted topics listed during policy creation to the LLM for inference. Also, an LLM response is passed without any action if detected with off-topic. - Block- When
Blockaction is selected, Motific.ai blocks a prompt and LLM response detected with off-topic content. The request does not proceed to the LLM. Also, if a model output is detected with off-topic the response is also blocked and no response is sent back.
- To set off-topic detection policy actions, select the Off-topic content template.
- You can see the pre-populated fields, you can either keep the same topics or edit them add customized topics want to list as off-topic.
- Enter the off-topic names and what action needs to be taken.
PII content
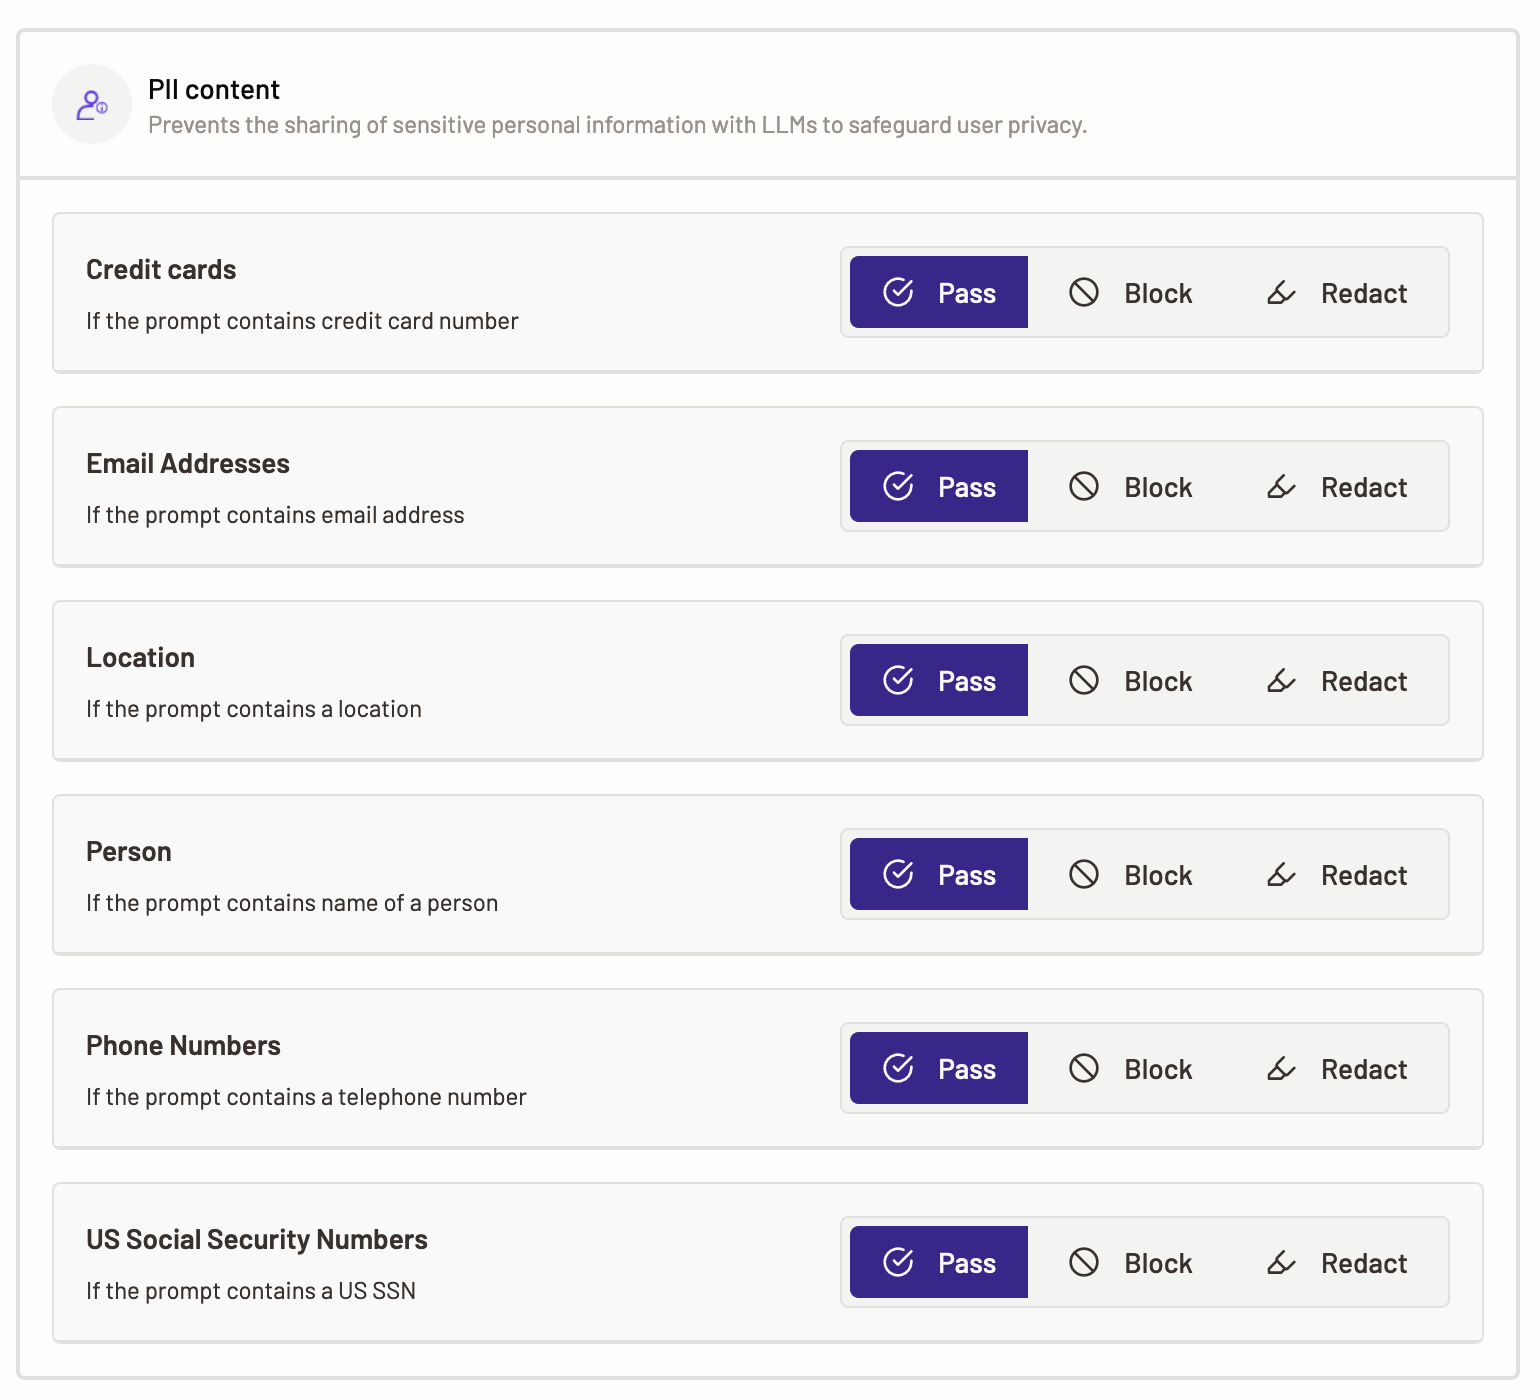
PII (Personally identifiable information) content policy prevents the sharing of sensitive personal information with LLMs to safeguard user privacy.
Here, you define an action that Motific.ai should perform, when it detects that a prompt contains any or all the PII entities. This helps safeguard user’s privacy from unauthorized access and breaches. The actions that Motific.ai can take are Pass, Block, or Redact the PII. By default, the action is set to Pass for each category.
- Pass- When the
Passaction is selected, Motific.ai passes the PII content in a prompt to the LLM for inference, without any action. - Block- When
Blockaction is selected, the PII content in a prompt is blocked from getting an inference from the LLM. - Redact- When the
Redactaction is selected, the PII content is redacted with a generic tag associated with the detected PII categories. For example, if a credit card number is detected in a prompt, then <CREDIT_CARD> tag is replaced with the credit card number.
-
To define PII content, select the PII content option.
-
The following PII categories are available for you to define policies over:
- Credit cards- Select a policy action to perform when Motific.ai detects that the prompt or inference response contains credit card numbers.
- Email address- Select a policy action to perform when Motific.ai detects that the prompt or inference response contains email addresses.
- Person- Select a policy action to perform when Motific.ai detects that the prompt or inference response contains a person’s details like first name, last name.
- Phone numbers- Select a policy action to perform when Motific.ai detects that the prompt contains a US phone number.
- Location- Select a policy action to perform when Motific.ai detects that the prompt or inference response contains a locations details like address, country, etc.
- US social security numbers- Select a policy action to perform when Motific.ai detects that the prompt contains US social security number(s).
Code presence
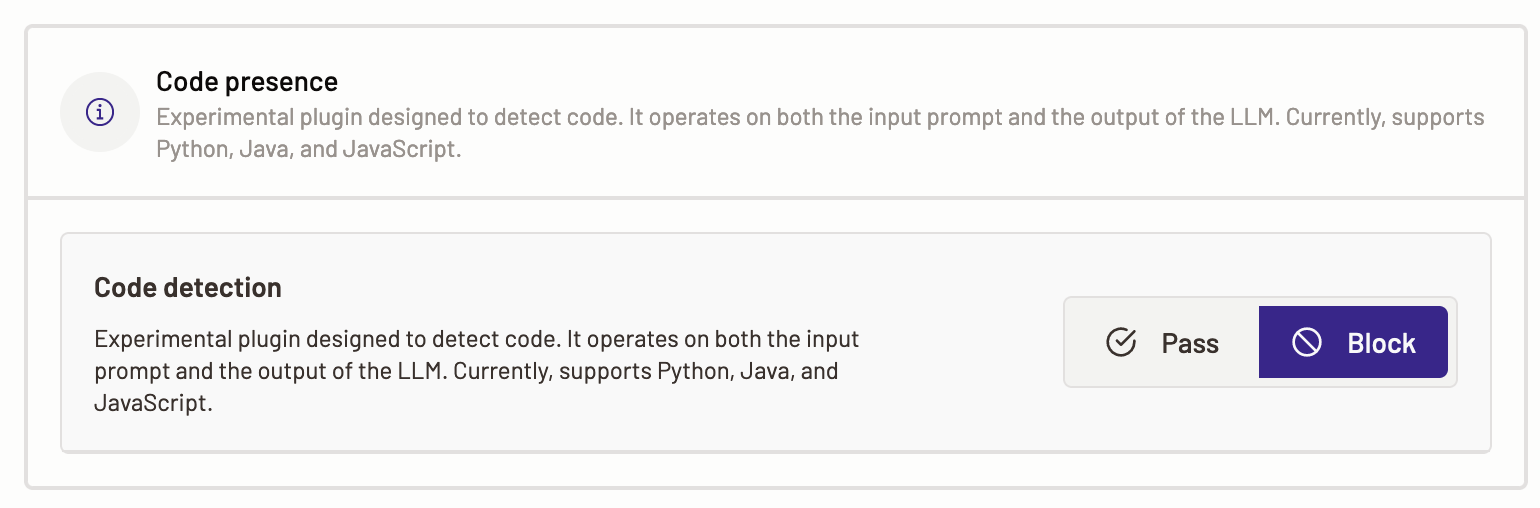
Code presence policy ensures the prompt is scanned for any vulnerable code.
Here you can set actions for when Motific.ai identifies that a prompt sent to a model, or an inference output form a model contains code in coding languages such as Python, Java, or JavaScript. The actions that Motific.ai can take are Pass or Block the insecure code.
Policy action
- Pass- When the
Passaction is selected, Motific.ai passes a prompt with code to the model for inference, without any action. Also, no action is taken when a model response contains code. - Block- When
Blockaction is selected, Motific.ai blocks a prompt from being passed to a model also it blocks an output from a model that contains code.
Once you are done adding the details and selecting the policies, click Save policy button.
Step 5: Access control
As a part of the access control for a Motif, Motific.ai provides an option to add users or user groups to a Motif. Provisioning access allows you to share the Motif with specific users or groups.
Add users
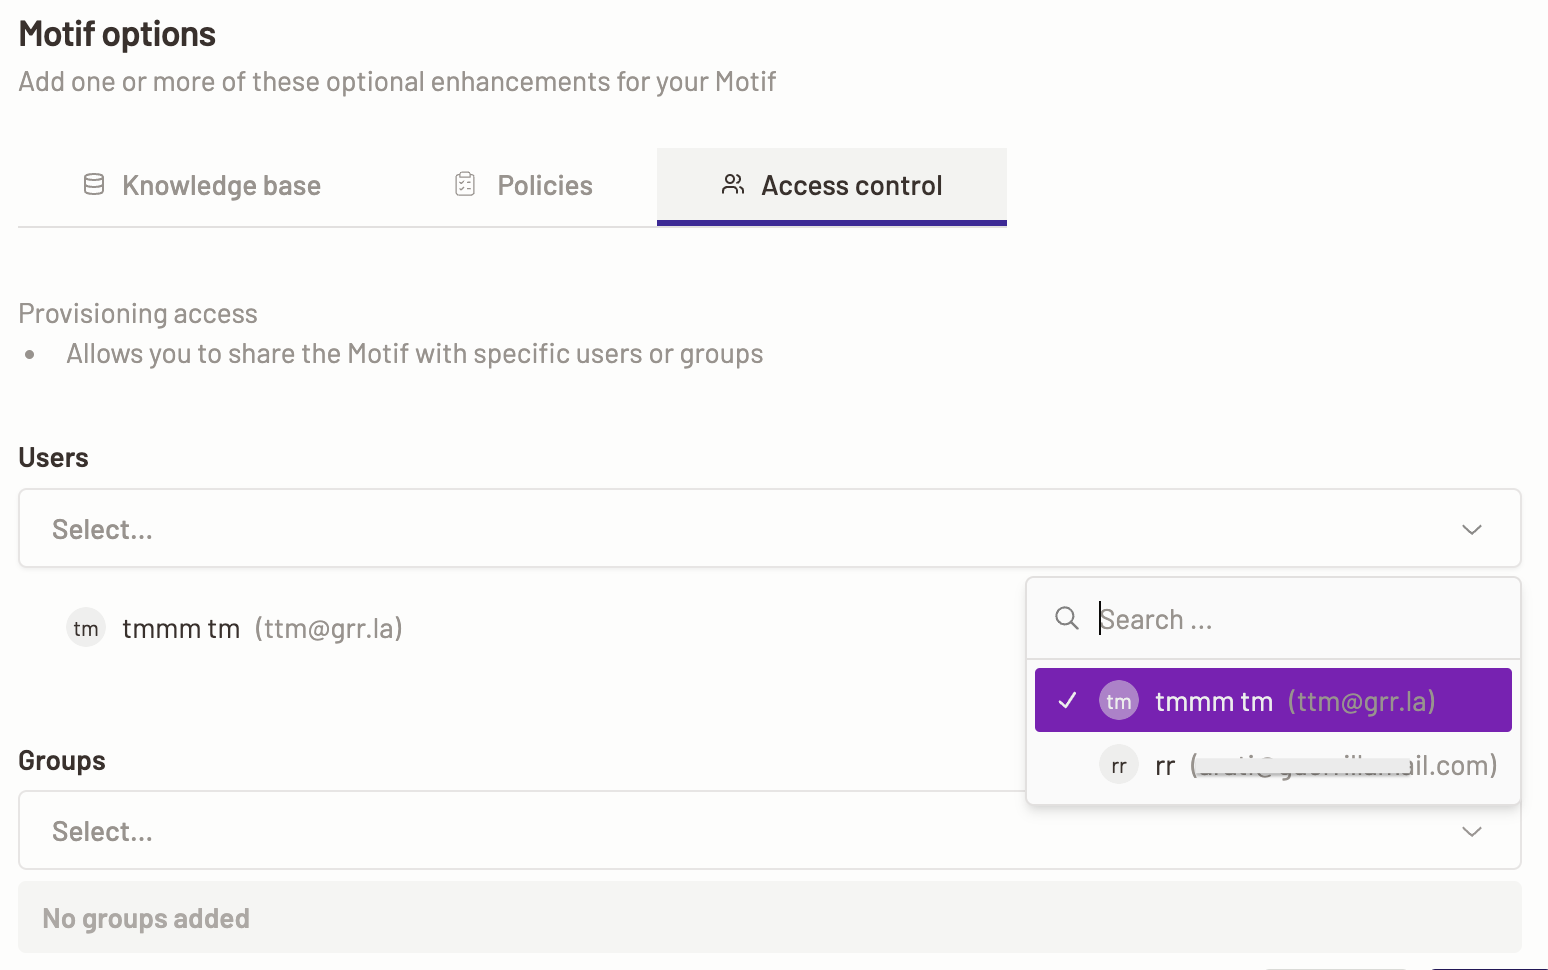
-
To add new individual users to provision access to a Motif, click on the Users dropdown. The list of users added to your organization’s tenant are displayed.
-
Select the users, or alternatively you can search for the users, click on the user you want to provision access to. You can add multiple users.
Note: To add new users, go to settings page. -
Once you add new users to provision access to the Motif, or if you have previously added users, then you can see them in the field below.
-
Alternatively, you can remove the users, click on the cross button on the users and they no longer have access to the Motif.
Add groups
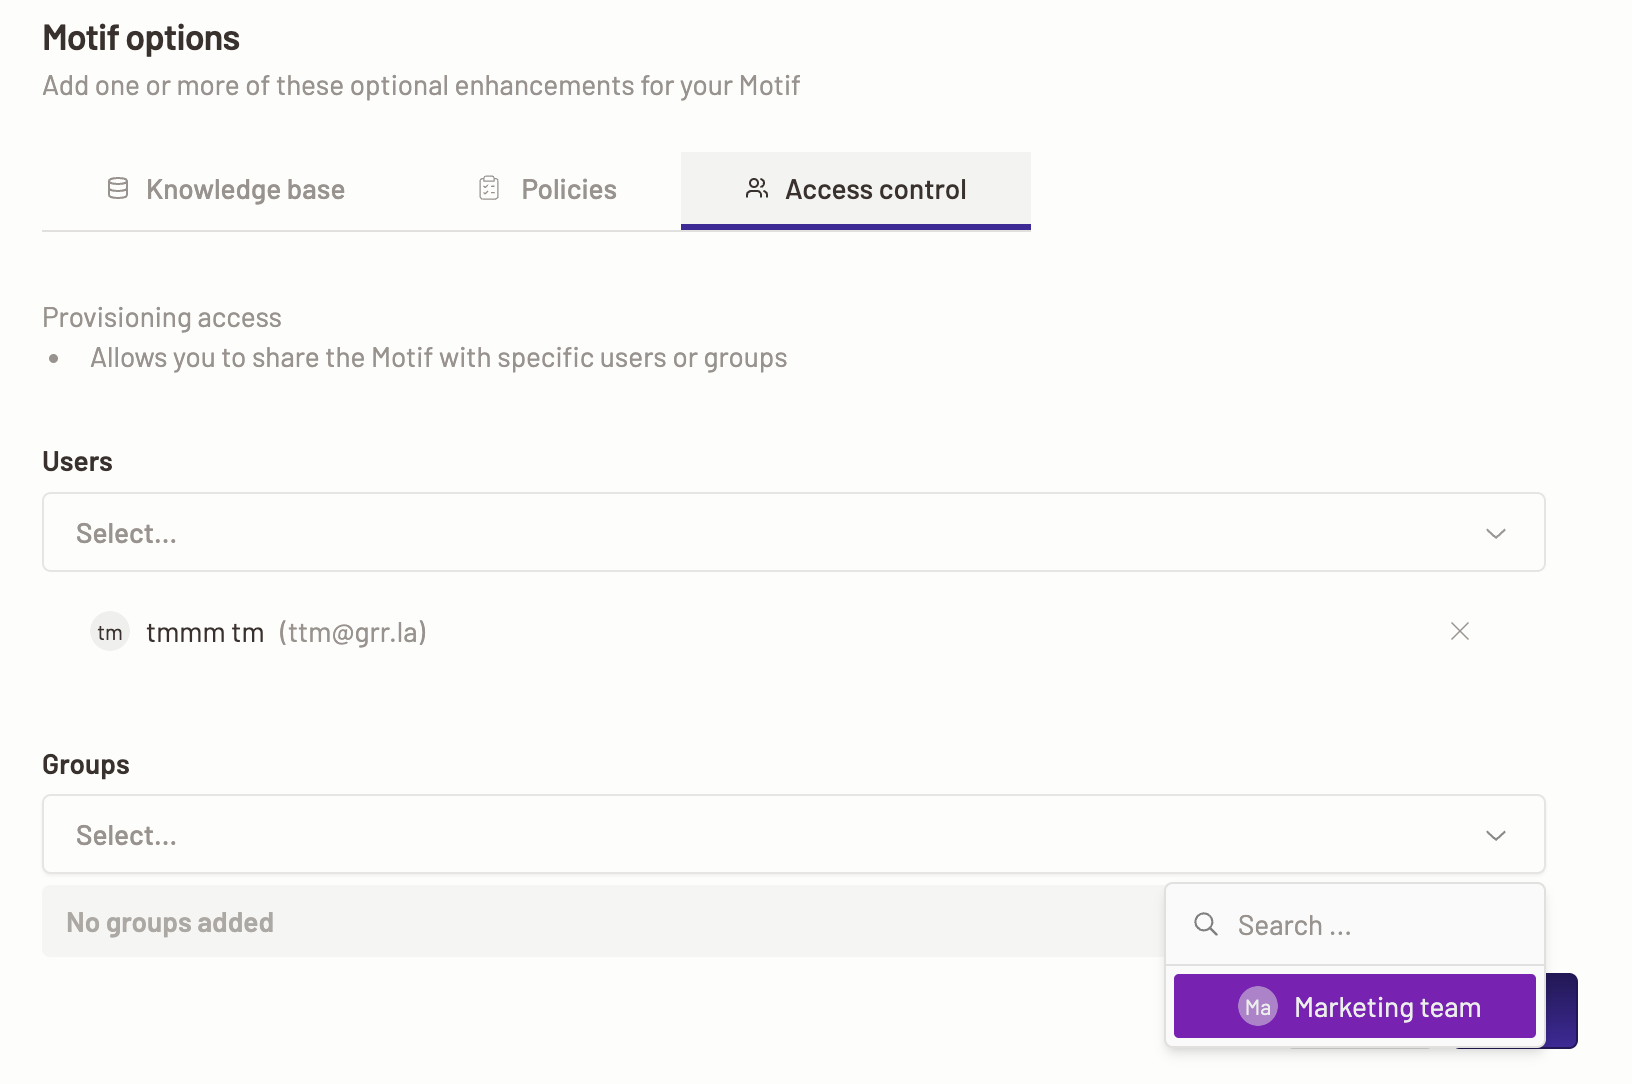
-
To add new user groups to provision access to a Motif, click on the Users dropdown. The list of user groups added to your organization’s tenant are displayed.
-
Select the user groups, or alternatively you can search for the groups, click on the group you want to provision access to. You can add multiple groups.
Note: To add new user groups, go to User groups tab in the Motifs page. -
Once you add new user groups to provision access to the Motif, or if you have previously added user groups, then you can see them in the field below.
-
Alternatively, you can remove the user groups, click on the cross button on the user group and they no longer have access to the Motif.
Step 6: Add Motif
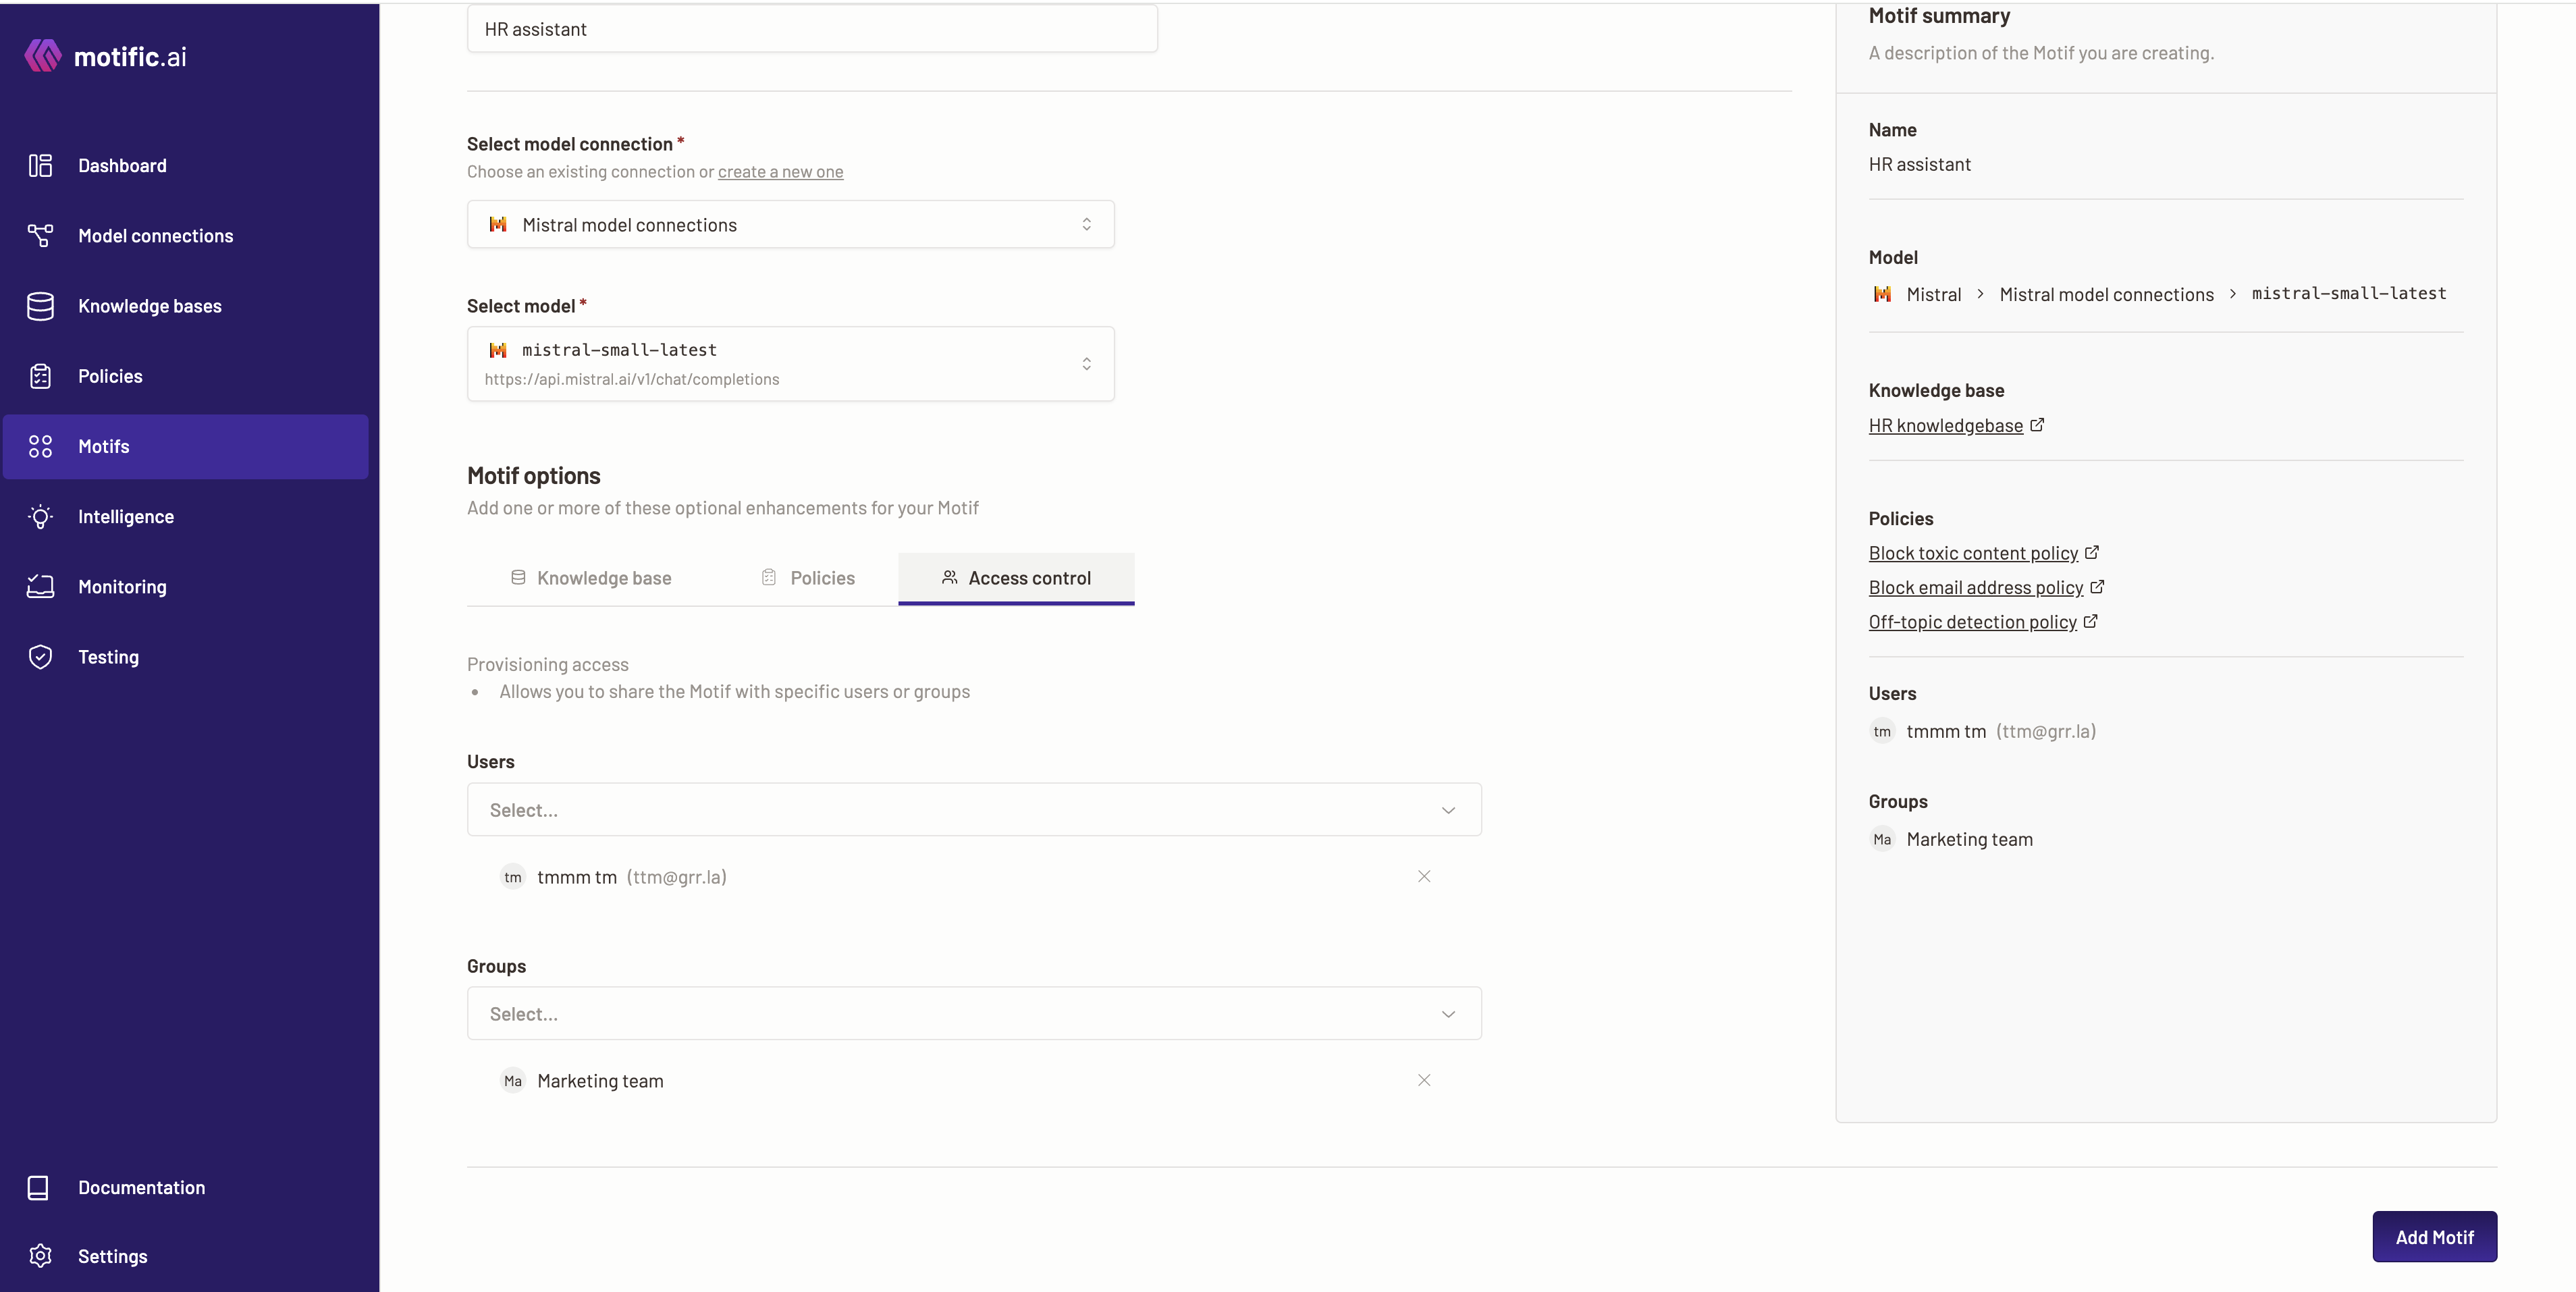
-
Verify that you have added all the configurations to the Motif you want to create in the Motif summary section.
-
Once you are done verifying, to create the Motif, click Add Motif button.